3d-printable terrain for all your samurai wargaming needs


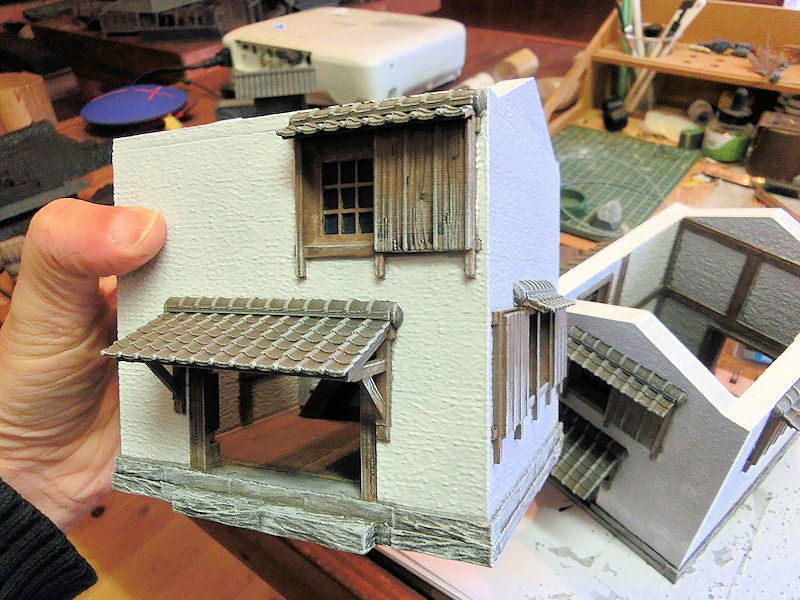
The huge Samurai Lord's House set is currently on the paint desk, and with only a few last pieces to complete, it seems a good moment to show you some tips and suggestions on how to paint everything quickly and efficiently!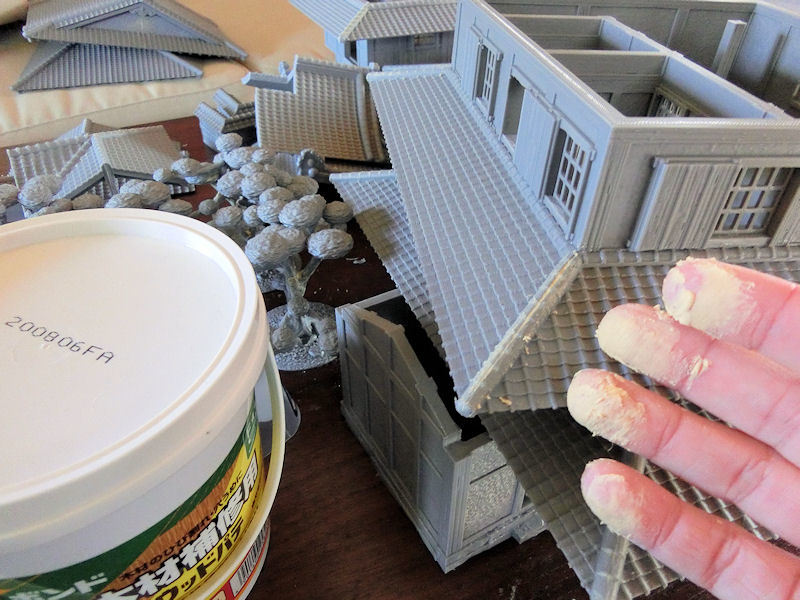
▲ The first thing to do is to cover some gaps. Many of the roof pieces are multipart, and it's a good idea to hide some gaps there - I find wood putty pretty helpful for this, although it's a rather messy job! Simply smear some putty in the gaps, and smooth it off with a wet finger.
The trees will probably also have some holes where you couldn't fit branches in, and those will probably also look better with putty covering the holes.

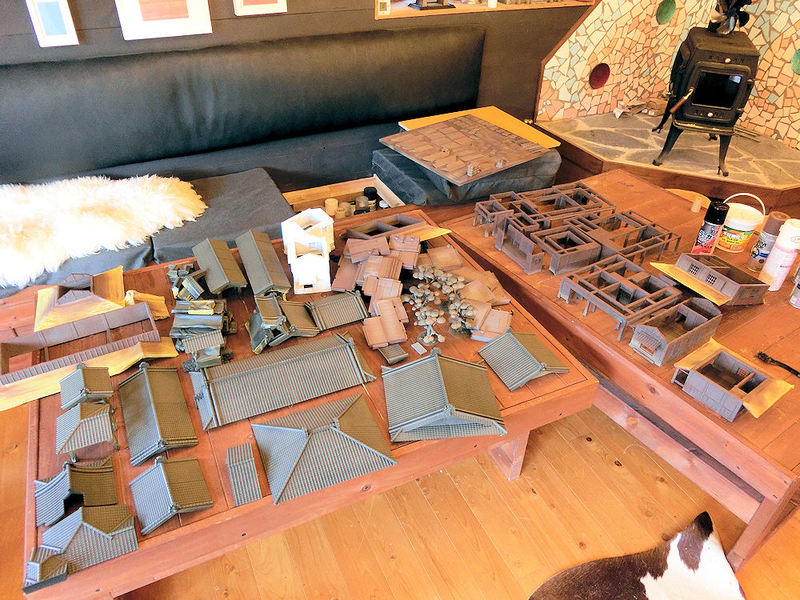
▲ Next job is to find a big, empty table and start breaking down all of the buildings into their component parts. If you look on the right of the photo above, you'll see that all of the base sections with tatami stuck to them are now separate from the walls, as this will make it much easier to get in all the nooks and crannies with a paintbrush. It also means that it will be much easier to get straight lines on those tatami mats.
▲ It's time to paint!! For such a big set, I think the best way to get things started fast is to spray basecoats - slate grey for the topside of the roof sections, and black for the stone paths and wall bases, and brown for everything else.
Take your time, and make use of plenty of masking tape where possible! My roof sections, for example, were sprayed slate grey on the tops, and then the edges were masked, and the undersides were sprayed brown for the wood. You can see this on certain buildings at the edges of this photo above.
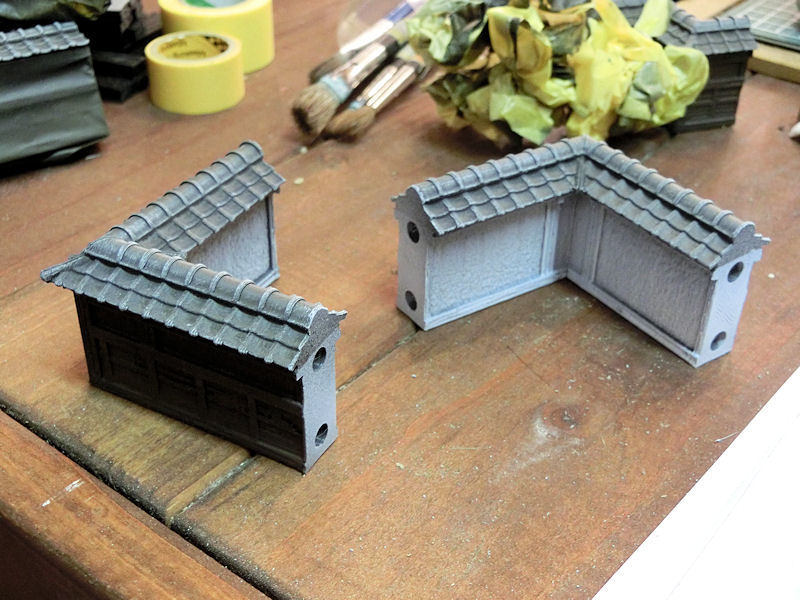
▲ The outer walls were in fact sprayed in three colours - brown for the wooden side, and white for the inner side, and then these were covered in masking tape before slate grey was sprayed over the roof tile parts. That's a pretty quick way to get these walls done fast.
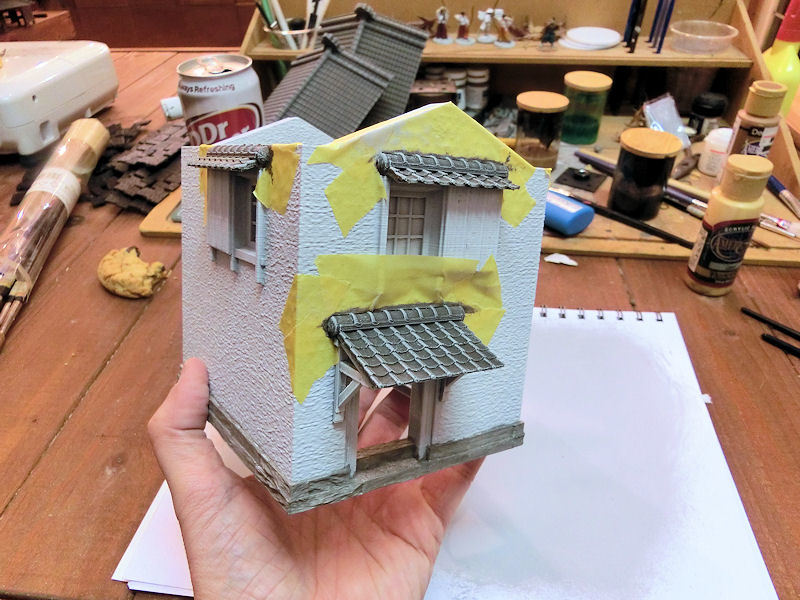
While the masking tape was still on, I spent an afternoon drybrushing every roof tile in the set in a light grey colour with a large 2" brush. This can be a slightly messy job, so it helps to keep the masking tape on where possible. Once the tape is removed, it should look like the photo above.

▲ Here's a great progress photo, showing big sections and buildings drybrushed and ready for detail. After the roof tiles were all drybrushed, the masking tape was all removed, and I drybrushed all of the wooden parts in a pinky-lightbrown colour called Fawn (by DecoArt). At this stage I also basecoated the tatami mats with two coats of Sage, the very light green colour you can see in the bottom left corner of the photo.
▲ Kura storehouses:
The two kura storehouses in the set are predominantly white, so I tried a different approach for those. Instead of basecoating with brown spray undercoat, I undercoated in a mat white, inside and out.
The roof sections were then basecoated with a 1cm wide, flat brush in slate grey, which helps to keep the edges neat, and then drybrushed in light grey. You might find using masking tape to cover certain parts of the walls helpful here, as it's a pain to repair smudges on white. I then basecoated the bottom stone sections in medium grey, and then gave them a black wash.
▲ The last parts to paint on the storehouses were the wooden door and window frames, and these were, I'll be honest, hard. My 1cm wide, flat brush helped to keep things neat, but adding a black wash over the wood was hard to keep neat. After the wood and stone was carefully drybrushed in light brown and grey, I did have to go back and repaint several bits in white again.
In hindsight, I'm not entirely sure the white undercoat saved me much time at all. It might have been just as fast to spray the building brown, drybrush the wood quickly, and then start to paint the walls in white. But never mind, you live and learn, eh?...
▲ Trees:
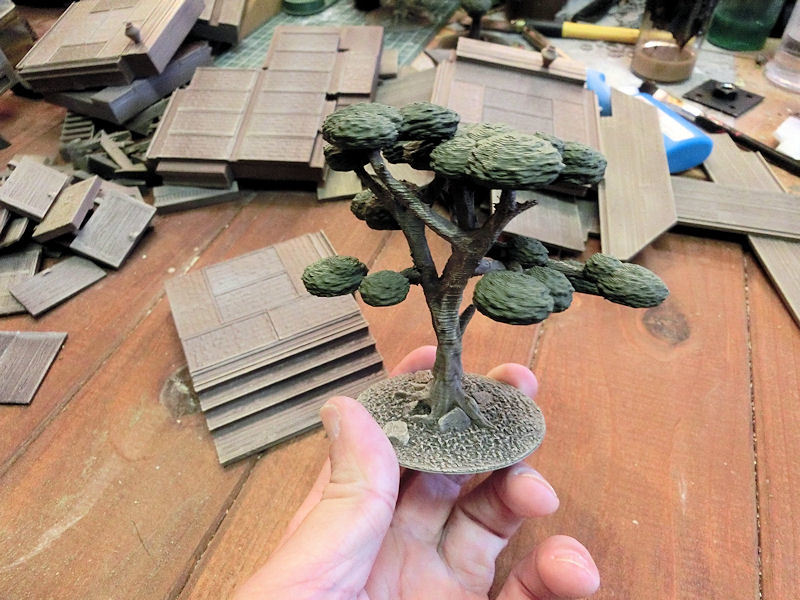
The whole model was spray undercoated in black to cover everything, and then lightly sprayed in a light brown colour. The base and lower roots were then drybrushed with a light grey/brown colour called Mississippi Mud (by DecoArts). 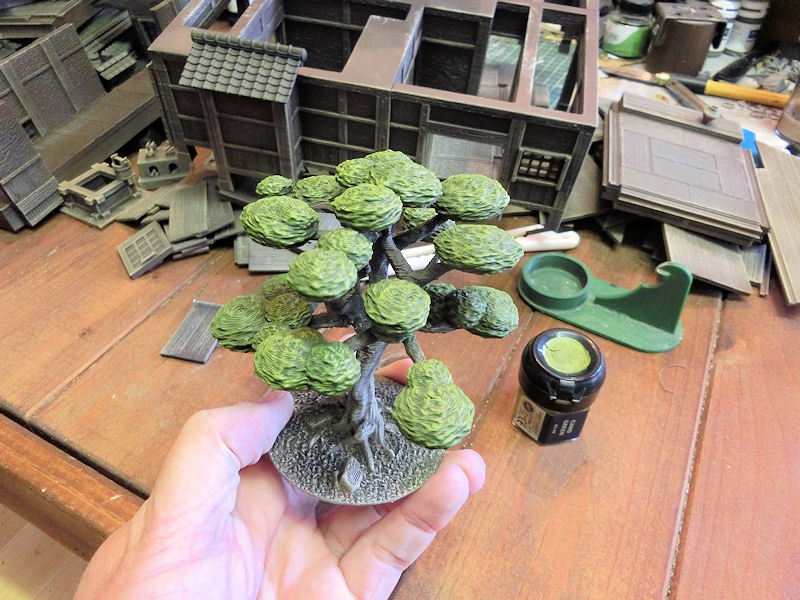
▲ These trees are juniper trees, shaped into very traditional topiary shapes. As such, they tend to be quite a uniform, mid-dark green. But that's not very interesting to look at on a scale model, so after basecoating the bush parts in a dark khaki green, I drybrushed with Camo Green (by GW), which gave them some extra pop.
▲ Tatami:
Tatami mats are usually light green or light yellow when new, fading to darker tones with age and time. However, I can imagine that the Samurai Lord owning this house would not want his visitors to see old, yellowed tatami mats, so I chose to paint them all in this very light green Sage colour (by DecoArts).
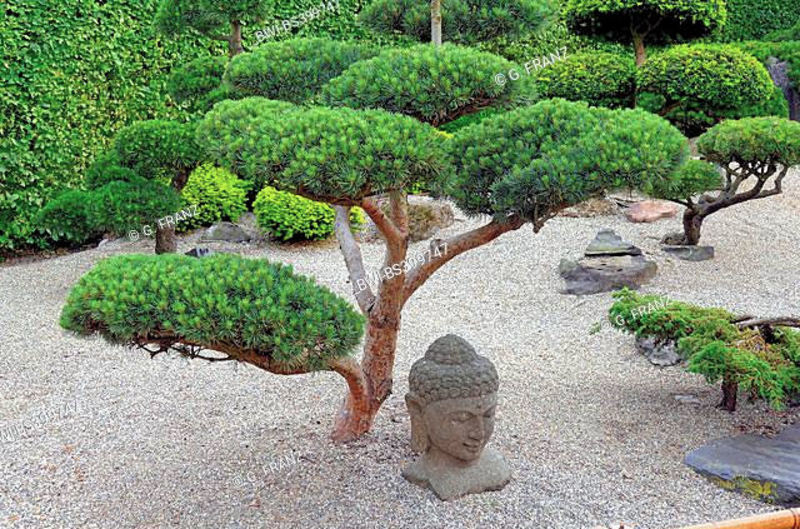
The edging on tatami mats is usually navy blue or a mid-dark green, but after looking at my reference photos of the real-life Inaba Residence (in Oita prefecture) I noticed the edges were all black. That's actually quite unusual, I think. But painting the edges in flat black would perhaps make them a little too strong, so I picked a more subdued dark grey/brown (Charadon Granite, by GW) to do mine.
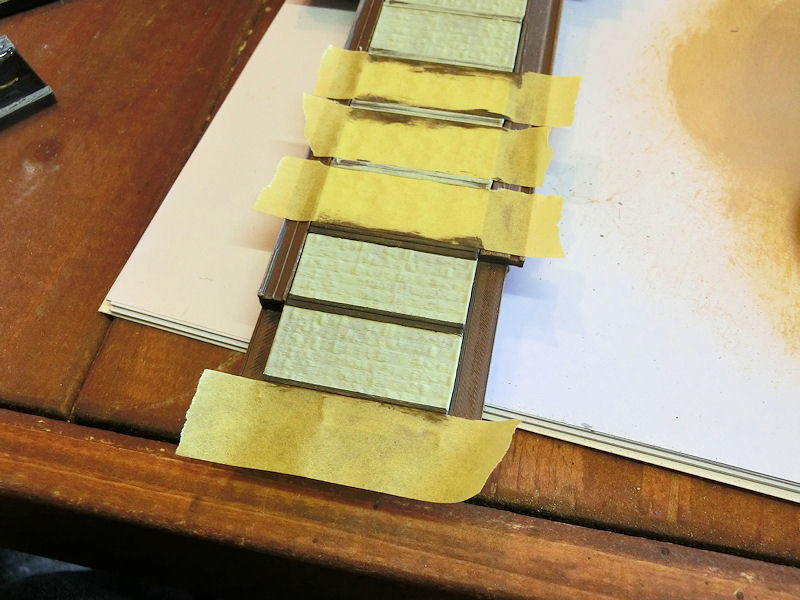
Here's a tip for you: There are hundreds of tatami mats in this set, and edging each one by freehand is nerve-wracking! Strips of masking tape moved from mat to mat as you go, helps speed things up and keep your lines straight!
Stone paths:
This article on painting the Shrine Set shows how to paints the paths:
https://www.3dalienworlds.com/blog.php?BlogID=326
Building walls:
See the dojo article for painting the walls (white outside, yellow inside):
https://www.3dalienworlds.com/blog.php?BlogID=319
Stone outer walls:
Here's how to paint the stone sections of the outer walls:
https://www.3dalienworlds.com/blog.php?BlogID=59
I think that's about it! The last pieces of the set will be fully painted up this weekend, so watch this space for the big release and finished photos next week... if I can find a table big enough!
This is the last blog about assembling the Lord's House set, because today we are taking a very quick look at the final element - the garden!
▲ More specifically, we're looking at how to print and assemble the multipart tree! The design is based on a juniper tree, which you'll often find trimmed into these curious topiary shapes in some Japanese gardens.
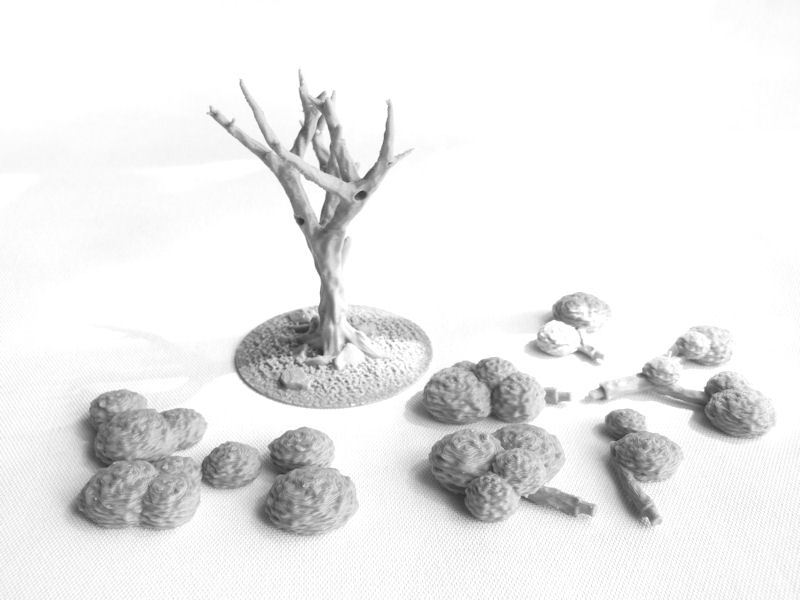
▲ To give you maximum flexibility, the tree prints separately from the branches, and uses the same 60mm round base I designed for those cherry blossom trees a while back. It also has a small magnet hole in the base, in case you want to magnetise your trees for easy transport.
The tree and base, as you can see in the photo above, are printed as one piece, and it prints fine without supports. You'll need to print the set of five branches separately, and they do need just a tiny bit of print supports for the first few layers. The set of five 'bushes' (on the left) are actually designed to be glued on top of the tree, as you see fit, and don't require print supports.
You'll notice that the tree itself has several holes in it. These are designed to fit the branches, although you might find that for the shallower holes near the top of the tree you should cut off a millimetre or two from each branch's end to make them fit better.
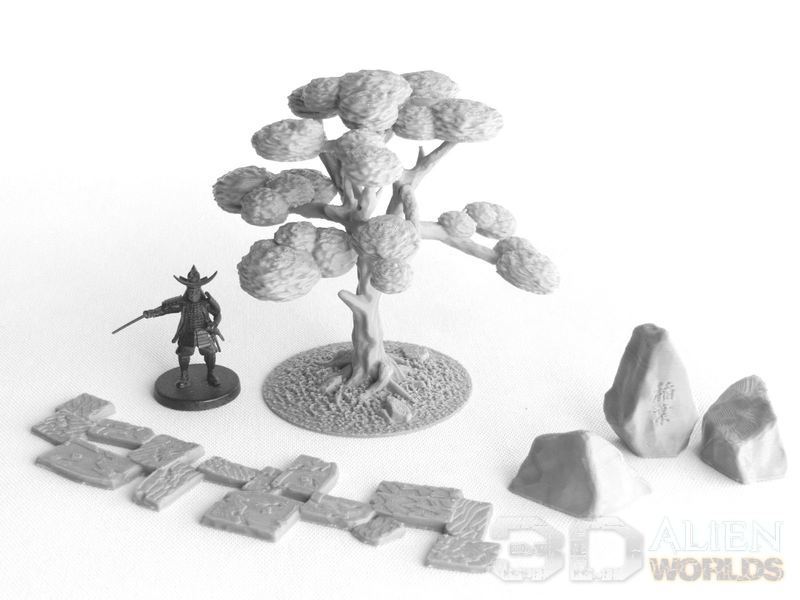
▲ And here's the end result - one large juniper tree with distinctive Japanese topiary, along with the thin garden stone path, and some oversized rocks! I'm planning on printing 4 or 5 of these trees for my Lord's House board, plus 5 or 6 curved paths.
Photos of the complete set will be coming very soon, so watch this space...
It's taken quite a while, but we've finally reached the end of this massive project! The last building from the upcoming Samurai Lord's House has now been completed.
So let's dive right in.....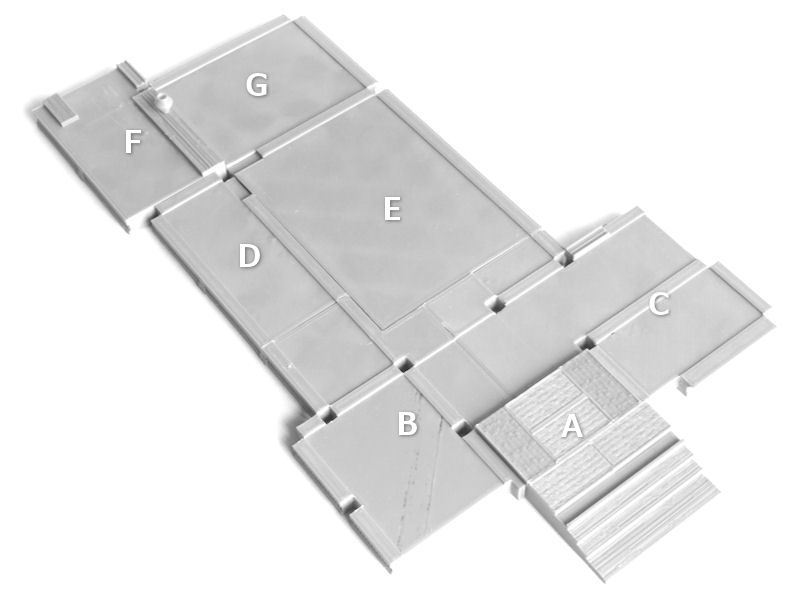
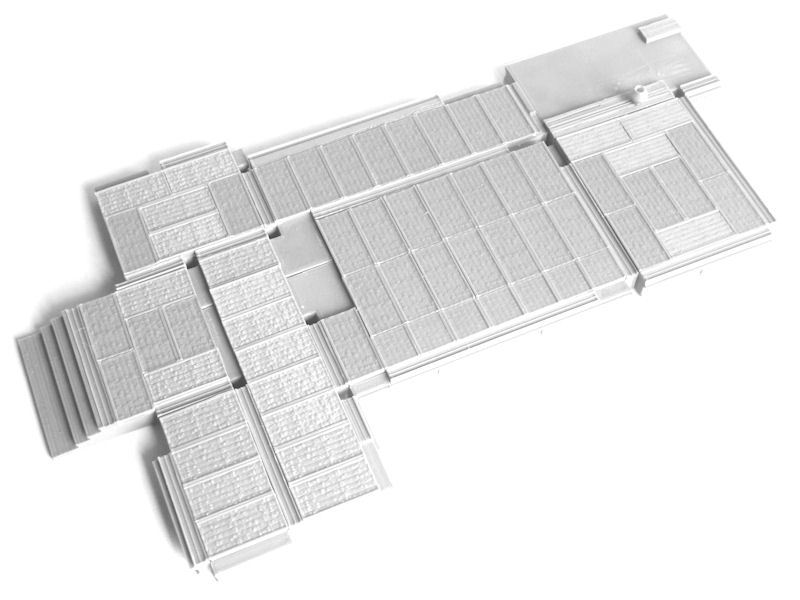
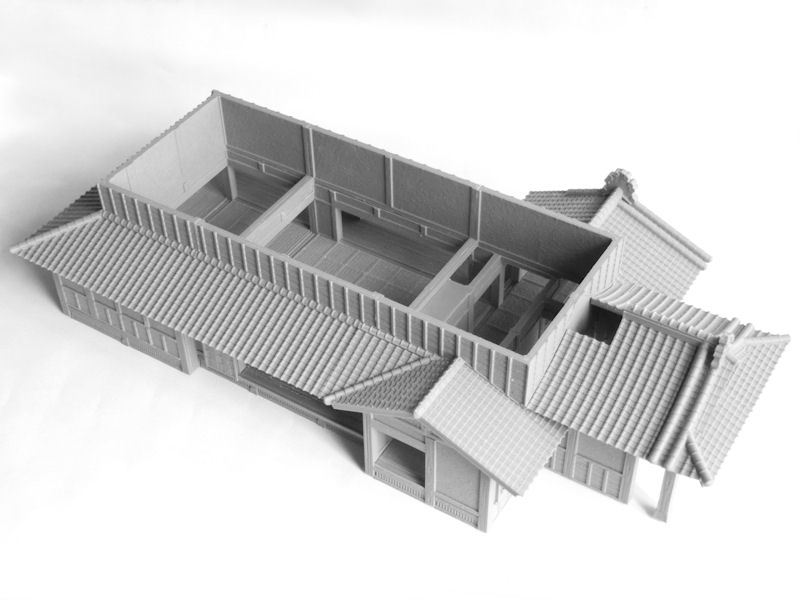
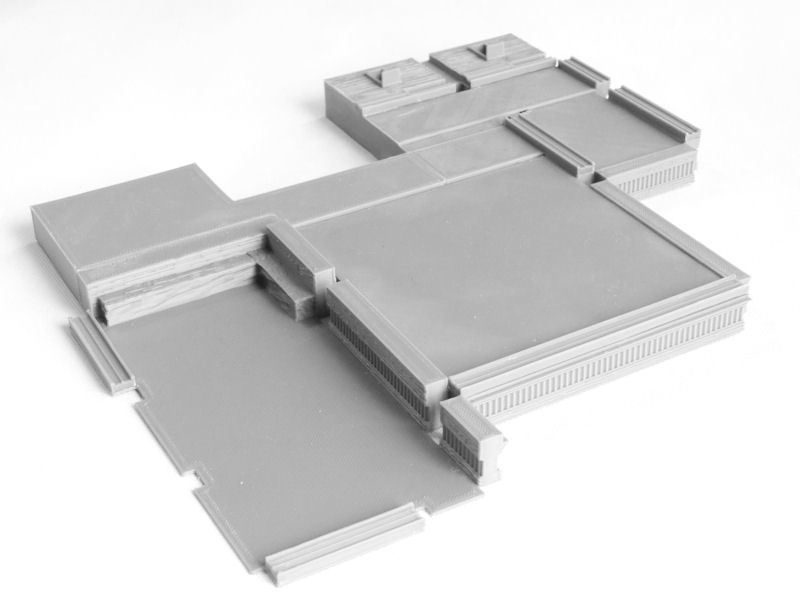
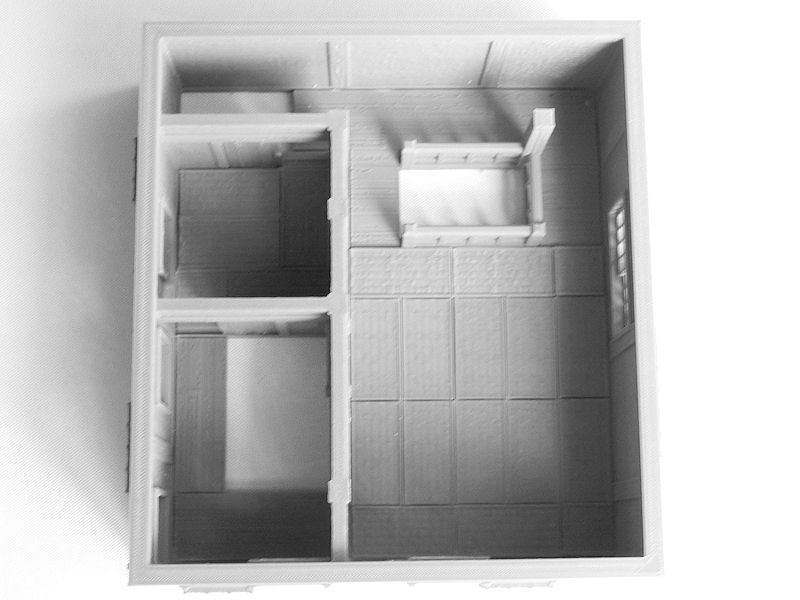
▲ The main house is by far the biggest building of the set, and as such it requires 7 sections for the base assembly. These have been labelled A~G, and should be arranged as shown in the photo above.
I chose NOT to glue most of them together now, so they would be easier to fit with the walls in subsequent steps.
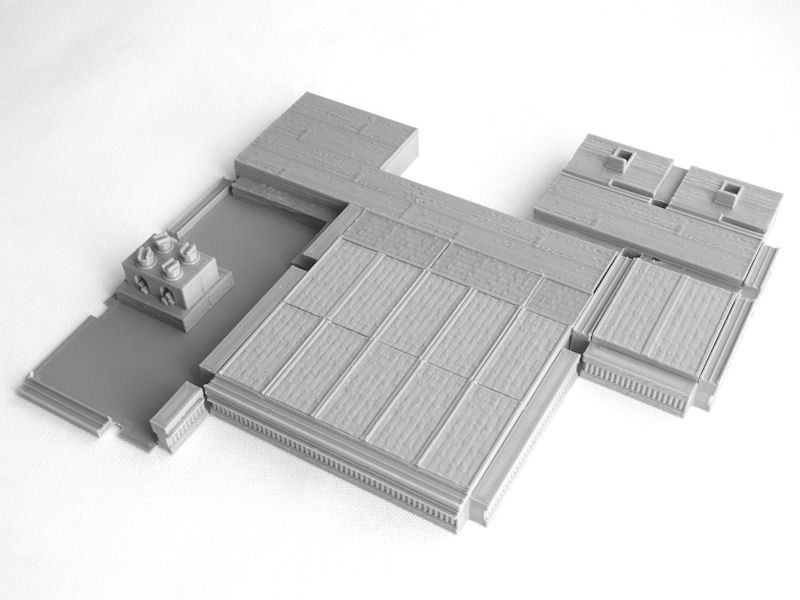
This first stage is also a great moment to note that the 6 tatami mats of the entrance room, immediately above the front steps (labelled A in the photo), are slightly different sizes of tatami mat from all of the others, so now is a good time to print those and glue them in first.
▲ It's tatami time! The rest of the floors require 51 tatami mats and 7 half-sized mats! Glue those down as shown in the photo above, and then you'll need to glue down all of the doorway strips for the sliding doors too.
My assembly tip here would be to use a quick rub along a strip of flat sandpaper, to ensure every mat fits snugly.

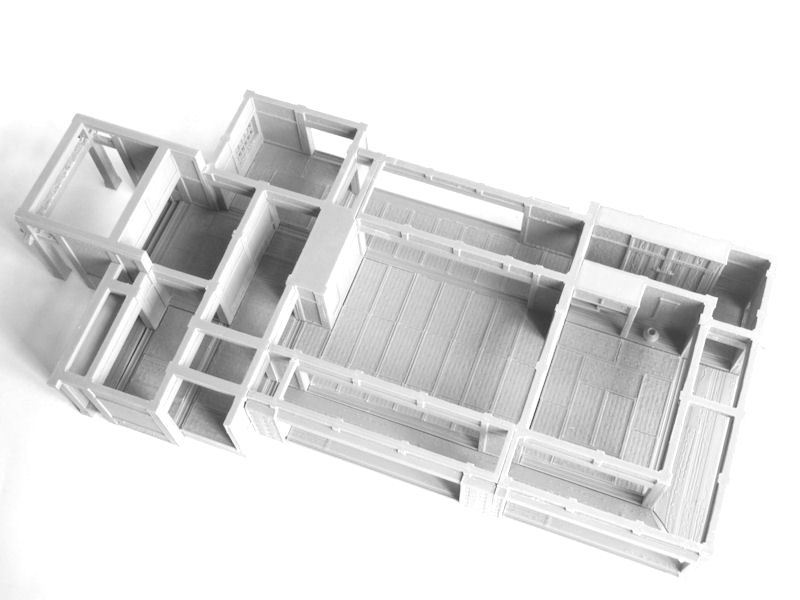
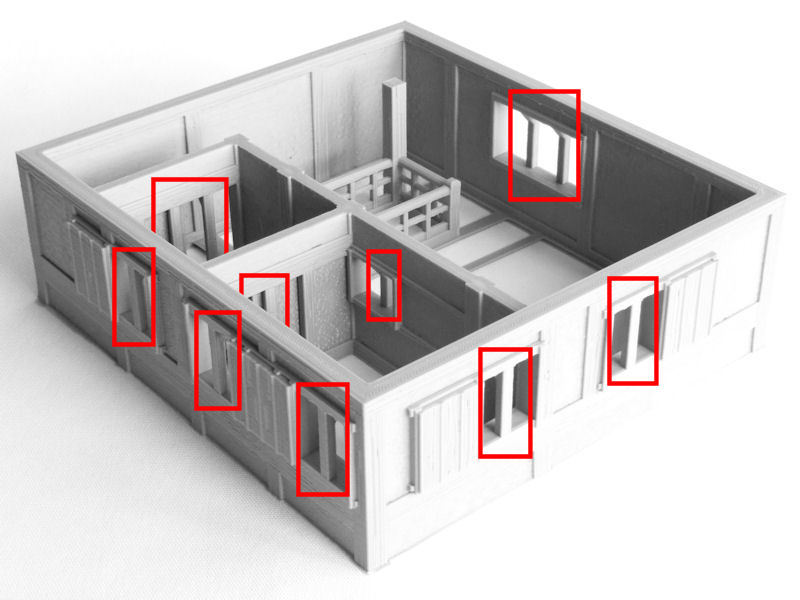
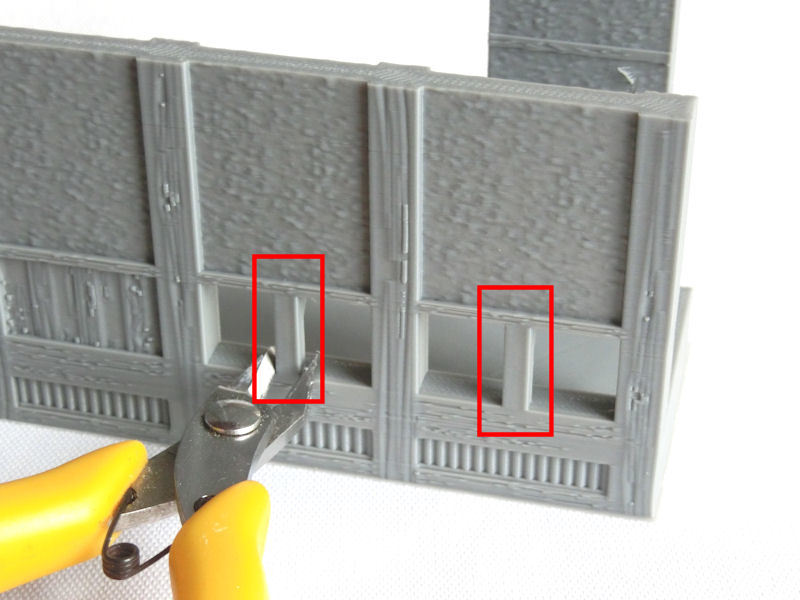
▲ Similarly to the base section assembly, the walls are also made up of 7 separate sections. They all print upside down, and don't require slicer print supports - although there are some built-in print supports at the front, and the front and rear windows, as shown in red in the photo above. You'll need to carefully remove those with cutters.
TIP: Setting your slicer to print walls "inside-to-outside" will help reduce printing problems with the overhangs in a few places, such as the shutter boxes and window frames.

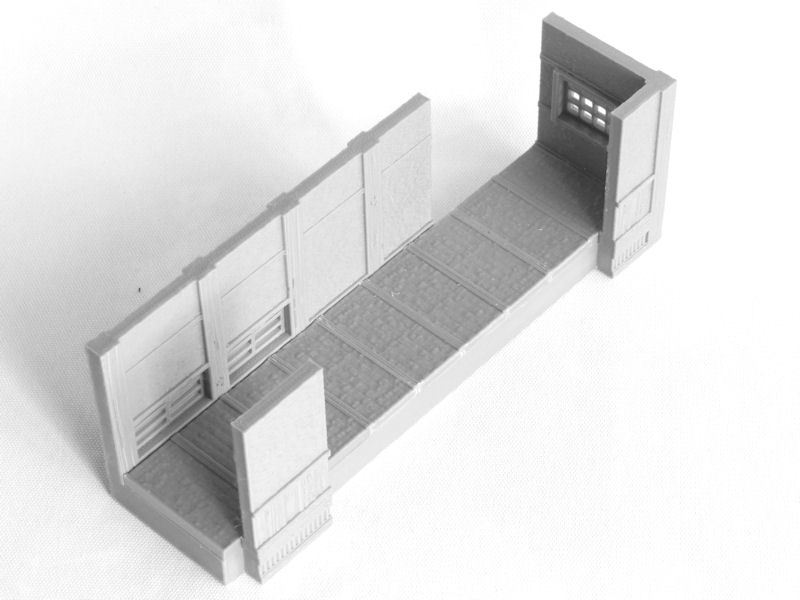
▲ It's time to slot the walls into the base sections, so you might find a thin needle file useful at this point, to help ensure everything fits. My printers produced a tiny bit of "elephant's foot" on many pieces, so some of the wall posts were a pretty snug squeeze before I filed things flat ever so slightly.
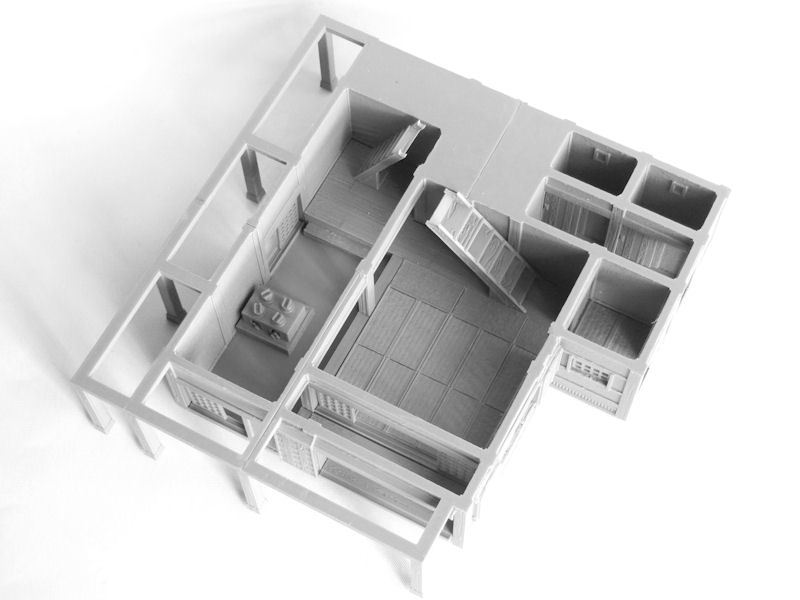
▲ It's time to finish the floors, with those long balcony wood sections on all four sides of the building. Now is also the time when you want to decide which version of the windows you want to print - a solid version and a version designed for use with semi-transparent baking sheet paper are included in the folder.
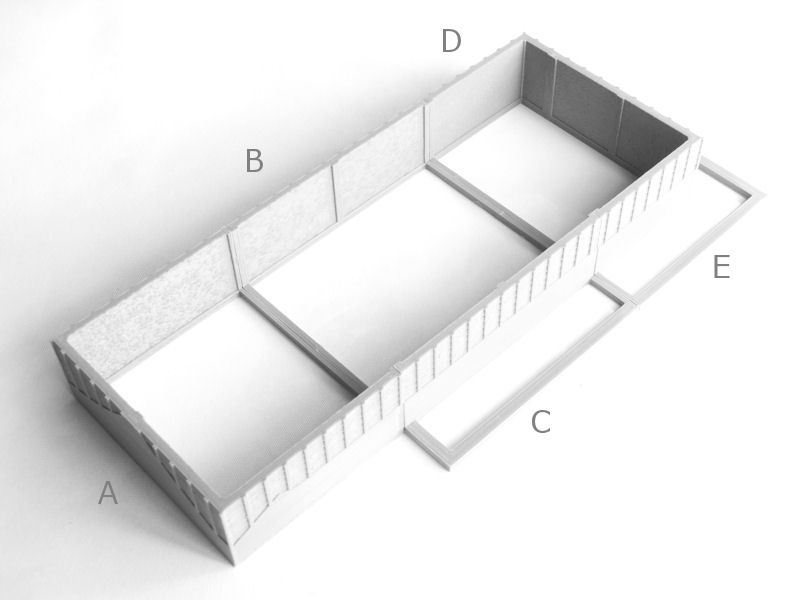
▲ Things get a little simpler as we move to the upper walls, with only 5 sections required for the construction. These are labelled A~E, and should be arranged as shown in the photo above.
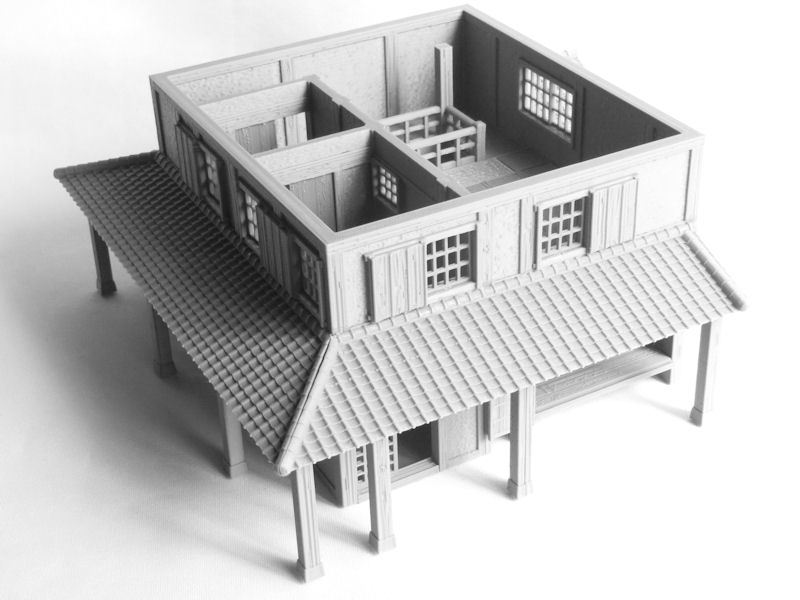
▲ Looks at these huge side roof sections! These have been included as long one-piece prints for those with big enough printers, and as smaller halved versions for everybody else! These can be glued to the upper walls as shown in the photo above, so they can be removed quickly during play.

▲ This is how the upper walls and subroof pieces fit onto the main walls.
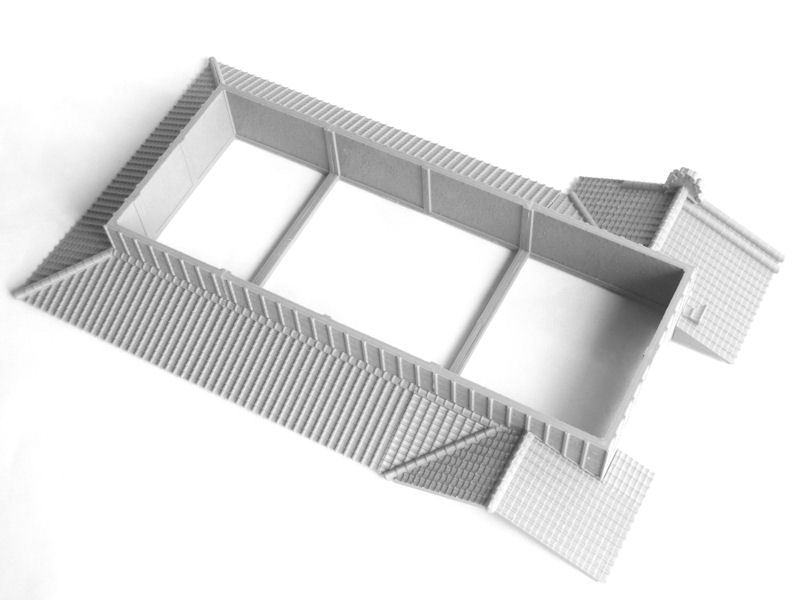
▲ The front roof of the building has an awesome curved roof shape, and I've decided not to glue mine to the rest of the upper walls yet. You can use it separately, or glue it as you see fit.
The last thing to do is print the 4 quarters of that massive long roof. You should find everything slots together nicely on top, to keep things from sliding around, even without glue.
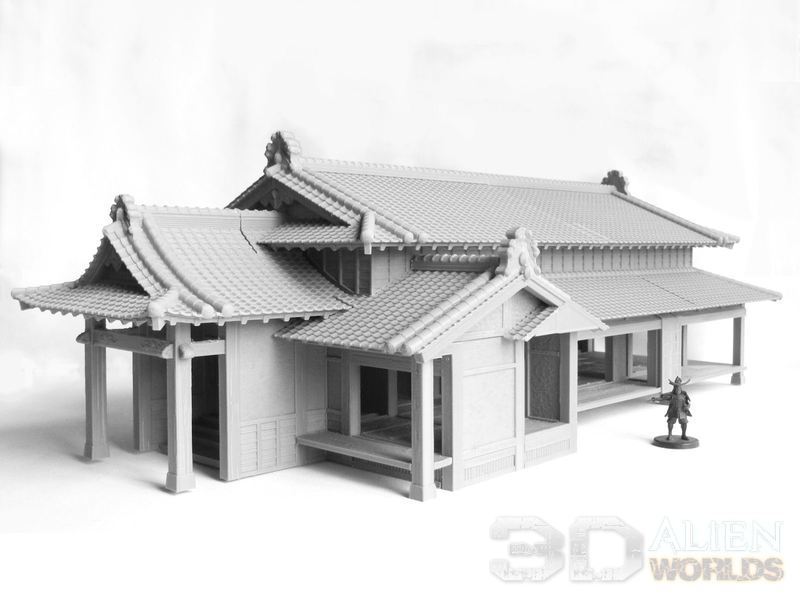
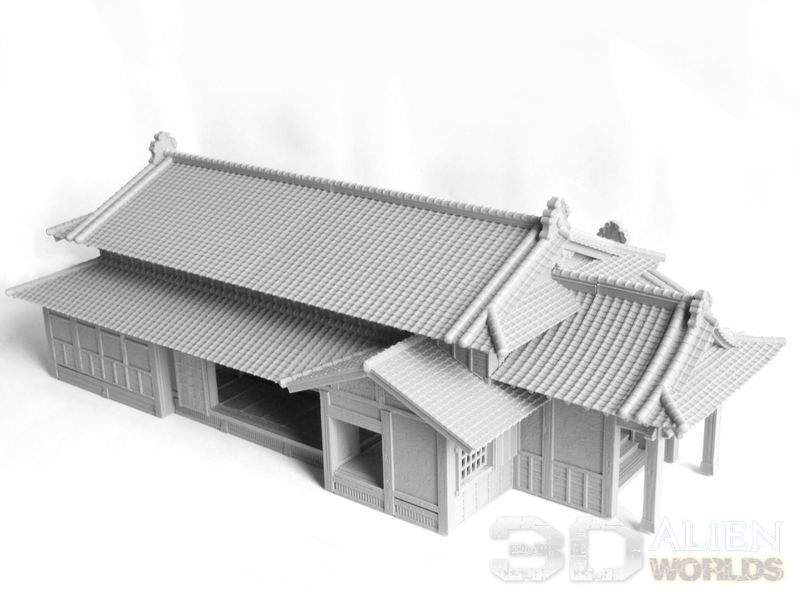
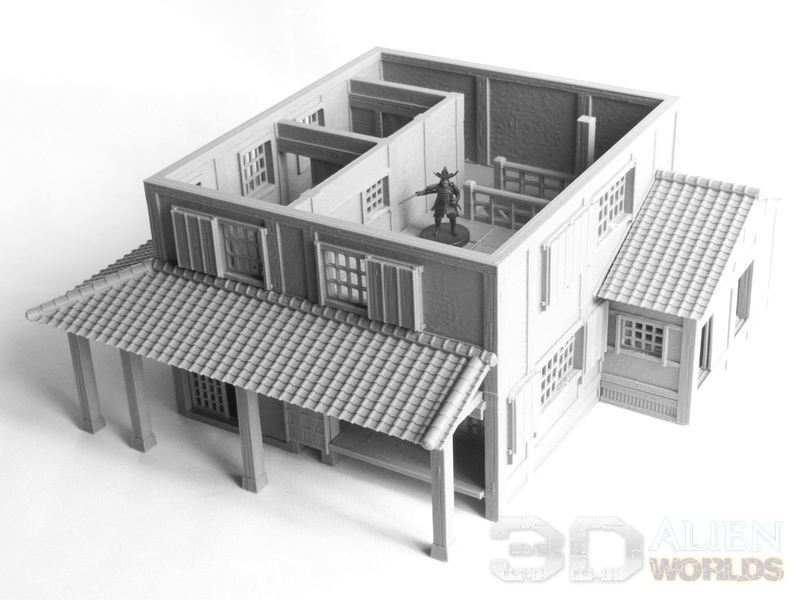
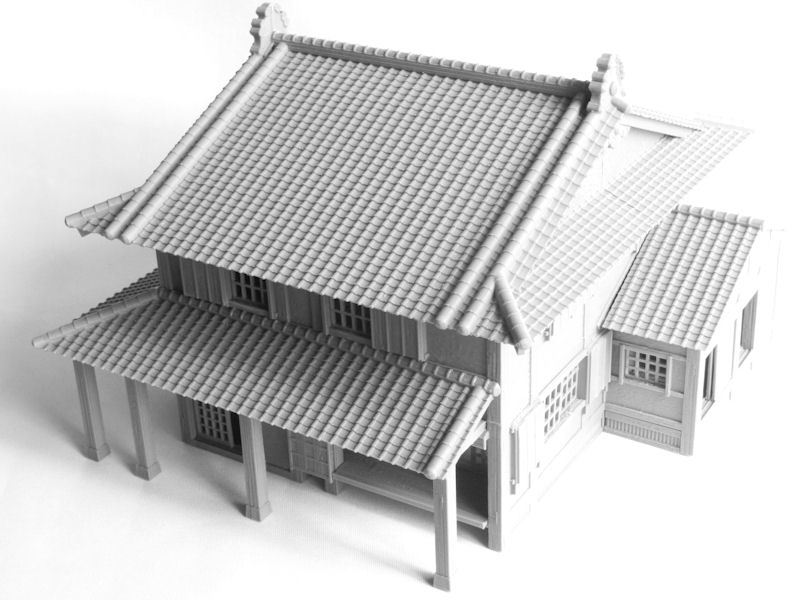
▲ Here's the finished building! Isn't it HUGE?! It actually turned out to be longer than the biggest roof level of the giant castle model!
If you look closely at the photo above, the doorway just to the left of the samurai figure is the opening that connects to the corridor piece leading to the Residence and Kitchen buildings - but in this photo I have also temporarily slotted in an extra optional doorway piece, to allow the main house to be used as a standalone building.
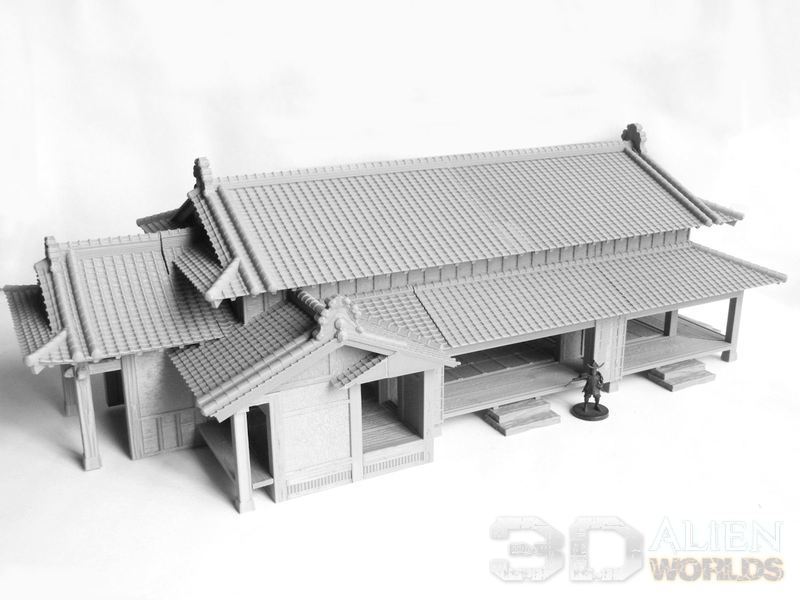
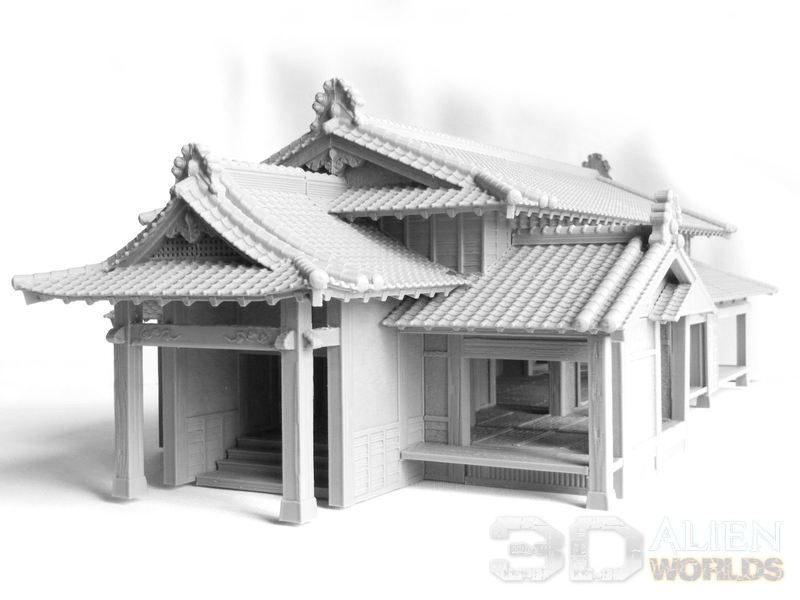
▲ Stone steps lead down to the garden and guesthouses on 3 sides!
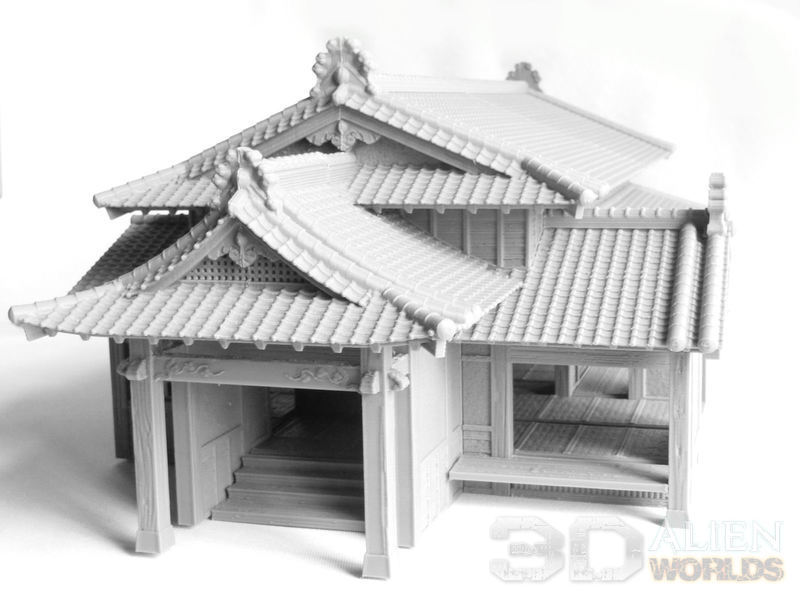
▲ This is the front angle of the house, with that imposing gateway reminiscent of a shrine entrance. I'll probably be using my doorways mostly without sliding doors, although you can print a full spread of different door types to allow your figures to explore this vast building room-by-room, if you prefer?
▲ This side of the house also features another doorway, which leads to the covered walkways connecting this building with the two guesthouses. As always, those are not essential for gameplay, so you have maximum flexibility in your gameboard layout.
▲ If you leave your doorways open, you can pretty much see all the way through the building from front to back and side to side.
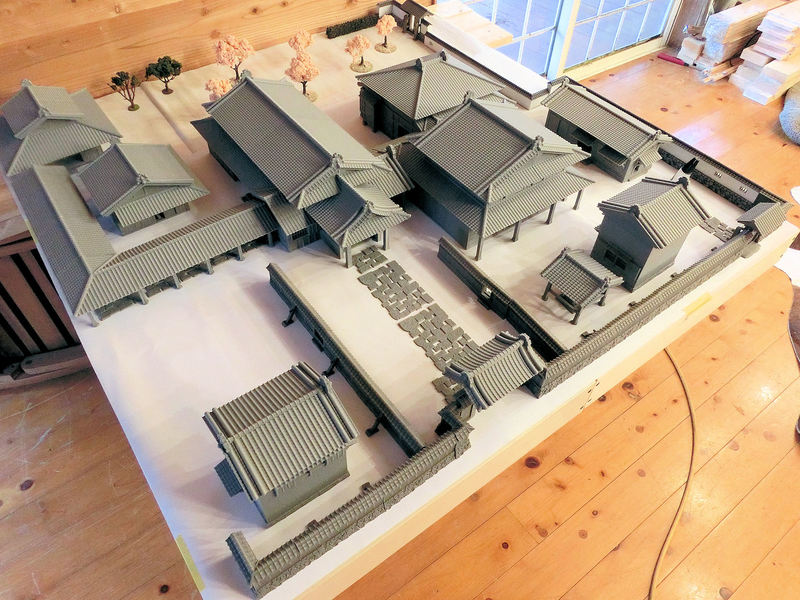
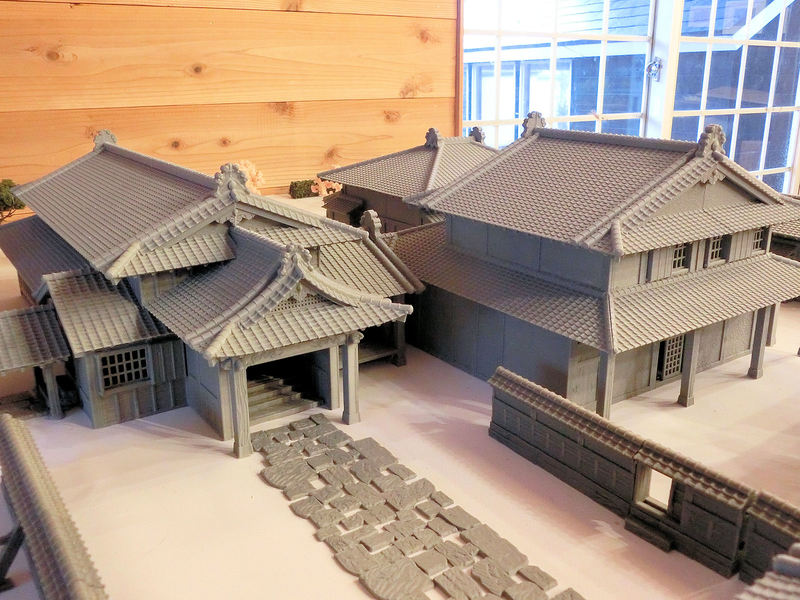
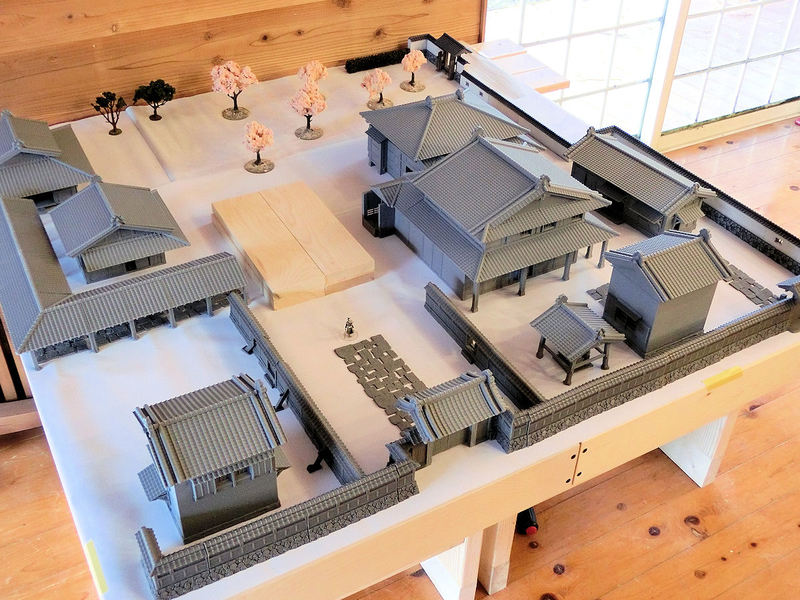
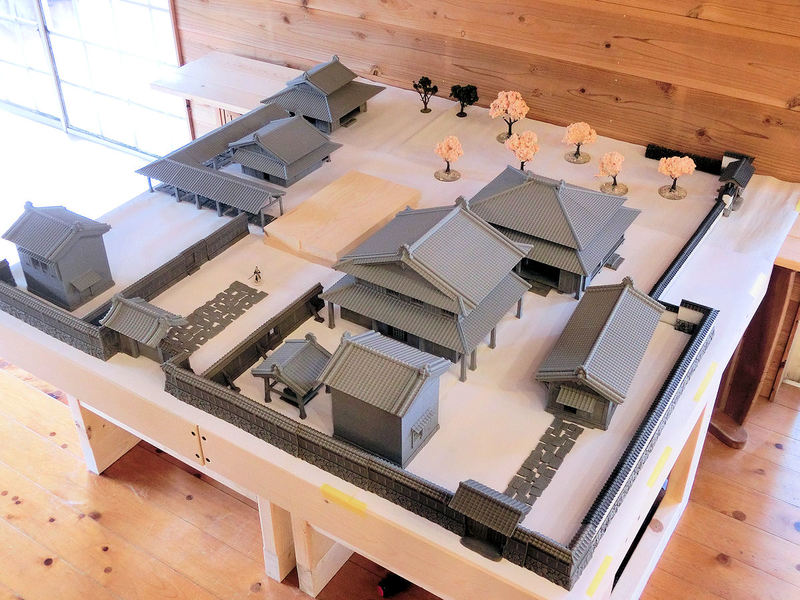
▲ So let's take a look at the almost-finished gameboard, as it now stands. Huge, isn't it?!
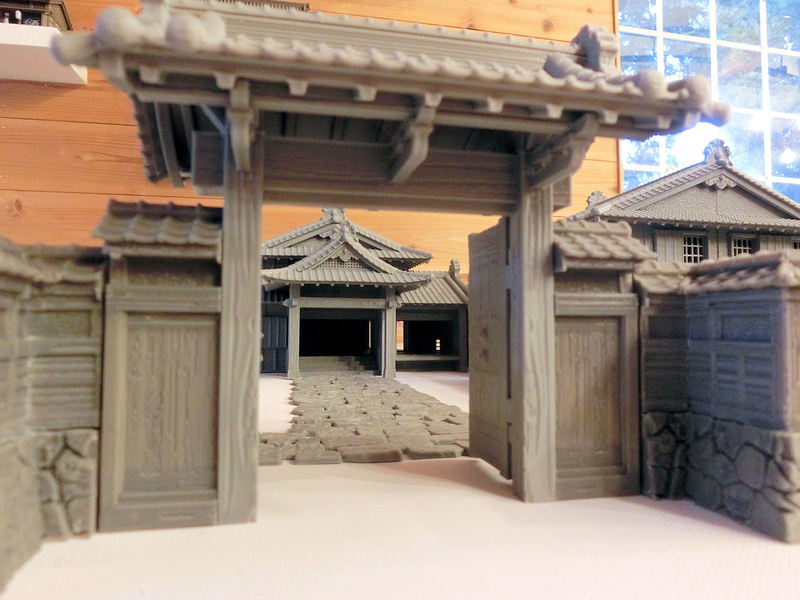
▲ Here's a fun little comparison photo for you - this is the view through the front gates of the model, towards the main house....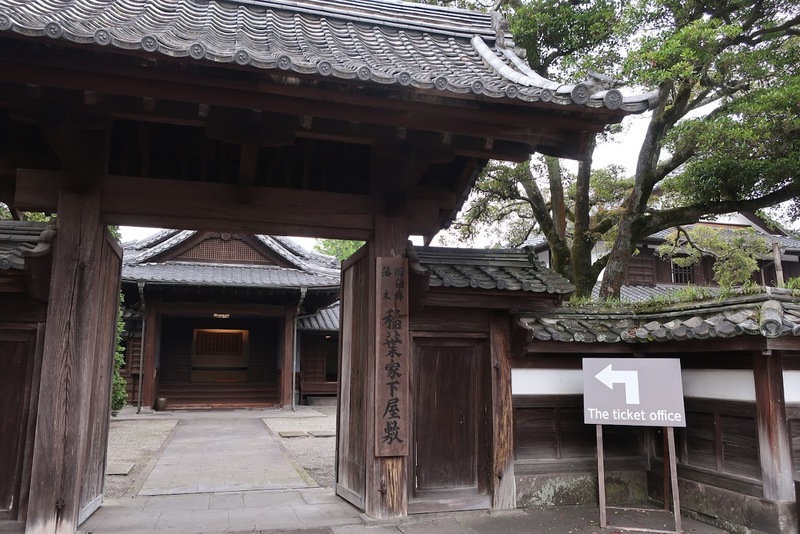
▲ ... and here's the real-life version, from the Inaba Residence in Usuki City, Oita Prefecture.
▲ Although the main house is the biggest of the buildings, the kitchen building is actually slightly taller, since it has a second storey inside.
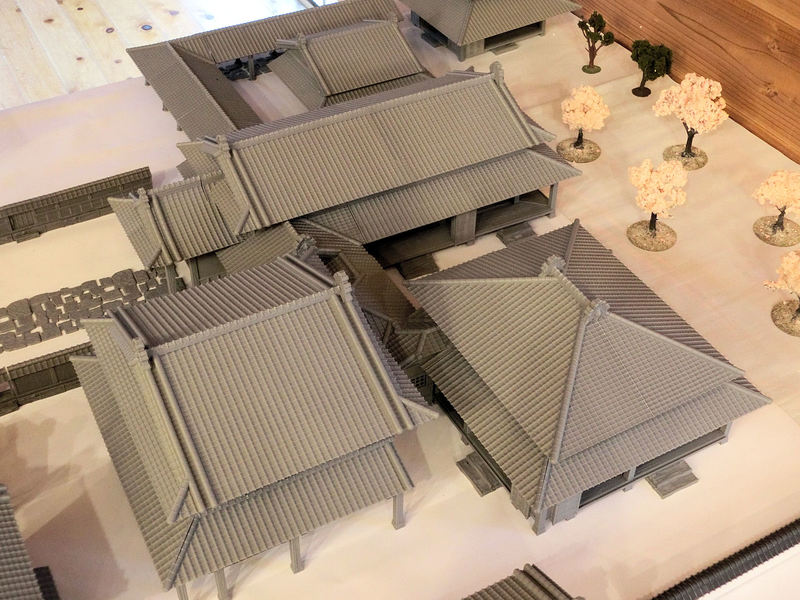
▲ This gives you some idea of how all 3 main buildings fit together with the connecting corridor. We'll be taking a closer look at this when it's painted up, but for now it's time to finish the set with some garden accessories.
Watch this space....
Today we'll be looking at how to assemble the penultimate building of the new Samurai Lord's House set, the big two-storey kitchen building!
▲ Once again, I'll start by saying that this large model is based very closely on a real-life samurai lord's house in Oita prefecture, so it does have a few weird layout points! haha
▲ We start with the four base sections, and then glue on the sliding door strips in the layout shown in the photo above.
▲ Next we're going to complete the floor sections by adding some wooden floor pieces, a special double tatami mat (it's slightly longer than normal), and whole bunch of tatami mats.
The odd little rectangluar holes at the top right of the photo, by the way, are actually toilet cubicles - which were simple holes in the floor, that dropped into a stone channel underneath and were sluiced by running water.
You can also print some stone ovens for the lower floor area. I arranged these back to back, to give my warriors something to fight around, but you could just back them against the wall! 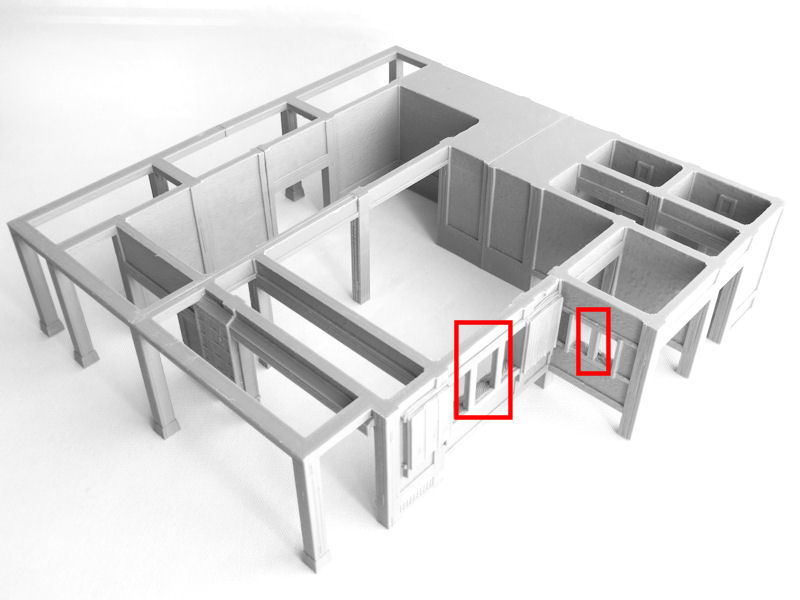
▲ Yay! It's time to print the wall sections, so that the layout finally makes some sense!
This prints in four pieces, all upside down. Slicer print supports are not required (but I would recommend printing your walls "Inside-to-Outside" to help with overhangs), although you'll need to remove the built-in window supports highlighted in red in the photo above.
▲ Final touches for the first level of the building are window frames (solid versions and versions designed for use with paper are included), various sliding doors, and the stairs. Yes, the smaller rear staircase really is that terrifyingly steep in real-life!
Note the single sliding wooden doors for the toilet cubicles. Perfect for ninja attacks, eh?
▲ We now move onto the second level, which can be printed in 4 sections or if, like me (on my Ender 3 V2), you have a large enough print bed, you can print it as a single large piece with millimetres to spare!
There are numerous built-in print supports that need to be carefully removed (shown in red in the photo above), for the windows and doorways. Have fun!
▲ Floor time! The wooden floors slot in as shown, leaving that interesting open floor space above the ovens below, and then you'll need about a million tatami mats again!
The small room on the left also needs a couple of small doorway strips, and two wooden doors.
▲ You'll probably have noticed that the second level has been sliding around on top of the first level, up to this point. Fear not - by gluing the lower roof strips to the 3 sides of the upper level walls, you should find the levels will align perfectly. Hooray! These can be printed in really long sections if your printer is big enough, or half-sections for smaller printers.
▲ If you look at the right-hand side of this photo, you'll see that there is a small gable roof over the toilets. This is actually an optional piece, and can be used to convert the kitchen building to a standalone building. I printed it so that I had a bit of extra flexibility in games, but normally I would replace it with a super-complicated connecting roof to the adjacent corridor section.
More on that later!
▲ The last step of the assembly is to print two halves of this large roof (or 4 quarters on smaller printers), and drop it on top.
Congratulations, you're finished!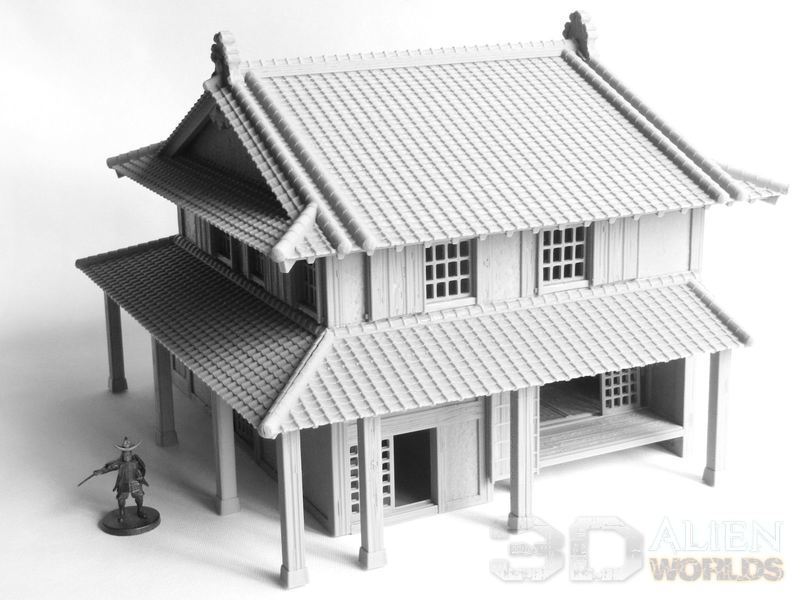
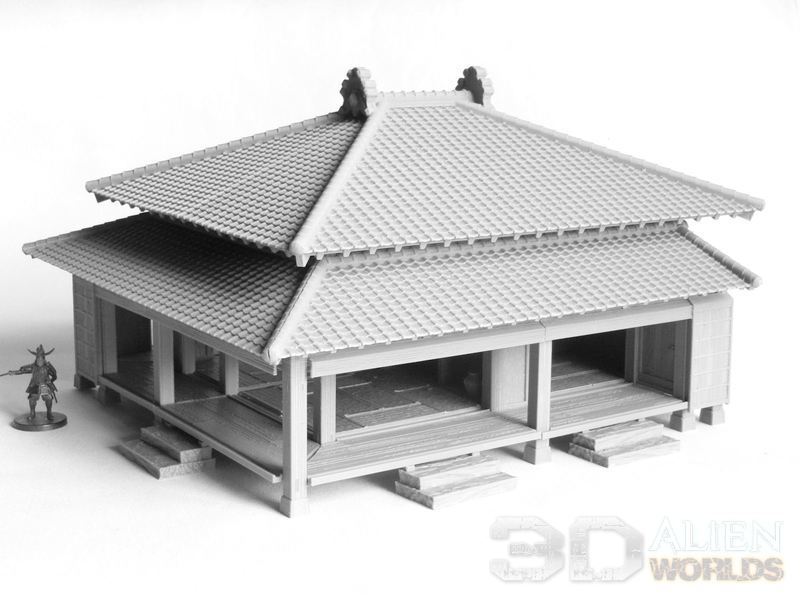
▲ Here's the completed kitchen model, with a 28mm samurai model for scale. It's pretty darn big!
Corridor:
Now seems as good a time as any to show you what the connecting corridor looks like!
▲ Assembly is a piece of cake, but you'll need to remove these two built-in print supports from the floor-level windows.
▲ Hey, somebody forgot to build the walls properly!?
Don't worry, this piece is only required if you're using all 3 main buildings together, and they all slot into place to complete the long corridor walls.
The roof, by the way, took me 3 afternoons to model! All those multiple roofline levels and angles were a complete nightmare, because I found I didn't have a clear reference photo of the roof there! So I had to get creative, and so you can rest assured that it's properly engineered - you could print it at 1:1 scale and use it on the real building!
▲ So here we are, with only one more building to go! The kitchen building (on the right of the wooden blocks) is the biggest one so far, but the final main house building will dwarf even that!
▲ Yes, huge, isn't it?!
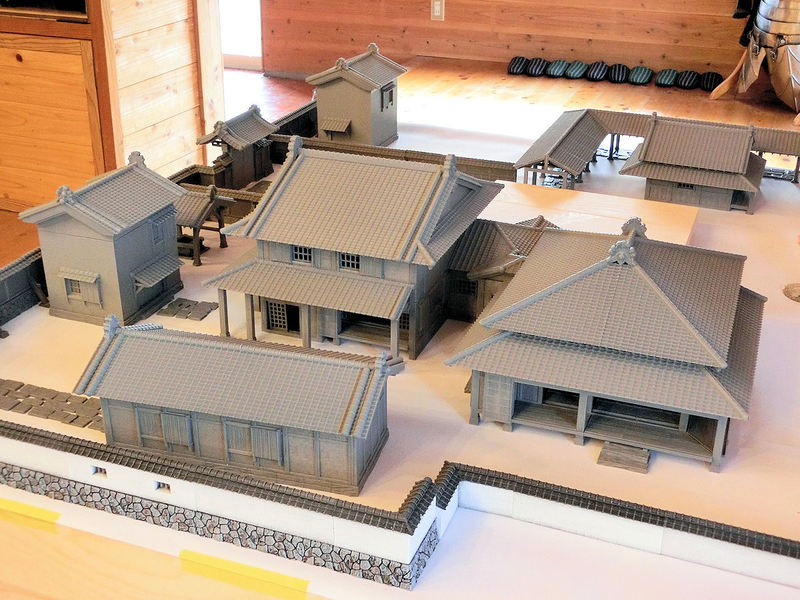
▲ This photo shows the two big buildings (kitchen and residence) connected by a corridor section....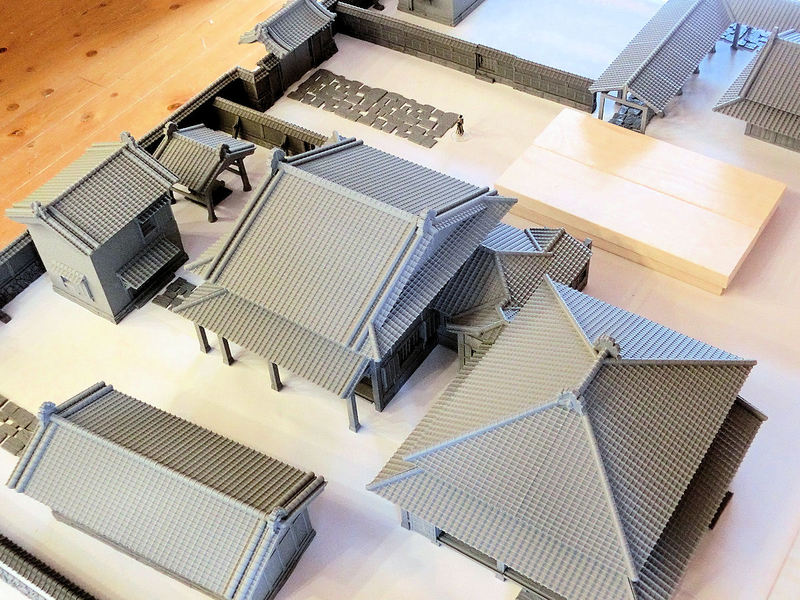
▲ ... and in this photo you get some idea of how mad that roof section is!
The big main house building is now being modelled and test-printed, so watch this space for the final layout pics!!
EDIT:
William asked for a bit of extra guidance on how the corridor section's roof assembles, so here's a quick image of how those 3 pieces glue together: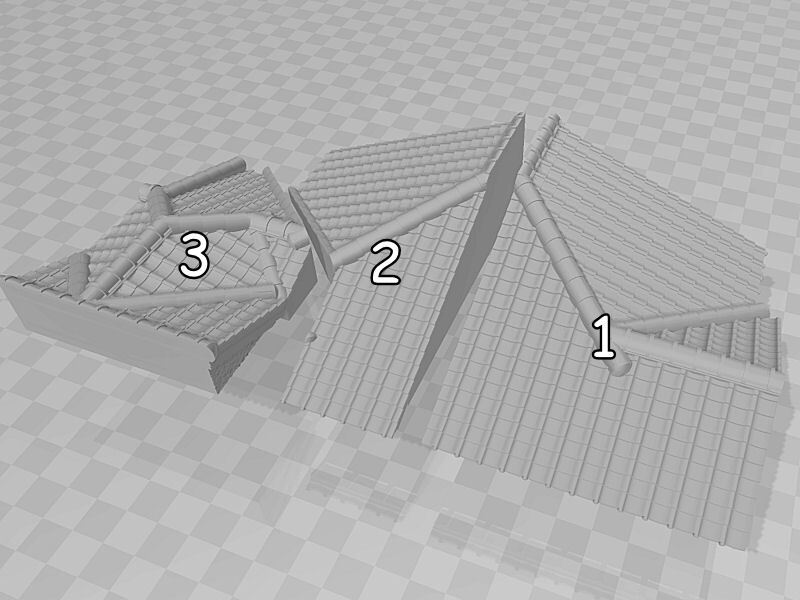
▲ Hope that helps!
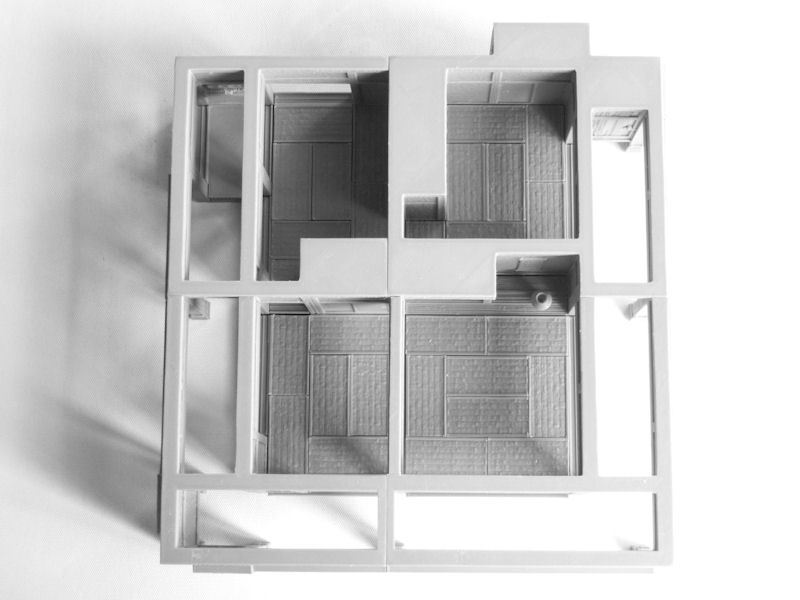
There are only 3 more buildings to be completed before the new Samurai Lord's House set is released, so let's take a look at how to assemble the biggest building so far - the Residence!
▲ This 4-bedroom residence building is where the Lord and his family would sleep, and although it's quite a big building the assembly process is actually quite simple and straightforward.
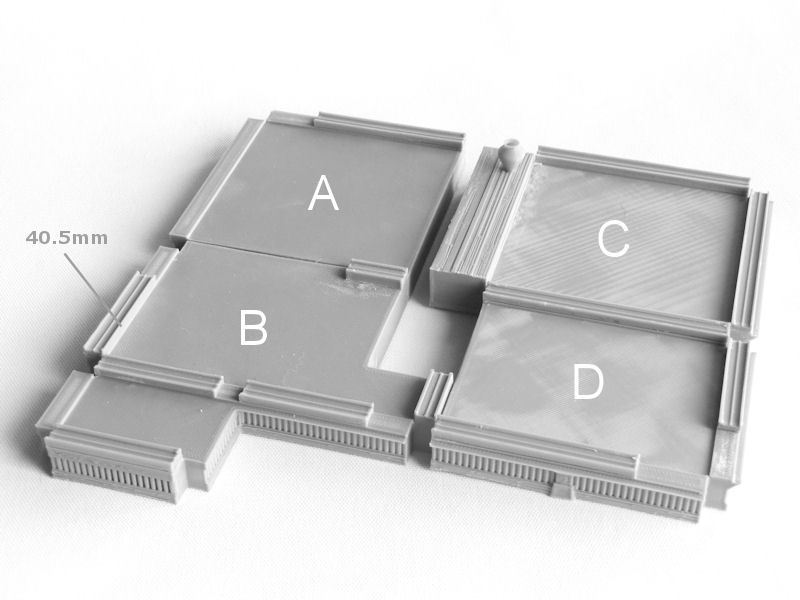
It starts with printing the four pieces of the building's base, labelled A~D in the photo above. On top of that, as shown in the locations in the photo, you'll need to glue the sliding door frames. There are a few of each length (long, medium and short), but the only one you need to pay attention to is the 40.5mm piece highlighted in the photo on the left. That one's just a tiny bit longer than the other short pieces. Sorry about that!
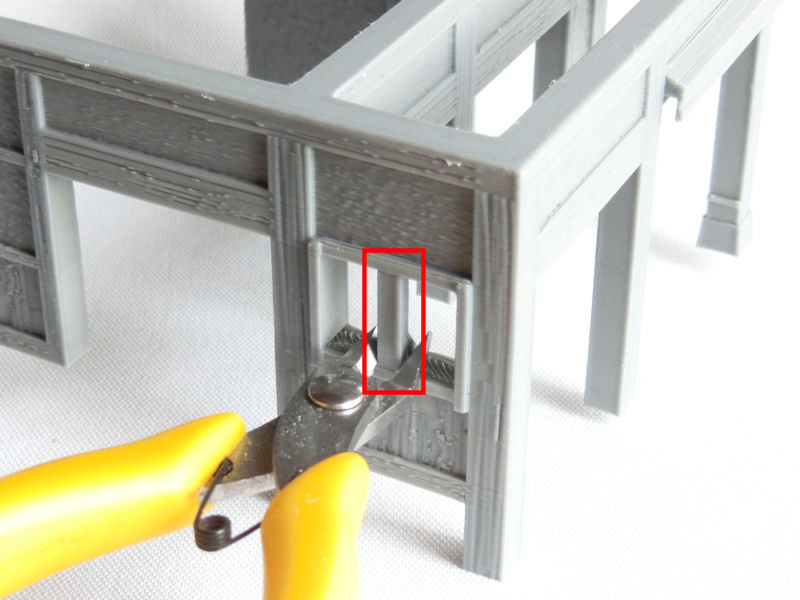
▲ The walls for the building also print in four sections, all upside-down. You don't need slicer supports for anything, but I recommend making sure that your slicer software is set to print "inside-to-outside" for the walls - this makes the overhangs work better.
There is one built-in print support on section B, for the window frame (shown in red in the picture above) which needs to be removed during assembly.
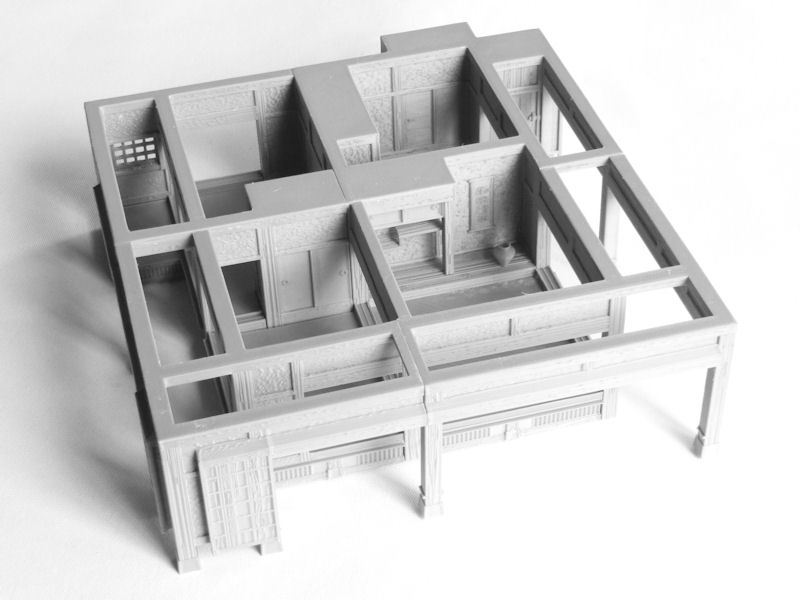
▲ You should also print the window grills and the tiny shelf piece at this point, and glue them in place.
I didn't actually glue the base sections to the wall sections yet, because they'll be much easier to paint separately.
▲ You will need to print 26 tatami mats (and 2 half-size mats), and glue them in place on the base sections as shown in the photo above. I recommend gluing these in pairs, starting with the end-to-end sides first, to retain your sanity!
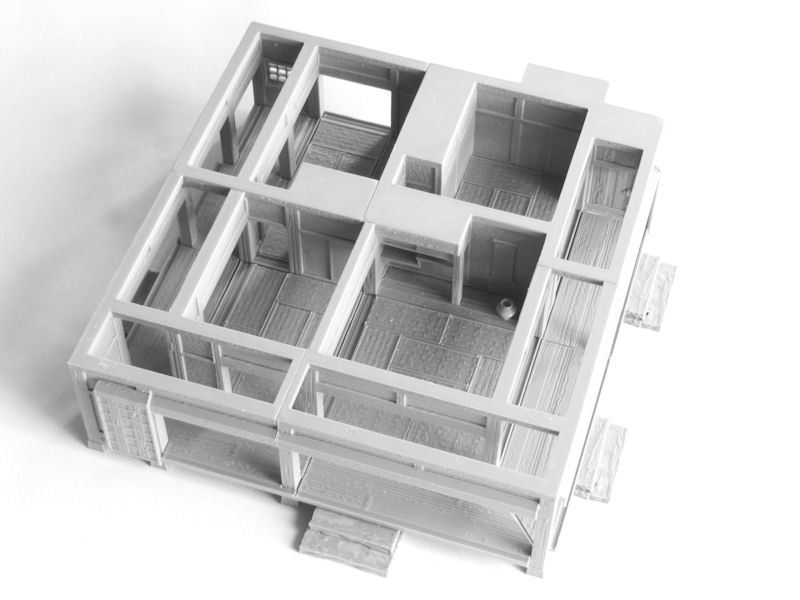
▲ The last stage for the interior assembly is to print the 6 floor pieces, cut out the built-in print supports, and slot them into place around the outer balcony.
You'll also need 4 of those stone step pieces, if you want to match the location of garden exits in the real-life building.
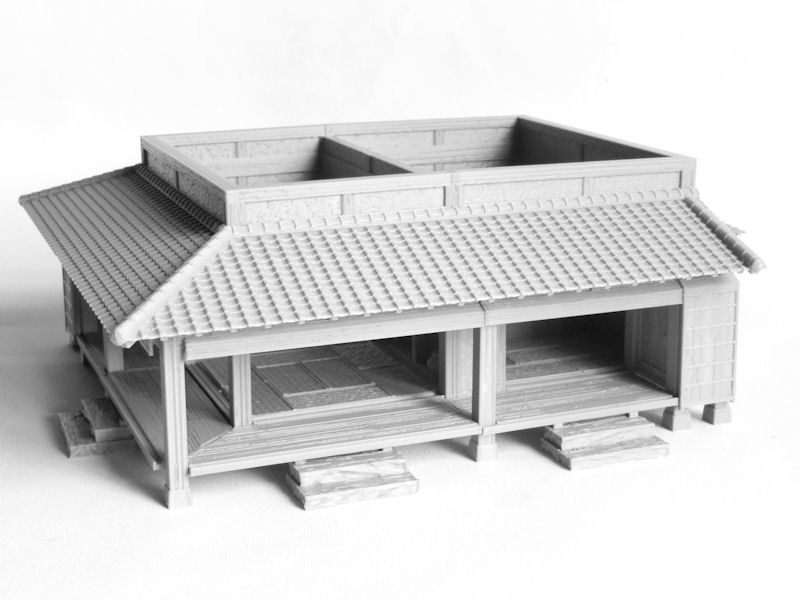
▲ Next we print the short upper level of the building, which can be printed as one piece on bigger printers, or as 4 sections on smaller ones.
The subroofs similarly can be printed in 3 pieces if your printer can handle the long sizes, or 6 half pieces if you have a smaller print bed. There is also a small roof piece that should go at the back of the building, and I glued this to the top of the lower walls (rather than the upper walls) so that it's easier to locate the subroof section when removed and replaced during gameplay.
The far side of the building actually joins onto a connecting corridor if you're using the Residence as part of the bigger House building, but you can print a non-connecting roof version instead if you want to use this Residence as a completely standalone building.
▲ Finally you should print the main roof in two halves (or 4 quarters if you have a smaller print bed), and add that on top.
Phew, we're done! With multiple exits and entrances, this building should see some serious action in skirmish games!


0 Comments :
Write a comment :