| << Samurai Wooden Sake Cup available NOW!! 2023-12-21 | Introducing OZWARGAMING, our new Australian print partner... >> 2024-01-13 |
The next big project for the samurai collection, the Samurai Lord's House, is moving closer to completion. The outer and inner walls, and the 3 gates to go with them, are all completed and have been test printed.
There's a photo at the end of this article to show how they look on the table, but for today let's start with some assembly notes about printing the new main gate....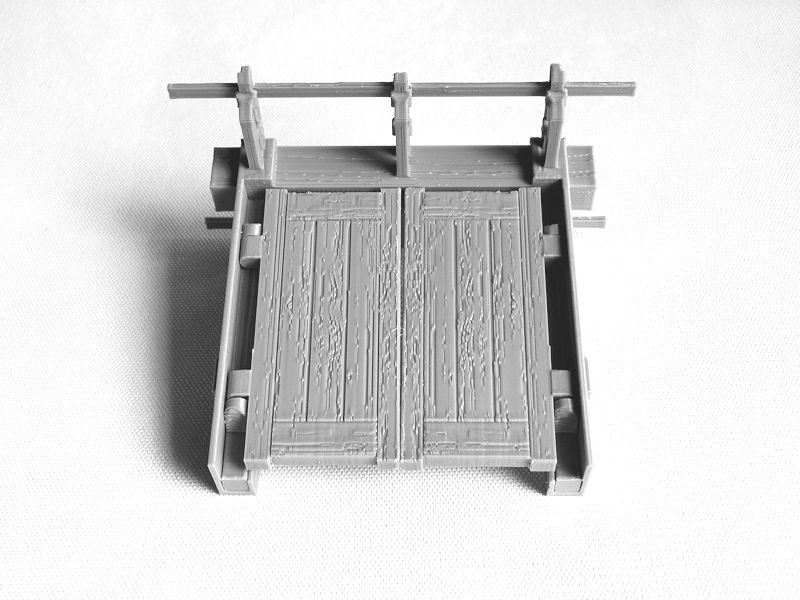
▲ The new main gate starts with a one-piece frame, which is printed upside down and therefore doesn't require any print supports. In fact, all of these wall and gate sections don't require slicer supports.
The large double gates are printed side on, and simply slot into the top pegs. Then you'll need to slide in the two small peg blocks, into the slots at the bottom. That will hold the doors in place, and allow them to swing open and closed.
The photo above shows this construction from the back, so remember that the metal studs go on the front of the gate.
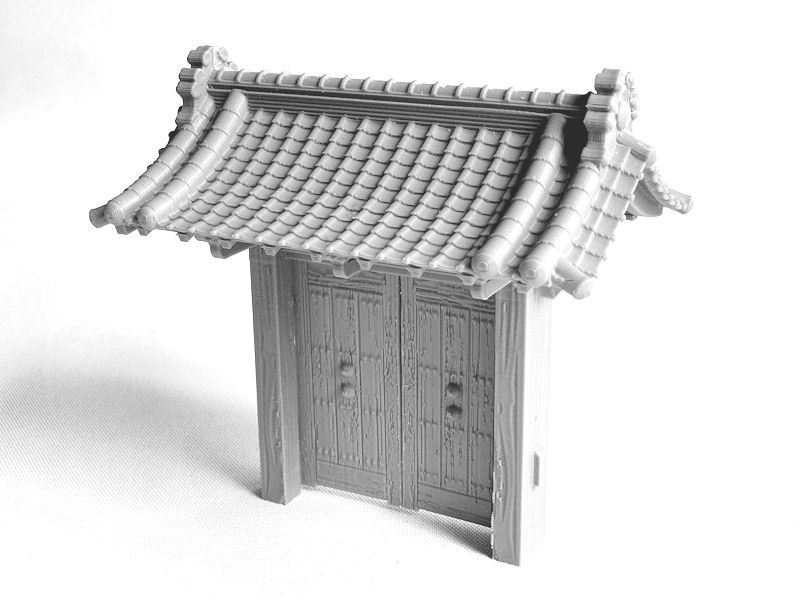
▲ Step 2 is to print the two halves of the beautiful roof structure, which are glued together and slotted into the frame. At this point you'll have a functioning gate, and you could use this model as is for your games (or customised models), but there are a few more bits which can be added to make it even larger.
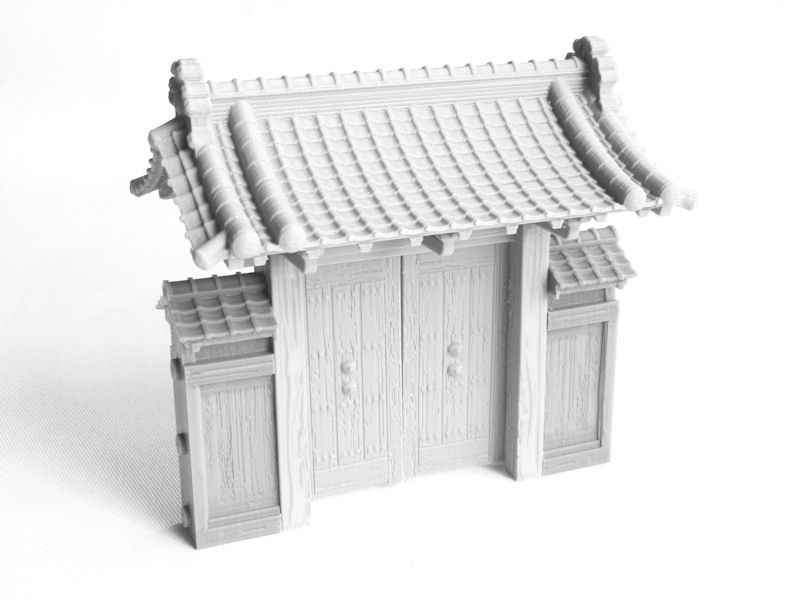
▲Step 3 is to print the side door sections. These glue into the slots on the side of the frame posts. Note that the small wooden locks should be placed at the back of the gate. These door sections don't open, by the way.
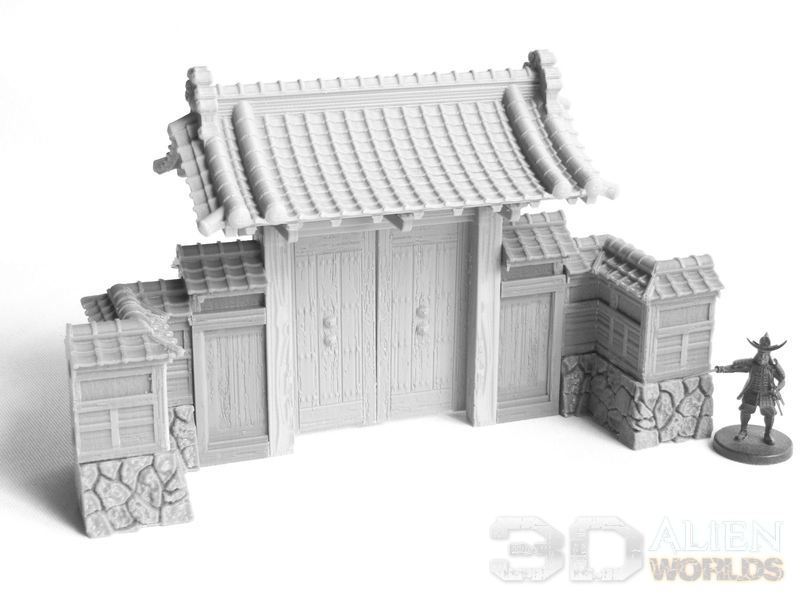
▲ Finally, you can complete your main gate by printing these zig-zag wall sections. The bases are one-piece prints, but each side of the zig-zag wall is actually made from 4 small pieces which should be glued together. The wooden sides should be to the front of the gate model.
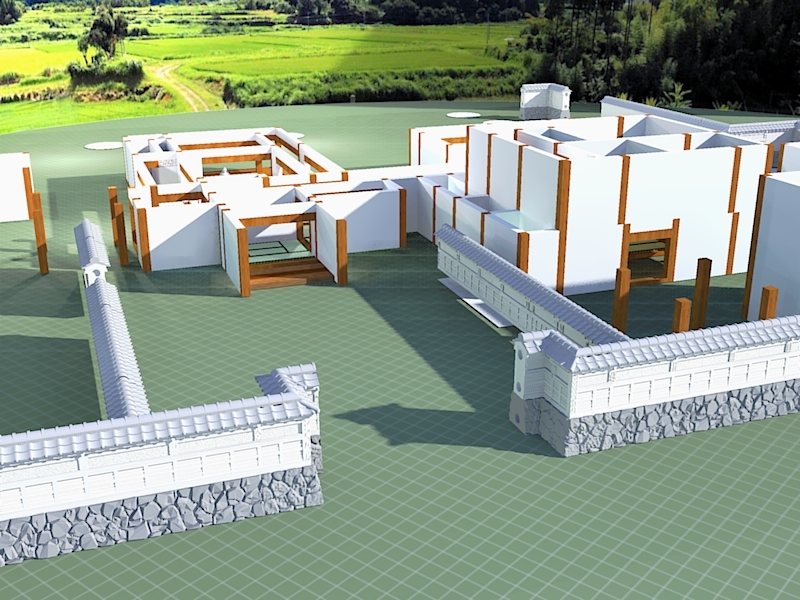
▲ Just a quick work-in-progress shot of the walls being modelled, in relation to the main house and buildings. It's quite an imposing entrance!
Okay, let's take a look at the wall models in the set....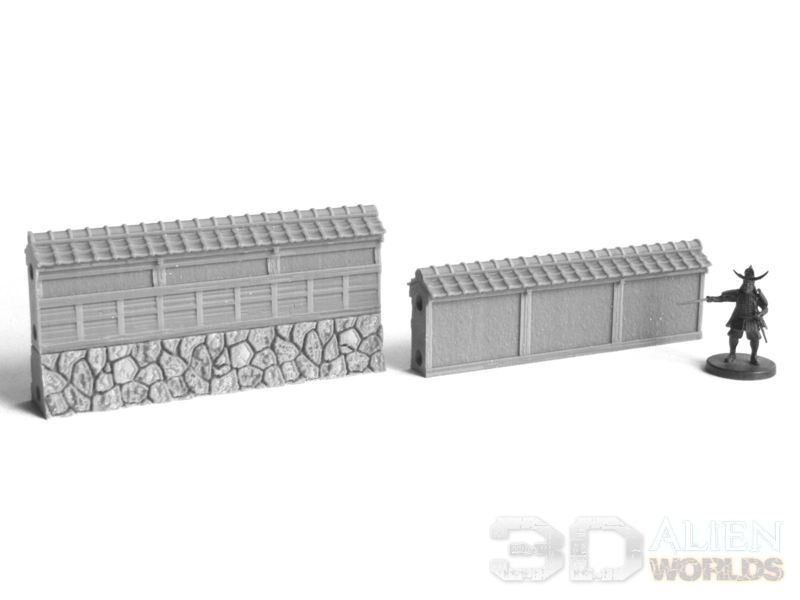
▲ We obviously have new straight sections, on the same stone bases. The new walls have a wooden lower half and a plaster top part to the front, and a plaster and timber beam design to the back. These walls are fully textured, and include magnet holes as on many of our other walls designs.
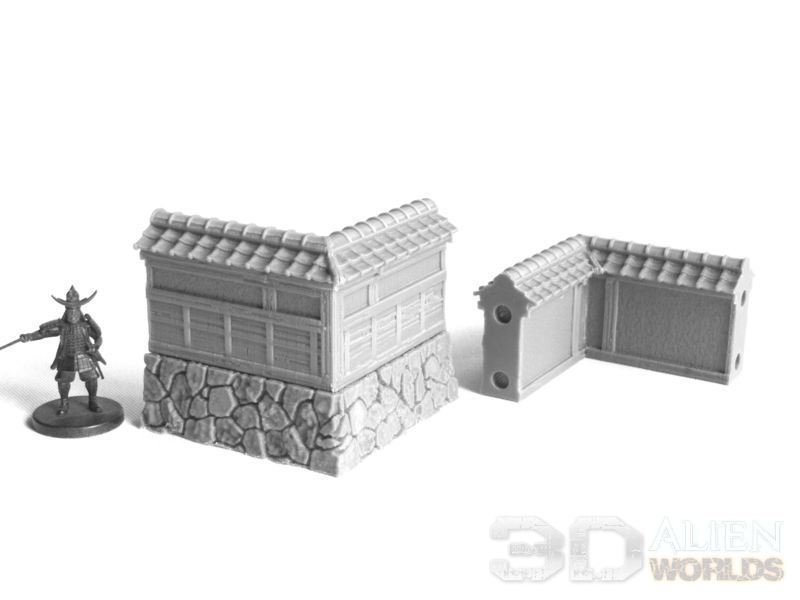
▲ A wall set wouldn't be very useful without corner sections, and the upper walls are again printed in two parts and glued together.
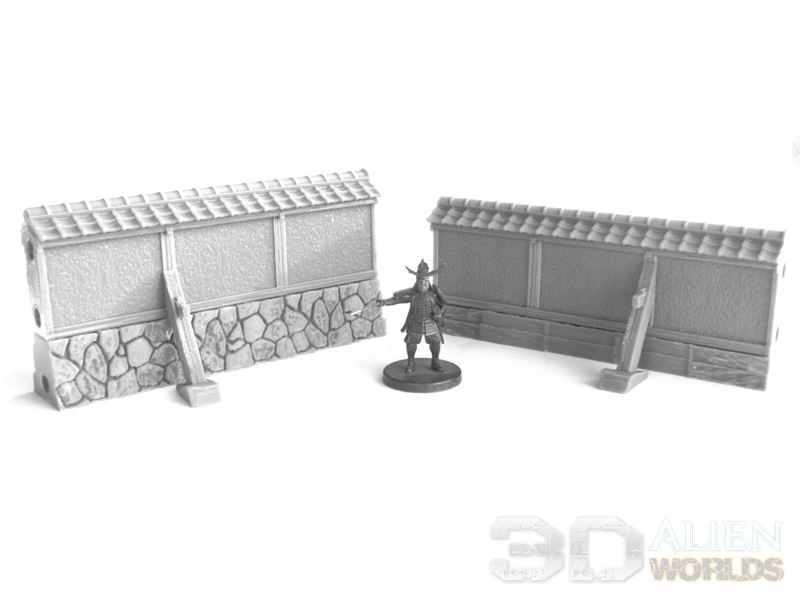
▲ The outer walls (on the left) should be used with those big stone bases, but a lower stone base (on the right) has also been created to work with inner walls of the residence. You'll find that the inner walls butt onto the outer walls quite well, with the two heights of roof tiles fitting neatly.
One feature of the real-life historical residence this is based on, is these great heavy timber supports for the inside of the walls. These print well at 90 degrees to the print bed, but do require a little bit of support for the stone. They're not essential, but I think they're great little details that add some realism to the models. They've been designed to work with both heights of wall, as shown in the photo above.
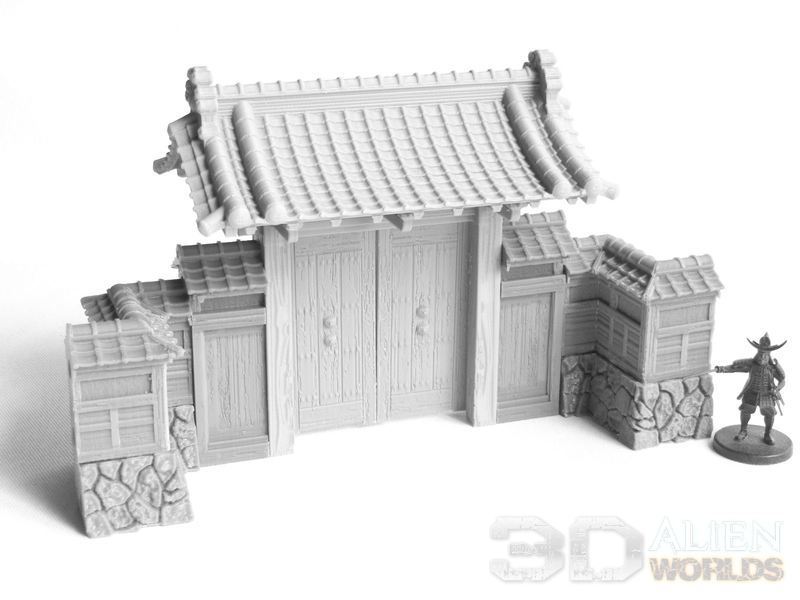
▲ Okay, it's time to look at the gates included in the set. You've already seen the big main gate above, and usually you'll only want to print one of these, to be located right in front of the main house entrance. The roof is curved and ornate, and intended to intimidate visitors and act as a display of power and status.
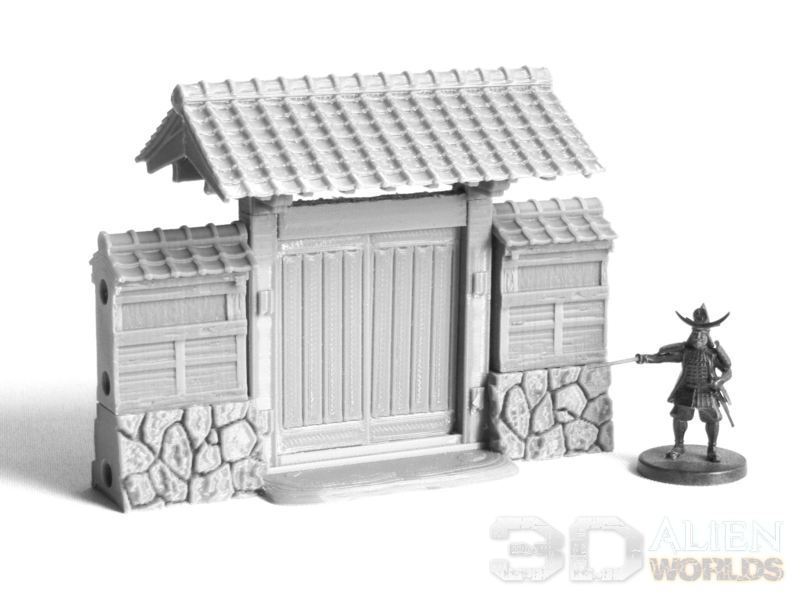
▲ The medium gate is a re-work of the existing gate from the Stone Walls set. The wall sections have been modelled to match these new walls.
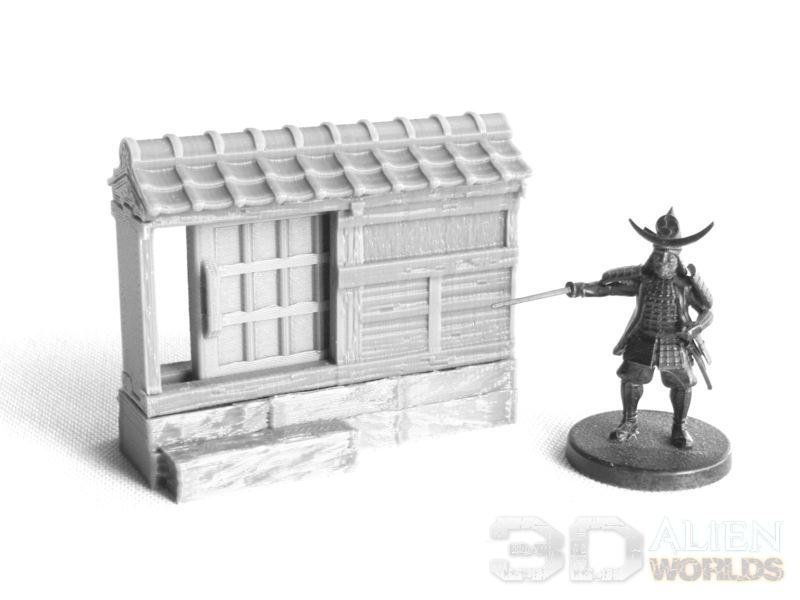
▲ The small gate is another new model included in this wall set, and is intended to be used inside the compound, as a 60mm section in the inner walls. There's a small stone step to both sides of the sliding door.
I've printed two of these smaller gates, to lead left and right from the main gate entrance to servants' areas.
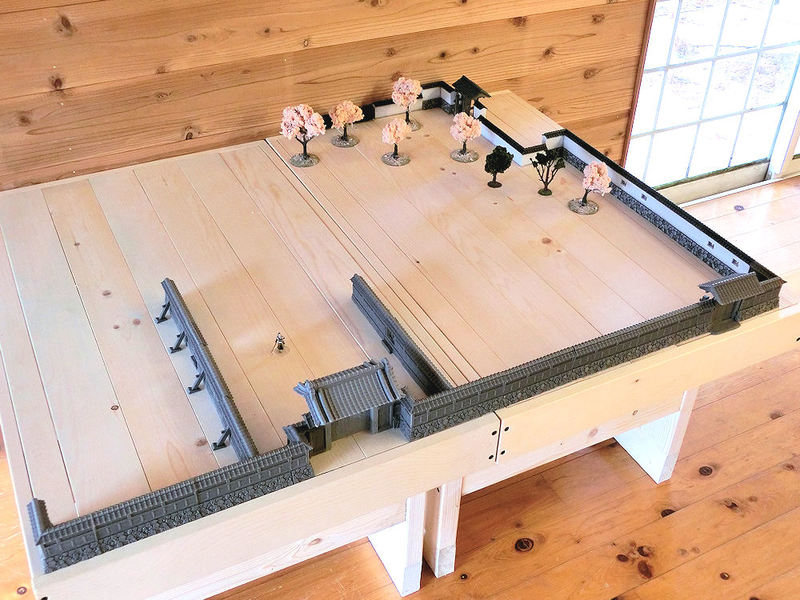
▲ Here's one last photo for today, to show progress on the layout. This particular layout is the real-life layout of the Inaba Residence this model is based on, but obviously you're free to arrange your layouts as you want to. As you can see it almost covers the width of both tables - a massive 120cm (4ft) wide!
I've combined these new walls to the front with my older plain walls to the right-hand side. There is one main gate roughly in the centre, and two medium gates on the right, leading to the storehouses and gardens. These would be mostly used by servants and gardeners.
It's a little hard to make out, but there are also two small gates in the inner walls, leading left and right from the main gate approach. Just imagine the fights you'll be able to wargame, to hold those vital chokepoints!
Next on the work bench are the storehouses and outbuildings. Watch this space!
| << Samurai Wooden Sake Cup available NOW!! 2023-12-21 | Introducing OZWARGAMING, our new Australian print partner... >> 2024-01-13 |
