3d-printable terrain for all your samurai wargaming needs


It's spring here in Japan, and that means cherry blossom season!!! Our next samurai terrain project (still TOP secret - sorry!) is being worked on right now, but I thought it would be a great opportunity to model some cherry blossom trees to go with it.
Sadly, it's not easy to 3d print a tree, as the number of branches that will actually print is limited. Not to mention supporting those branches during printing....
So instead I've decided to use bendable tree armatures from Woodland Scenics, and print up some wide 60mm bases to give them more stability and also provide a surface for attaching fallen petals. Hopefully these will look good!
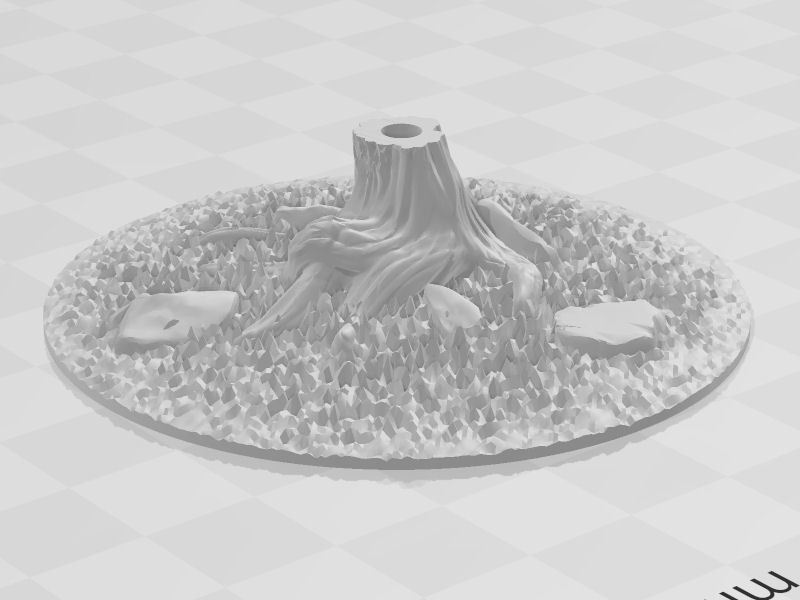
£ I used a free download from Thingiverse of a dead tree, and sliced it to just the lower trunk, then resized it to fit the 7.5mm diameter of the Woodland Scenic trees. Add a hole for the tree's pin, and place it carefully on a 60mm textured base with some small stones.
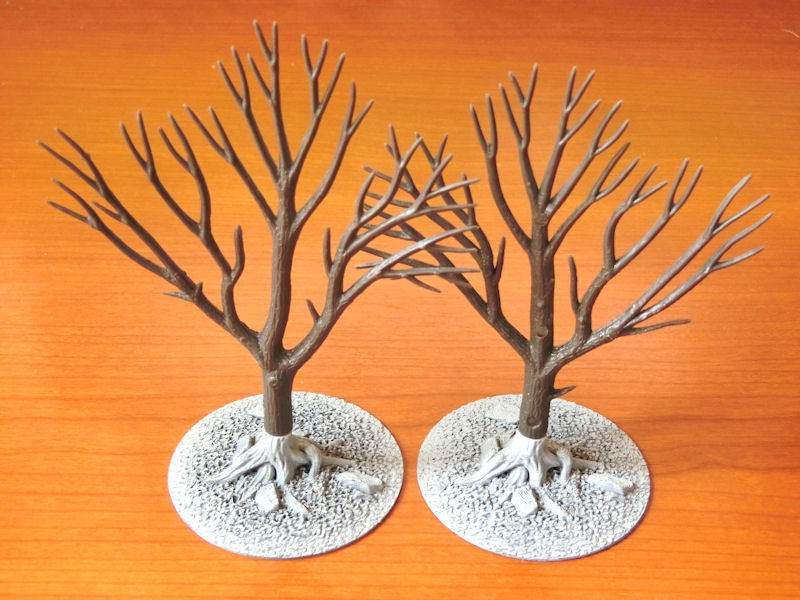
£ This photo shows a light dusting of white spray undercoat on two prints. The one on the left was done at 0.1mm layers, and the one on the right was printed at 0.2mm layers. There's not actually much difference - perhaps the deeper indentations on the ground surface are more defined on the 0.1mm layer version, and the rocks certainly look better.
Obviously the finished trees will be MUCH more twisty and gnarly, as cherry blossom trees tend to look in real life. But that's for another blog......
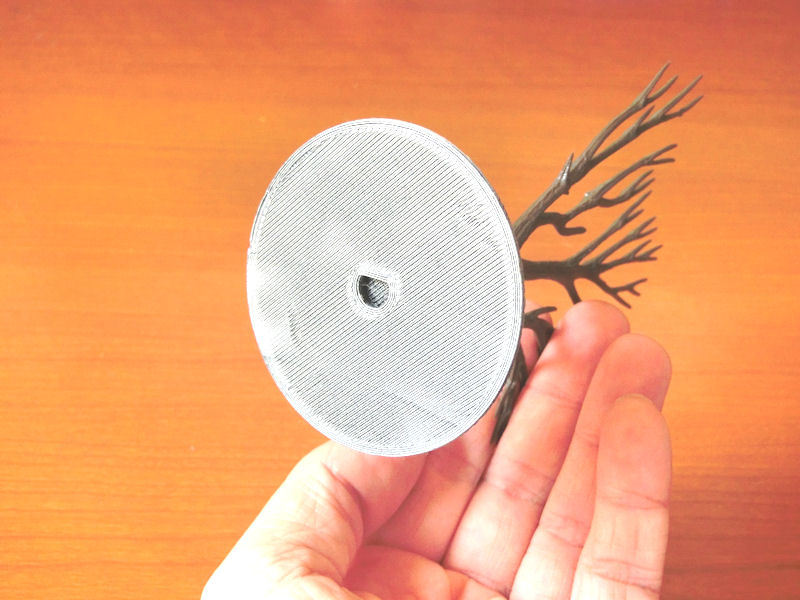
£ I included a small magnet hole in the base too, as this will help when transporting them, I thought?
These 60mm tree bases are available on Thingiverse for free download:
https://www.thingiverse.com/thing:4204227
Looking forward to modelling and painting these up!
It's time to stock up on blue LEDs! Yes.... that's right, we have another hi-tech Taui design coming for you soon!
Designed in the same vein as the recent Taui Landing Pad, this 10cm (4") tall Teleporter has the same smooth, advanced sci-fi look to it. 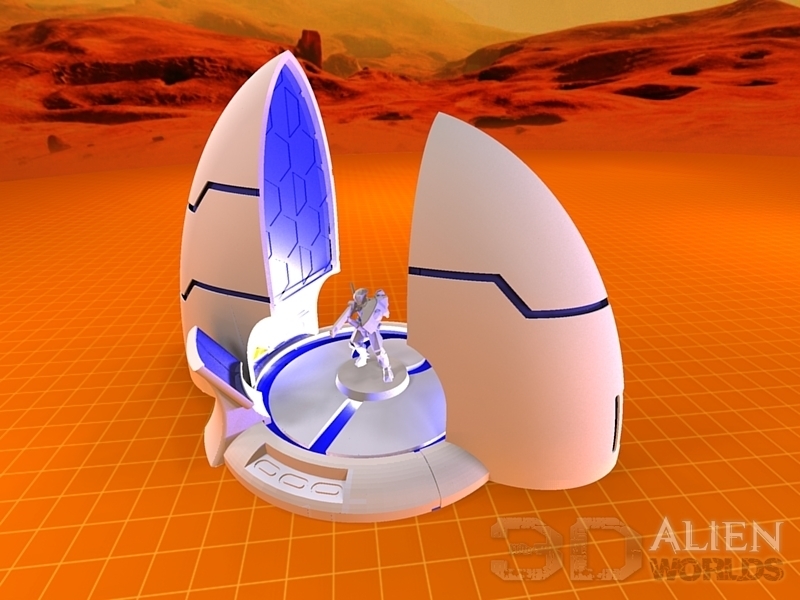
£ It's mostly a one-piece print, with a few extra pieces printed separately for customization. The control console is printed separately and can be glued in place anywhere on the rim, and central 'pad' comes in a hexagon motif or a variety of simple geometric shapes.
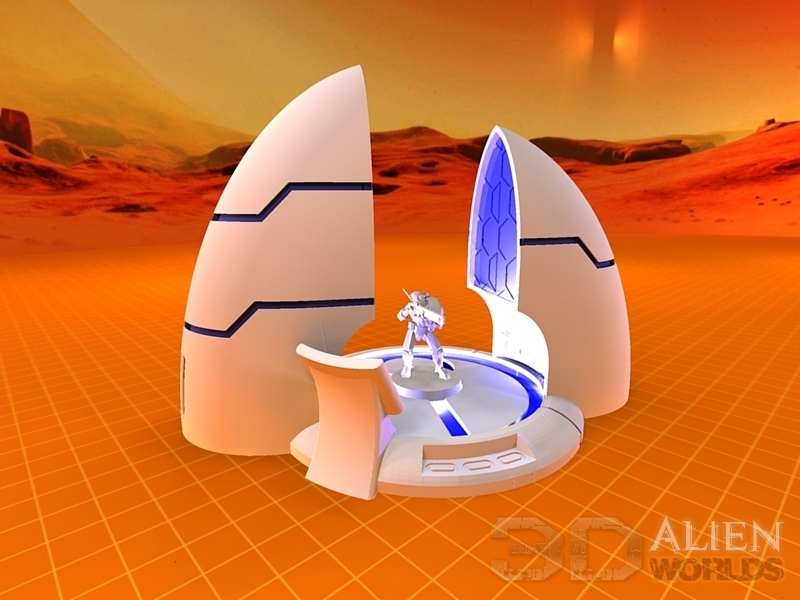
£ You probably won't be surprised to hear that the structure is hollow, so if you print this in clear PLA filament you can add small LED lights in the side towers, to shine out of the vents, side lines, and the hexagon wall facing the middle.
You can even run LEDs under the pad itself if you need to, and the console also has a hollow space inside if you'd like to try lighting up the display screen.
This Teleporter will be printing in the next few days, so watch this space for pics soon....
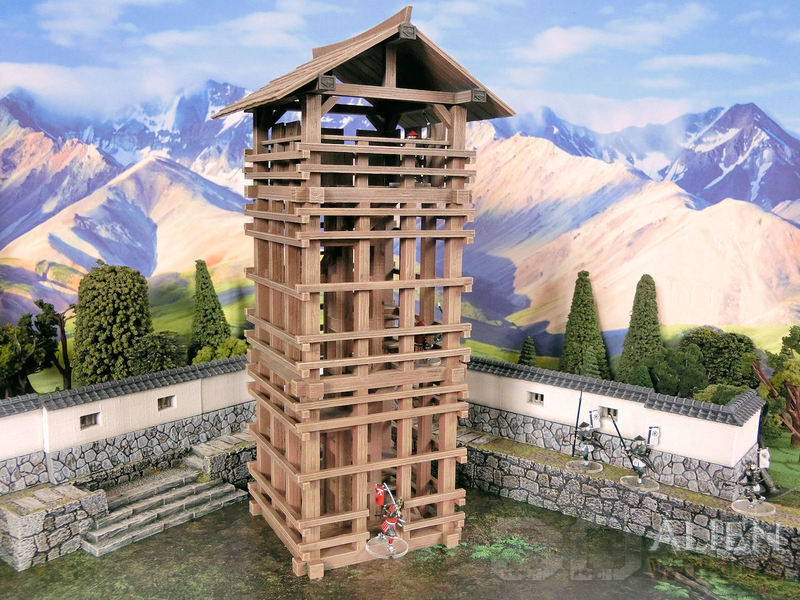
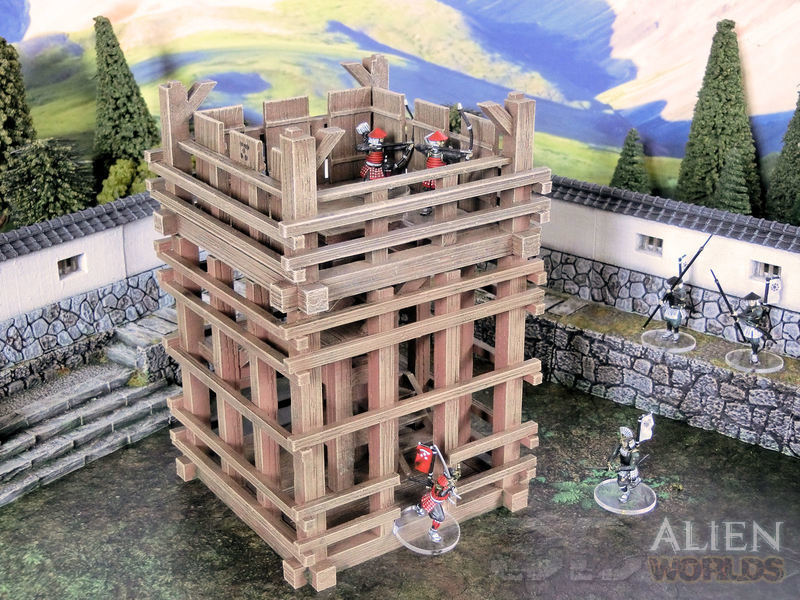
We have a new (and very tall) release for the Samurai range to show you today. The Samurai Watchtower is now officially available for download!
£ Well well.... painting this didn't take very long at all! With a spray undercoat, a spray brown wash, and some drybrushing, this whole thing was painted in only 1 hour and 47 minutes!! Posing the models for these shots probably took just as long!
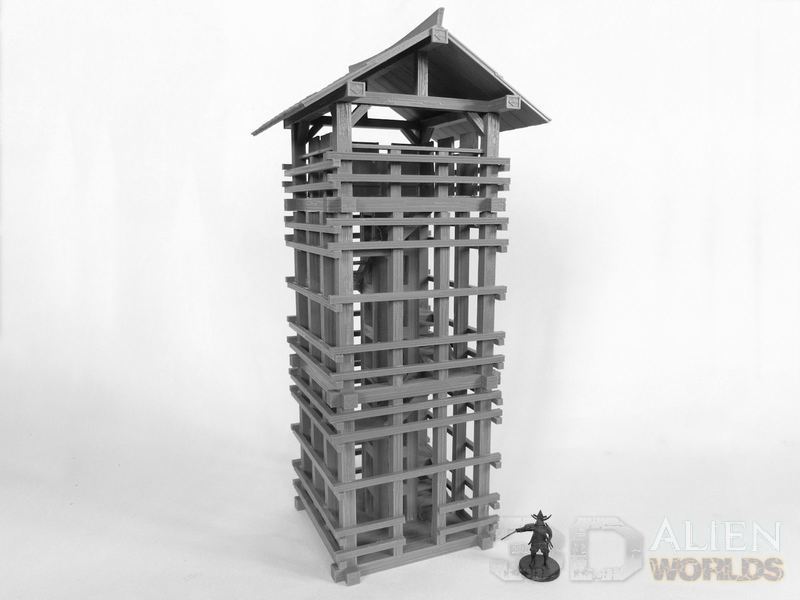
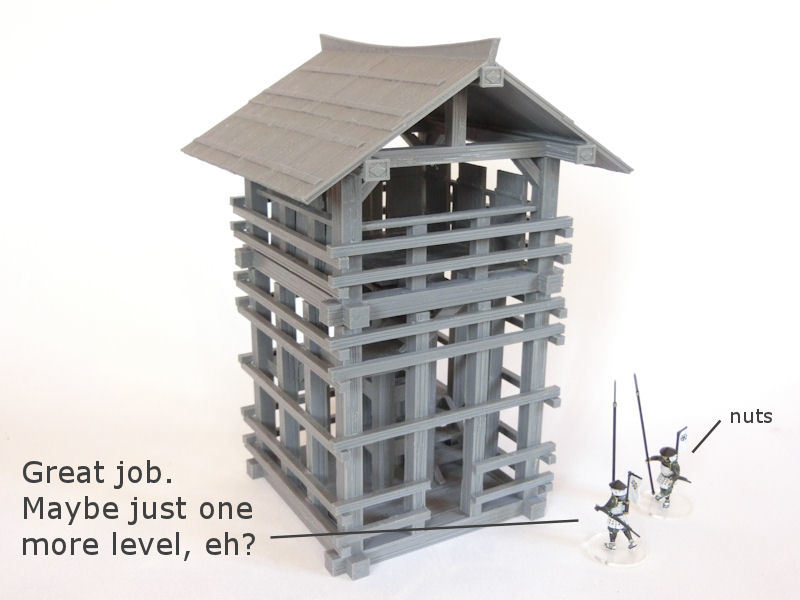
£ The 3-level version of the watchtower measures a very tall 320mm (13") tall, and is made up of a base level, a mid-level and a top level with that large roof.
Each level can be removed separately, in case your ninja want to fight your way up to the top to silence the alarm from being raised? On every staircase corner there is a small platform which can accommodate a regular-sized model.
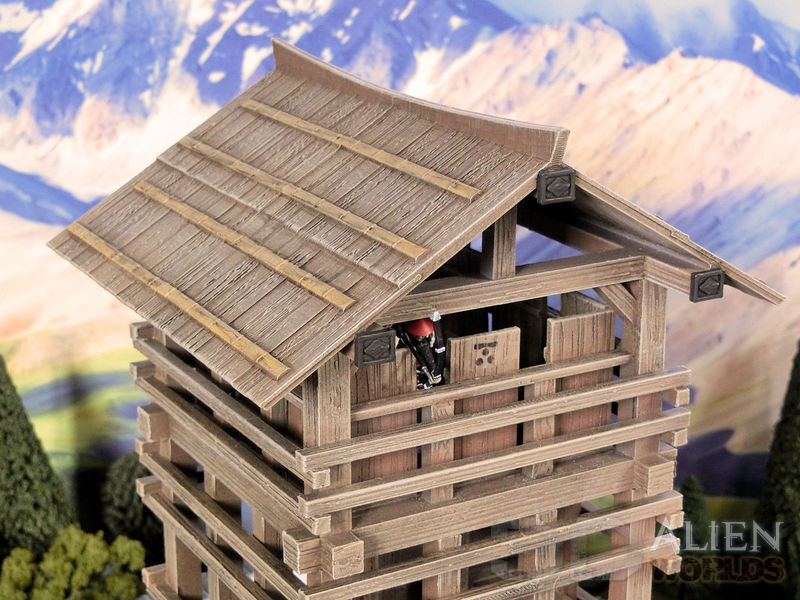
£ The roof has been modelled with rough wooden planks, held down by long strips of bamboo. They were used as fixed watchtowers in earlier castles, and could also be erected on the battlefield to provide commanders with a better view.
I also added a few water transfers to the centre "shield" of each side, to simulate the local lord's clan crest - these were commonly painted on, or branded into the wood.

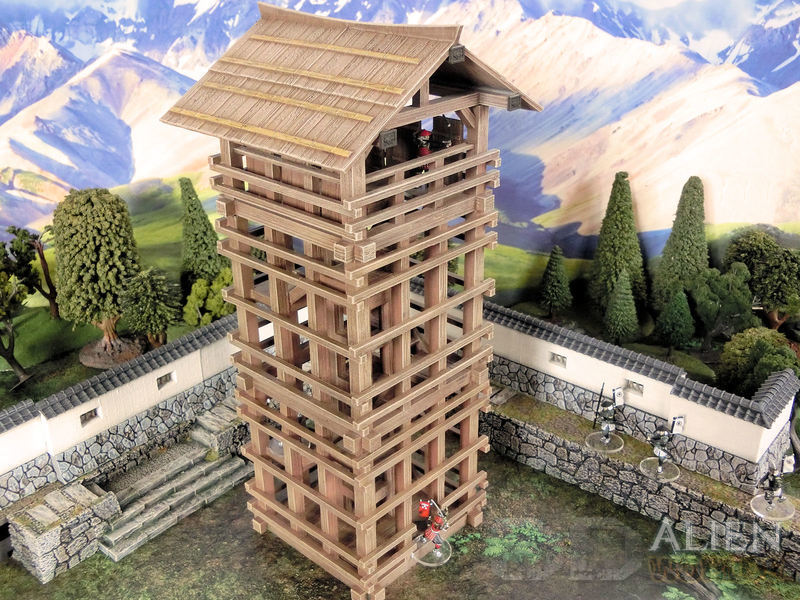
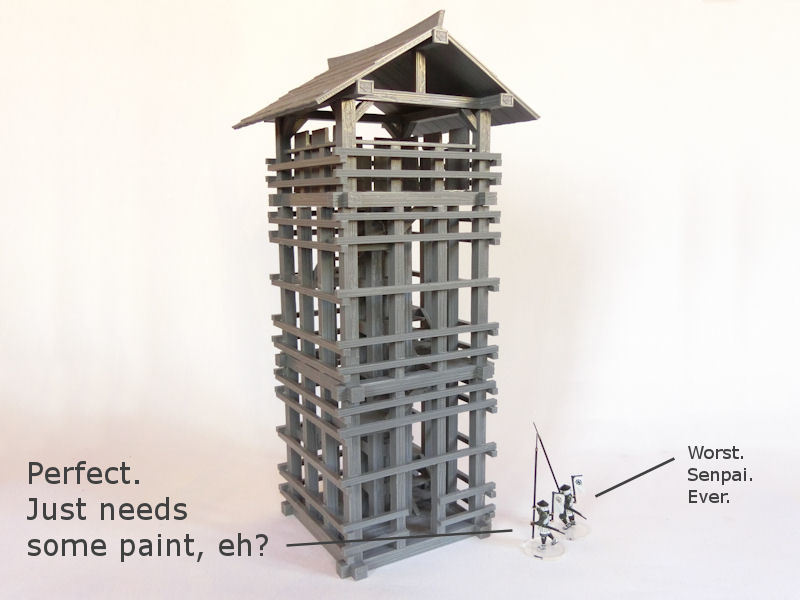
£ If the full 3-level tower is too much for your warriors to handle (just think of all those steps!!), then why not remove the middle level and just create this 2-level tower. The interior staircases are designed to fit both options - simply slot on the top level!
The two-level tower is 210mm (8½") tall.
£ If you are a particularly cruel local lord, you can remove the roof and let your watchtower guards get soaked in the rain! I'm sure they'll thank you for it.....
The Samurai Watchtower is available for download from today!
We're completing the assembly of the new samurai watchtower today, with the top level and roof - see previous blogs for guides for the base level and mid-level.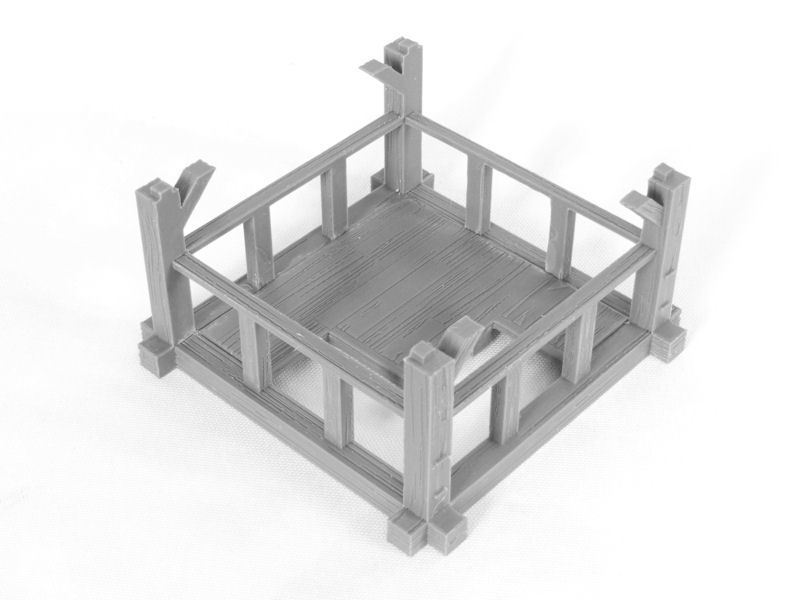
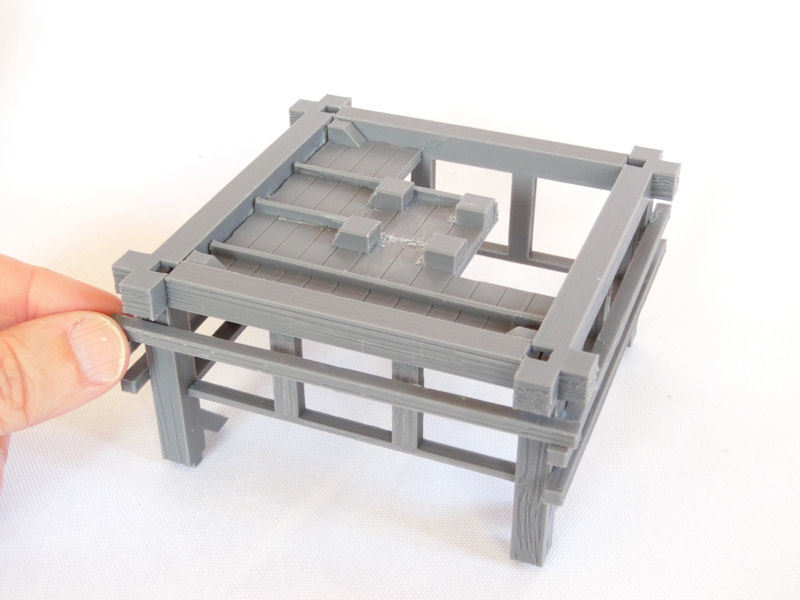
£ The top level of the watchtower is pretty simple to assemble, but please check that you have the floor aligned correctly with the staircases from lower levels.
As for the other levels, the front (and back) of the level has small nubs on the outside. In the photo above, the front side is on the bottom right.
I would also recommend testing the fit several times whilst gluing, to make sure that the pegs from lower levels fit the holes in the bottom of this level's frame.
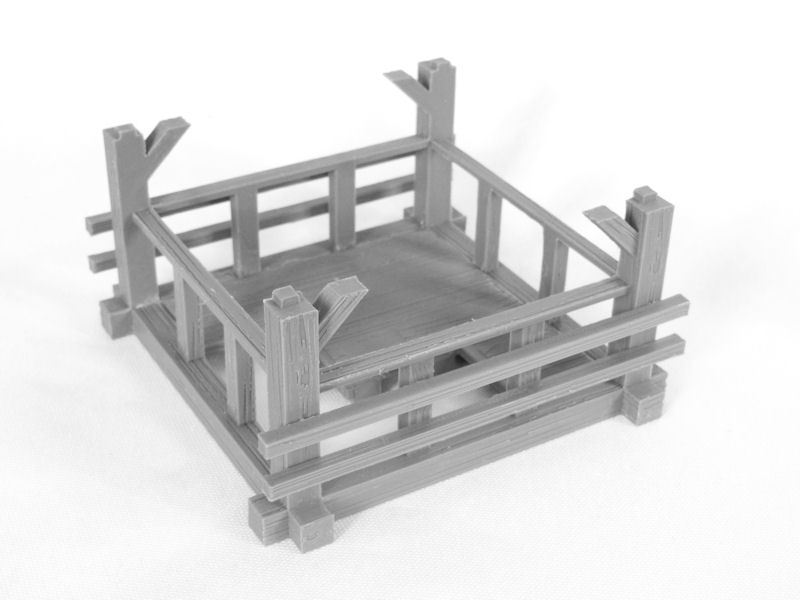
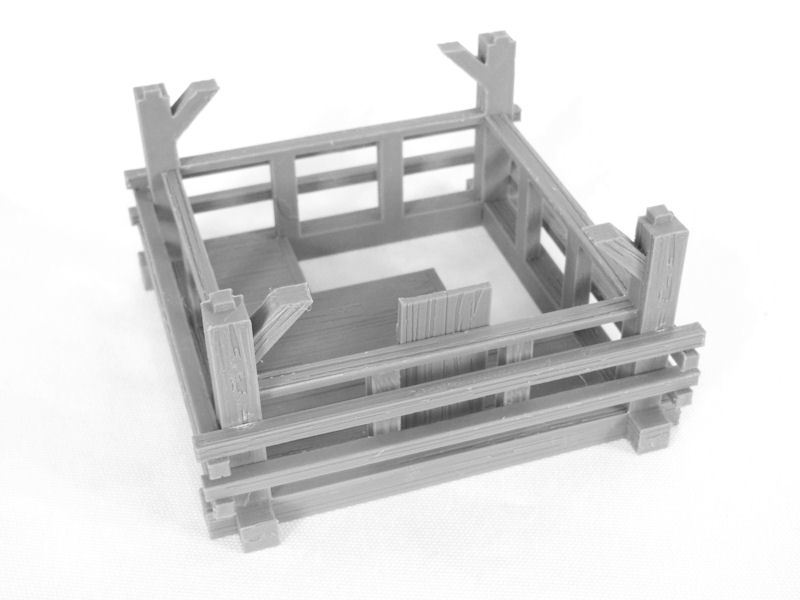
£ Next, we need to add a few horizontal beams to the front and back of the outside.
£ When those are dry, gently flip the frame over and glue more horizontal beams to the sides, resting on the previously glued beams as shown.
£ The last stage for the top level is to glue some large wooden shields to the inside of the level. As on the reconstruction at Sakusai Castle, 3 shields on each side are recommended, but none on the staircase side - as this would be facing the inside of the castle.
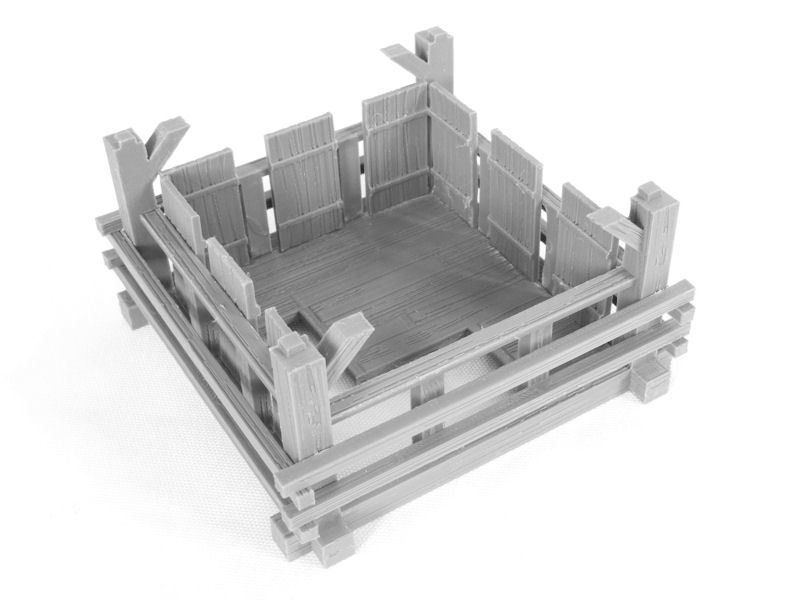
£ Here's the completed top level. The staircase side of the building (the front on our model) has no shields, and is shown bottom right in the photo above.
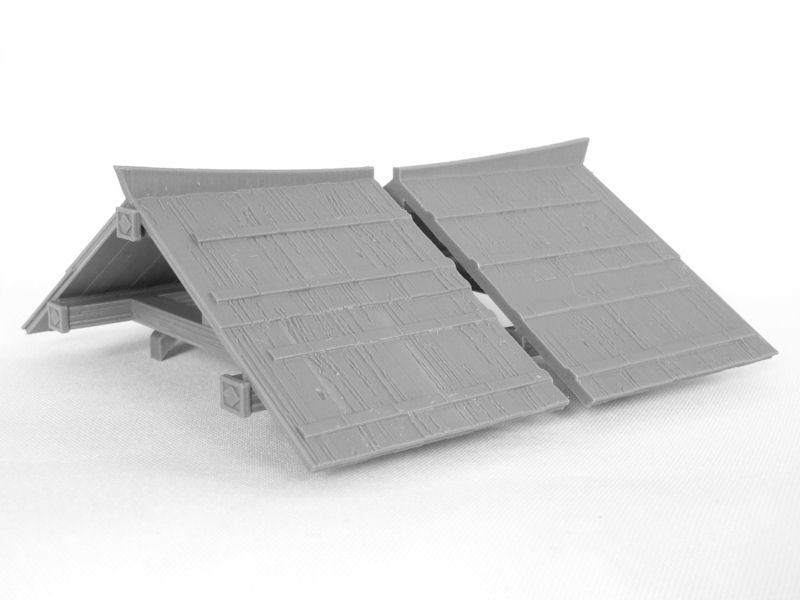
£ For the roof of the tower, you simply need to print 2 copies of the piece and then glue them together. This is the only piece that requires print supports.
So here is Shin and Taro, tasked with completing the watchtower build....
A few people commented on Facebook that the painting looked like it was going to be tricky, but I'm actually aiming to complete the whole thing in about 2 hours, with a good use of rattlecan sprays and some quick drybrushing. Fingers crossed.....
We're continuing the assembly guide for the new samurai watchtower today - the base level was completed in PART 1 yesterday.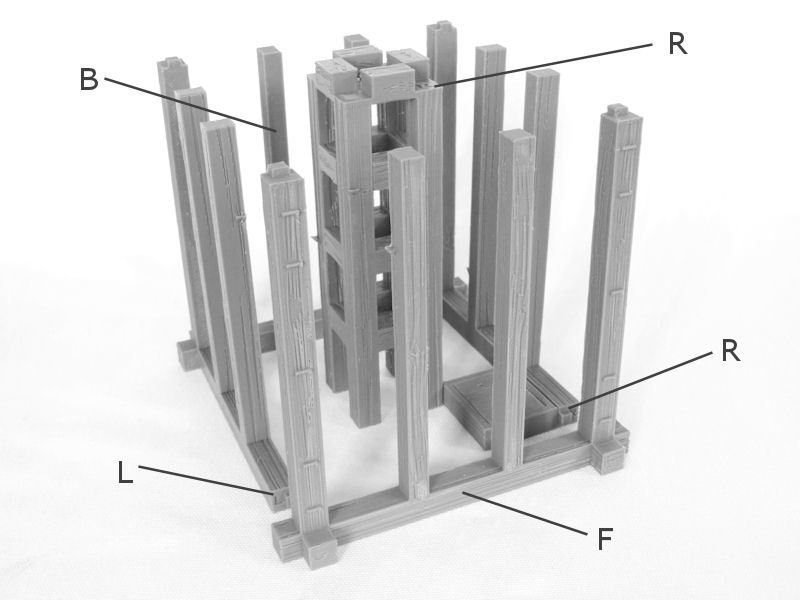
£ The middle level is pretty similar to the base level, except that there is no large floor piece. Again, the parts are labelled with Left, Right, Front and Back, and it's important these are arranged correctly.
When adding the central column, please ensure the R (on the top) is on the right hand side, as shown in the photo.
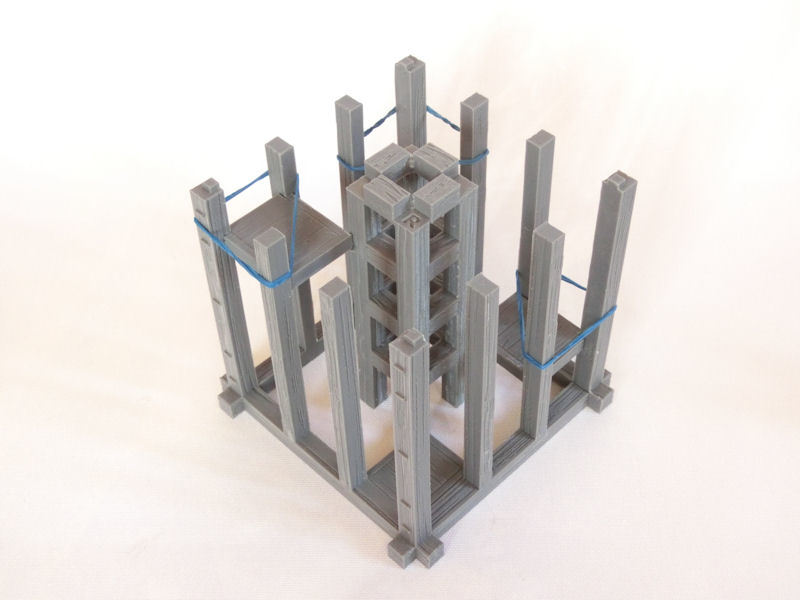
£ In addition to the slightly thicker platform glued at the bottom, you will need to print 3 more staircase platforms. These are glued in as shown, and are located on the small triangular rests.
I found that it was helpful to add a few rubber bands to hold the vertical pieces tightly together when gluing.

£ After adding the platforms, you can glue in the 4 staircases next. Gluing them to the platforms, vertical posts AND the central frame will make your model much stronger.

£ The last step for the mid-level piece is to add horizontal beams, to the front and back. These beams rest on the small nubs on the outside.

£ Once the beams on the front and back are dry, flip the piece over carefully, and then glue more horizontal beams to the left and right sides. These rest on the previous beams, as shown.

£ When all the beams have been glued in place, this is how the finished mid-level section looks.
The assembly guide concludes in Part 3 >>


0 Comments :
Write a comment :