3d-printable terrain for all your samurai wargaming needs


| << Printing & assembling the Garden 2024-03-09 | Setting out the Lord's House set - TIMELAPSE VIDEO >> 2024-03-27 |
The huge Samurai Lord's House set is currently on the paint desk, and with only a few last pieces to complete, it seems a good moment to show you some tips and suggestions on how to paint everything quickly and efficiently!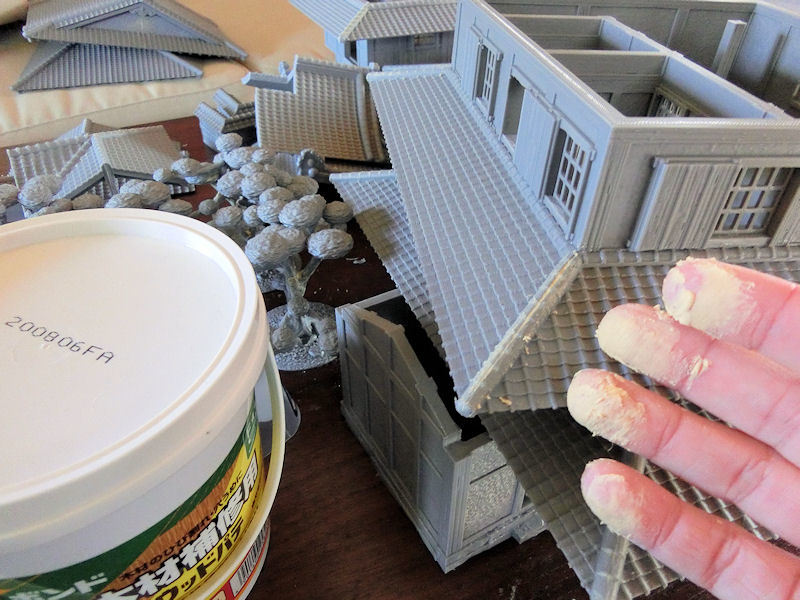
▲ The first thing to do is to cover some gaps. Many of the roof pieces are multipart, and it's a good idea to hide some gaps there - I find wood putty pretty helpful for this, although it's a rather messy job! Simply smear some putty in the gaps, and smooth it off with a wet finger.
The trees will probably also have some holes where you couldn't fit branches in, and those will probably also look better with putty covering the holes.

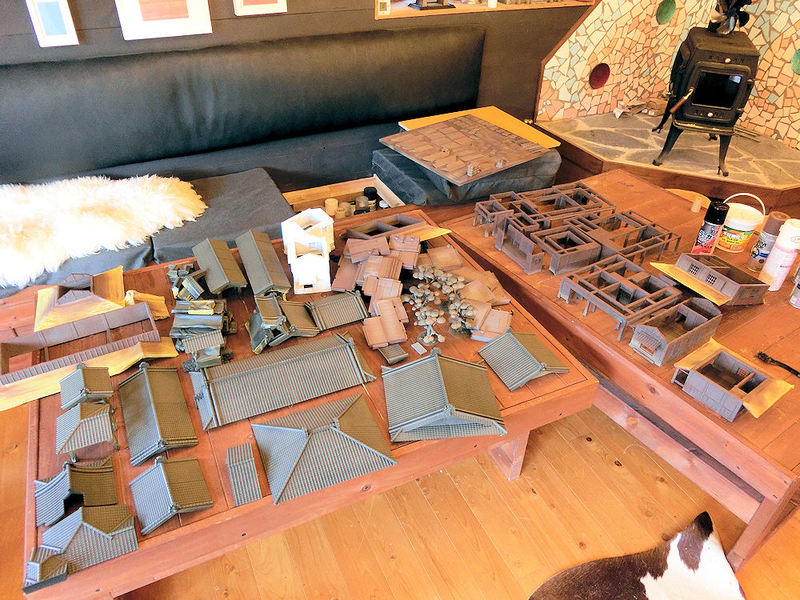
▲ Next job is to find a big, empty table and start breaking down all of the buildings into their component parts. If you look on the right of the photo above, you'll see that all of the base sections with tatami stuck to them are now separate from the walls, as this will make it much easier to get in all the nooks and crannies with a paintbrush. It also means that it will be much easier to get straight lines on those tatami mats.
▲ It's time to paint!! For such a big set, I think the best way to get things started fast is to spray basecoats - slate grey for the topside of the roof sections, and black for the stone paths and wall bases, and brown for everything else.
Take your time, and make use of plenty of masking tape where possible! My roof sections, for example, were sprayed slate grey on the tops, and then the edges were masked, and the undersides were sprayed brown for the wood. You can see this on certain buildings at the edges of this photo above.
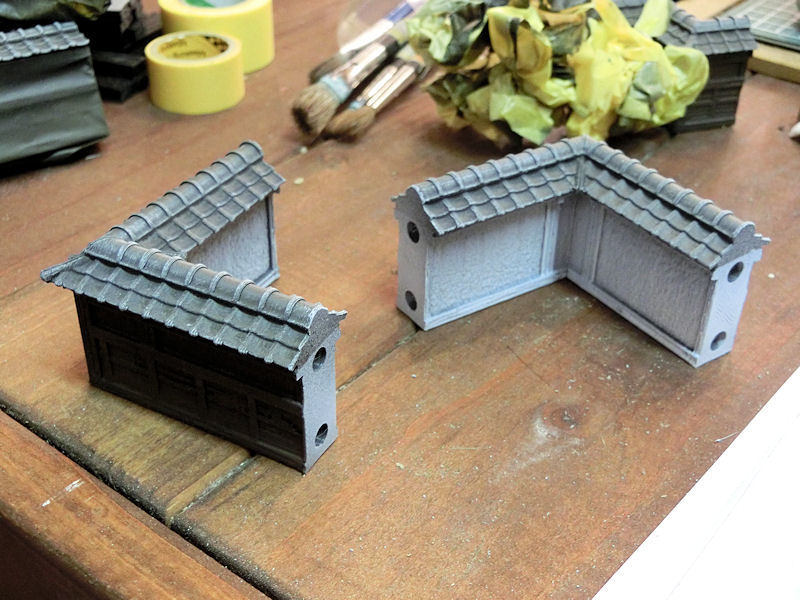
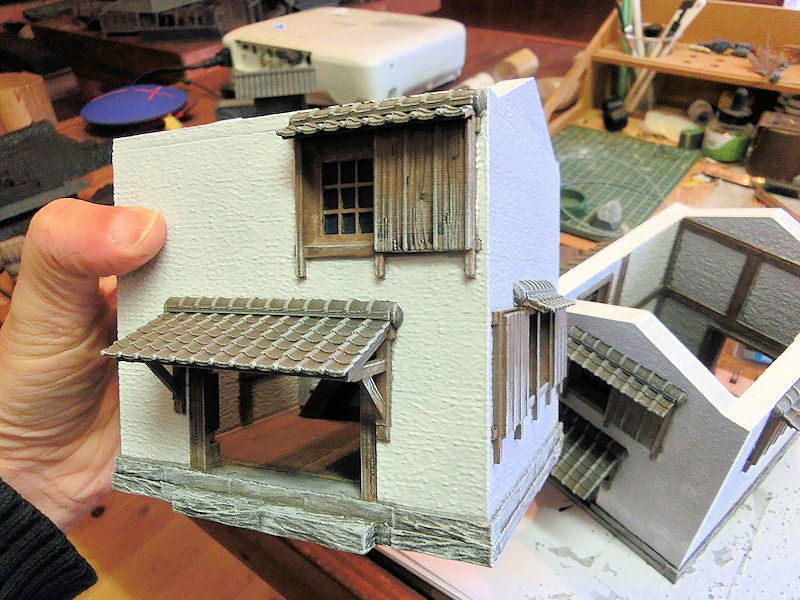
▲ The outer walls were in fact sprayed in three colours - brown for the wooden side, and white for the inner side, and then these were covered in masking tape before slate grey was sprayed over the roof tile parts. That's a pretty quick way to get these walls done fast.
While the masking tape was still on, I spent an afternoon drybrushing every roof tile in the set in a light grey colour with a large 2" brush. This can be a slightly messy job, so it helps to keep the masking tape on where possible. Once the tape is removed, it should look like the photo above.

▲ Here's a great progress photo, showing big sections and buildings drybrushed and ready for detail. After the roof tiles were all drybrushed, the masking tape was all removed, and I drybrushed all of the wooden parts in a pinky-lightbrown colour called Fawn (by DecoArt). At this stage I also basecoated the tatami mats with two coats of Sage, the very light green colour you can see in the bottom left corner of the photo.
▲ Kura storehouses:
The two kura storehouses in the set are predominantly white, so I tried a different approach for those. Instead of basecoating with brown spray undercoat, I undercoated in a mat white, inside and out.
The roof sections were then basecoated with a 1cm wide, flat brush in slate grey, which helps to keep the edges neat, and then drybrushed in light grey. You might find using masking tape to cover certain parts of the walls helpful here, as it's a pain to repair smudges on white. I then basecoated the bottom stone sections in medium grey, and then gave them a black wash.
▲ The last parts to paint on the storehouses were the wooden door and window frames, and these were, I'll be honest, hard. My 1cm wide, flat brush helped to keep things neat, but adding a black wash over the wood was hard to keep neat. After the wood and stone was carefully drybrushed in light brown and grey, I did have to go back and repaint several bits in white again.
In hindsight, I'm not entirely sure the white undercoat saved me much time at all. It might have been just as fast to spray the building brown, drybrush the wood quickly, and then start to paint the walls in white. But never mind, you live and learn, eh?...
▲ Trees:
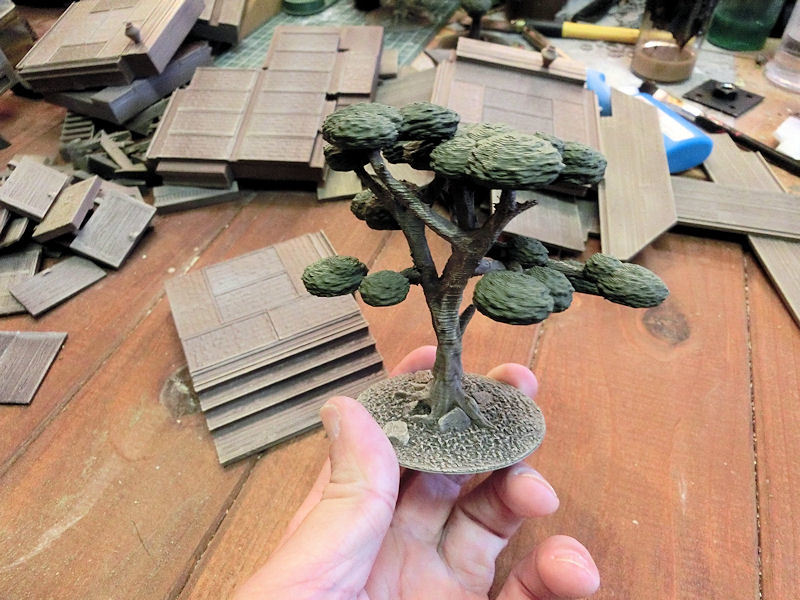
The whole model was spray undercoated in black to cover everything, and then lightly sprayed in a light brown colour. The base and lower roots were then drybrushed with a light grey/brown colour called Mississippi Mud (by DecoArts). 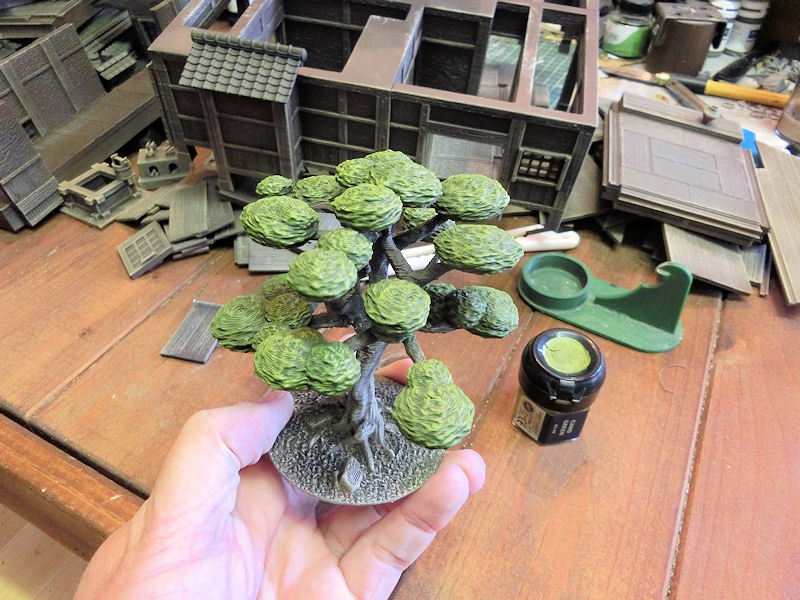
▲ These trees are juniper trees, shaped into very traditional topiary shapes. As such, they tend to be quite a uniform, mid-dark green. But that's not very interesting to look at on a scale model, so after basecoating the bush parts in a dark khaki green, I drybrushed with Camo Green (by GW), which gave them some extra pop.
▲ Tatami:
Tatami mats are usually light green or light yellow when new, fading to darker tones with age and time. However, I can imagine that the Samurai Lord owning this house would not want his visitors to see old, yellowed tatami mats, so I chose to paint them all in this very light green Sage colour (by DecoArts).
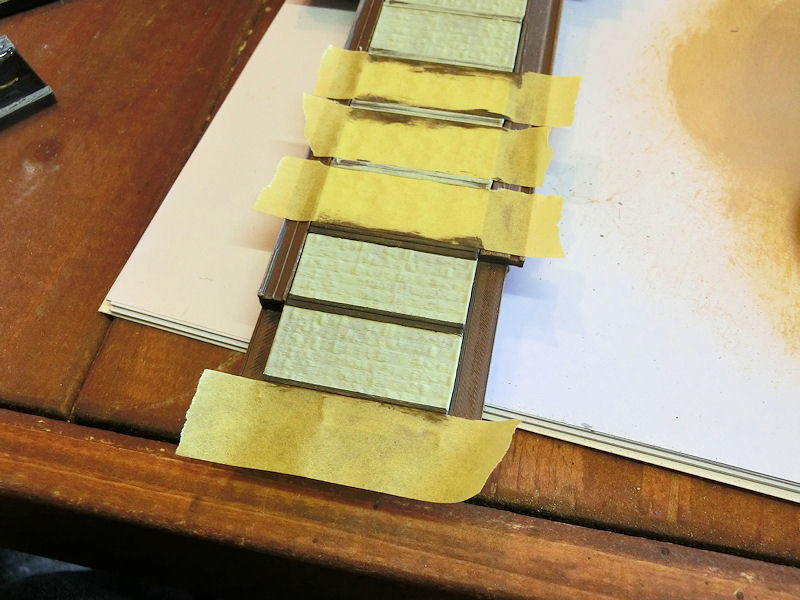
The edging on tatami mats is usually navy blue or a mid-dark green, but after looking at my reference photos of the real-life Inaba Residence (in Oita prefecture) I noticed the edges were all black. That's actually quite unusual, I think. But painting the edges in flat black would perhaps make them a little too strong, so I picked a more subdued dark grey/brown (Charadon Granite, by GW) to do mine.
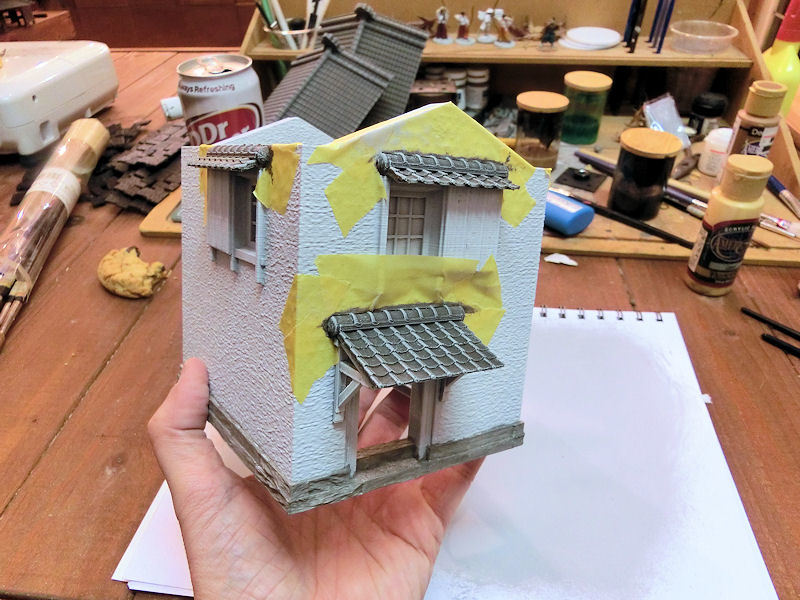
Here's a tip for you: There are hundreds of tatami mats in this set, and edging each one by freehand is nerve-wracking! Strips of masking tape moved from mat to mat as you go, helps speed things up and keep your lines straight!
Stone paths:
This article on painting the Shrine Set shows how to paints the paths:
https://www.3dalienworlds.com/blog.php?BlogID=326
Building walls:
See the dojo article for painting the walls (white outside, yellow inside):
https://www.3dalienworlds.com/blog.php?BlogID=319
Stone outer walls:
Here's how to paint the stone sections of the outer walls:
https://www.3dalienworlds.com/blog.php?BlogID=59
I think that's about it! The last pieces of the set will be fully painted up this weekend, so watch this space for the big release and finished photos next week... if I can find a table big enough!
| << Printing & assembling the Garden 2024-03-09 | Setting out the Lord's House set - TIMELAPSE VIDEO >> 2024-03-27 |