3d-printable terrain for all your samurai wargaming needs


There's a new samurai terrain model to show off soon, but in the meantime I've been painting up some wounded samurai models, from Perry Miniatures. They've been mounted on 40mm clear bases to protect them from scratches and yet still match any terrain interior or gameboard exterior.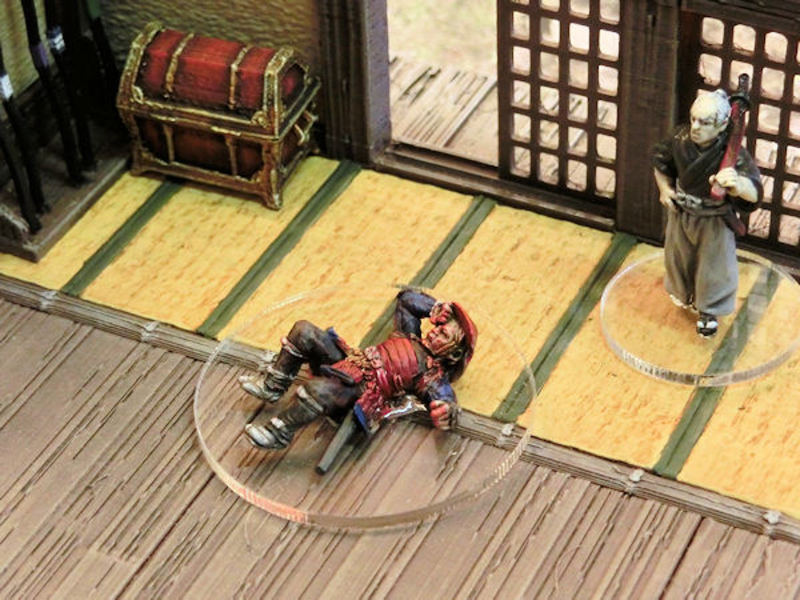
▲ That'll teach him to try and bully his way into the dojo!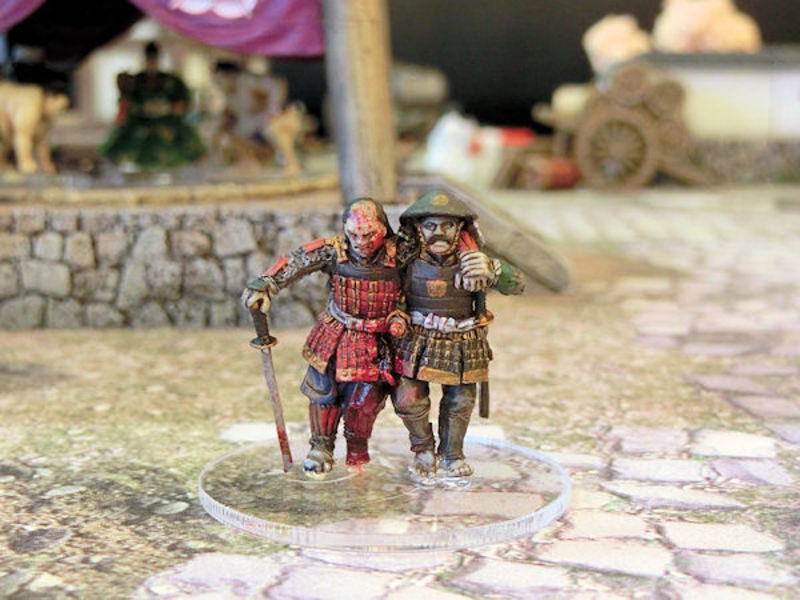
▲ Nasty leg wound means he'll need some help escaping the battlefield.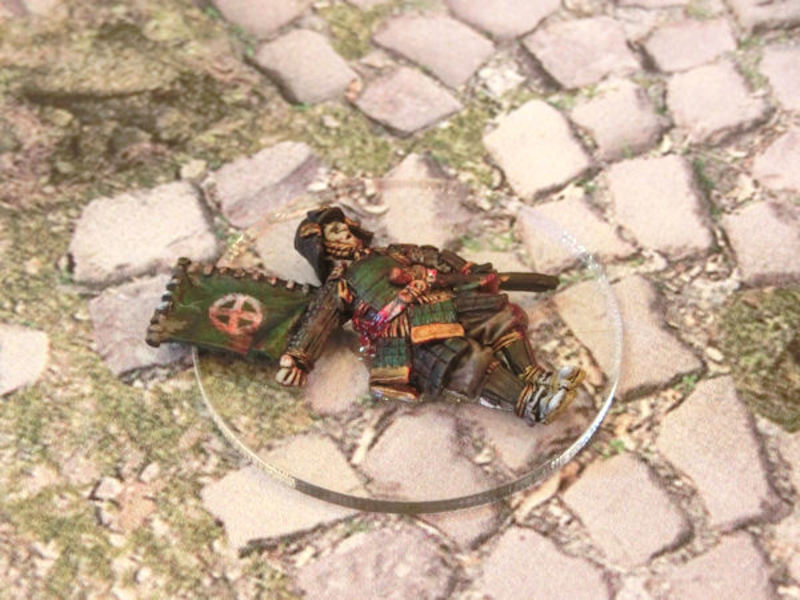
▲ I reckon this guy's almost had it!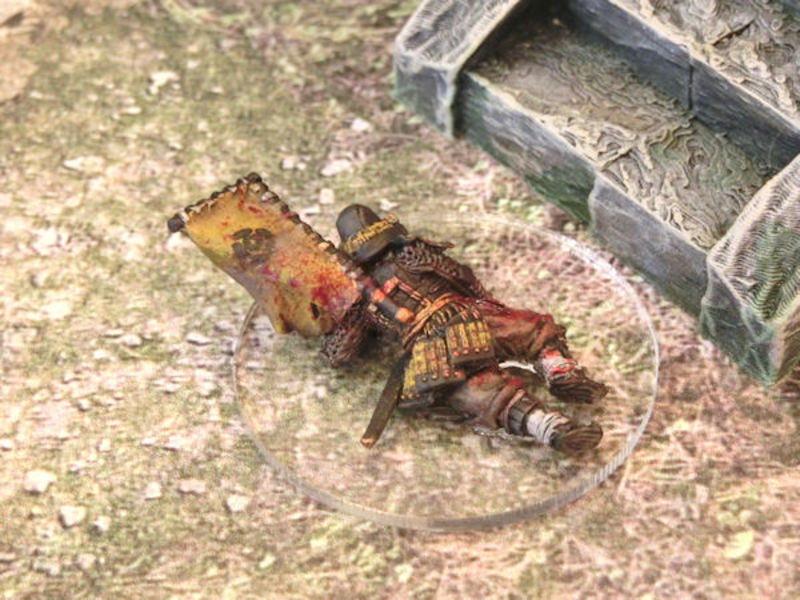
▲ This samurai's crawling for some help at the temple steps!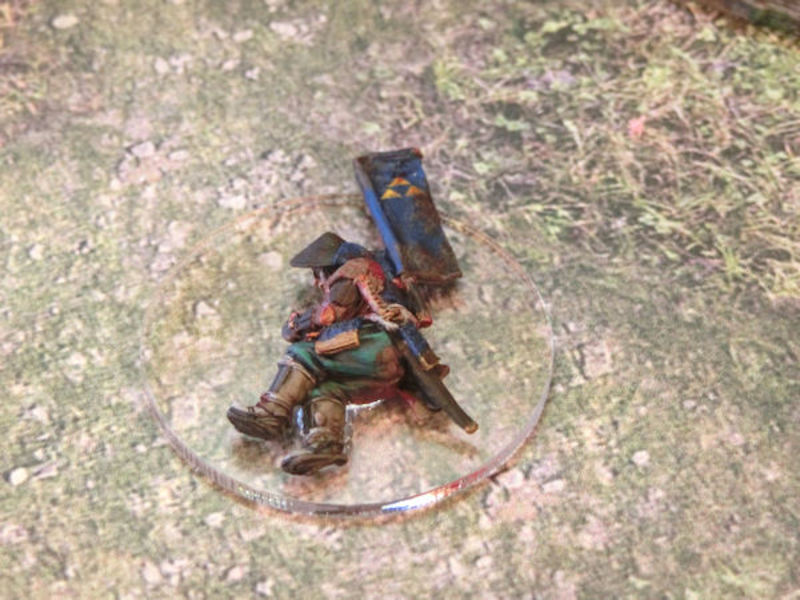
▲ Quite a mess, this guy!
Look at that! Another print partner shop to show off..... this time we're heading to the US to introduce CENTRION 3D, from New York!
They're starting with some of the bigger stuff from our samurai collection - the temple and shrine buildings, the dojo, and even the big castle! Go and take a look at their great offers:
This is our first and exclusive print partner shop for Japan, ASO MILL in Kumamoto Prefecture.
Their new online store is offering the entirety of our Japanese terrain collection, in 7 different model scales ranging from 10mm all the way up to 40mm scale!

▲ There's a 20% OFF special offer available to celebrate the launch, so go take a look:
Today we have a new European print partner to announce - THE 3DWARFS, from Belgium. They are now selling print versions of our samurai and Necrontyr terrain ranges.
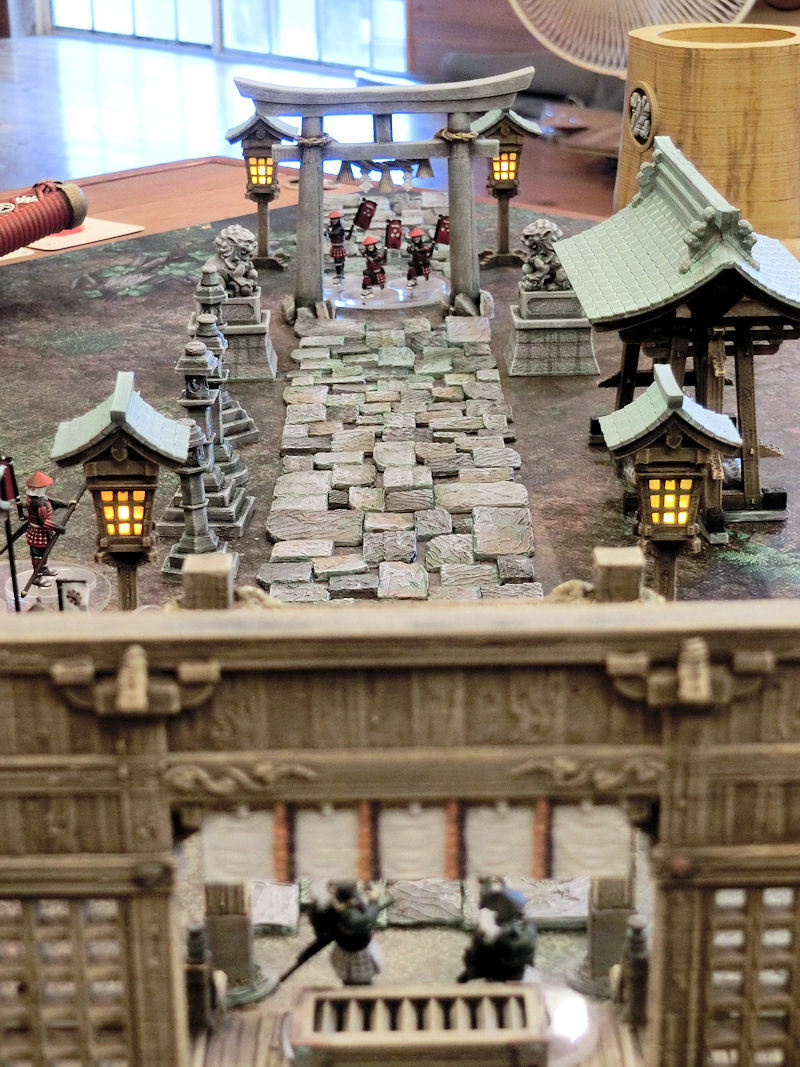
I've been looking forward to playing a game across the new shrine board, so this time I pulled out a special scenario from the Test of Honour rulebook - "Last Stand". Unlike most of the scenarios in the game, this particular one is VERY uneven! It made for a real nailbiter of a game!
"Surrounded by a superior enemy, a small force prepares to sell their lives dearly and die with honour."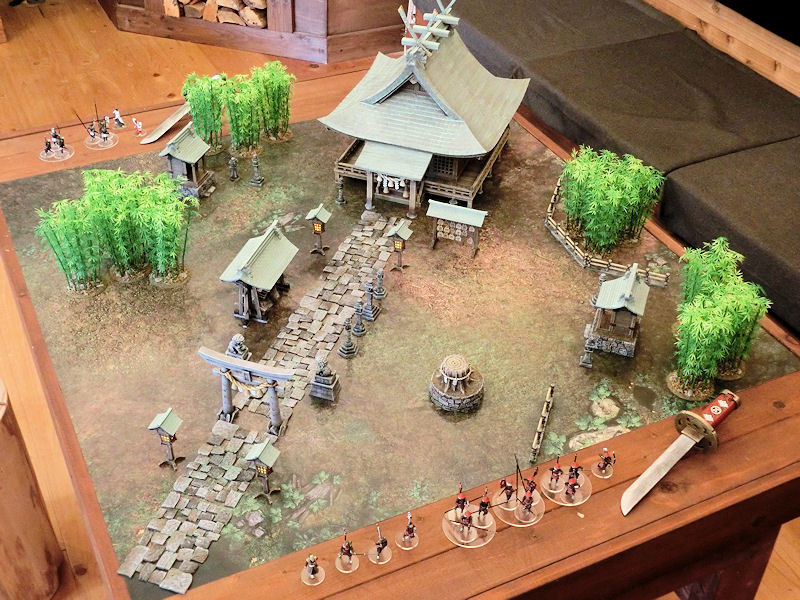
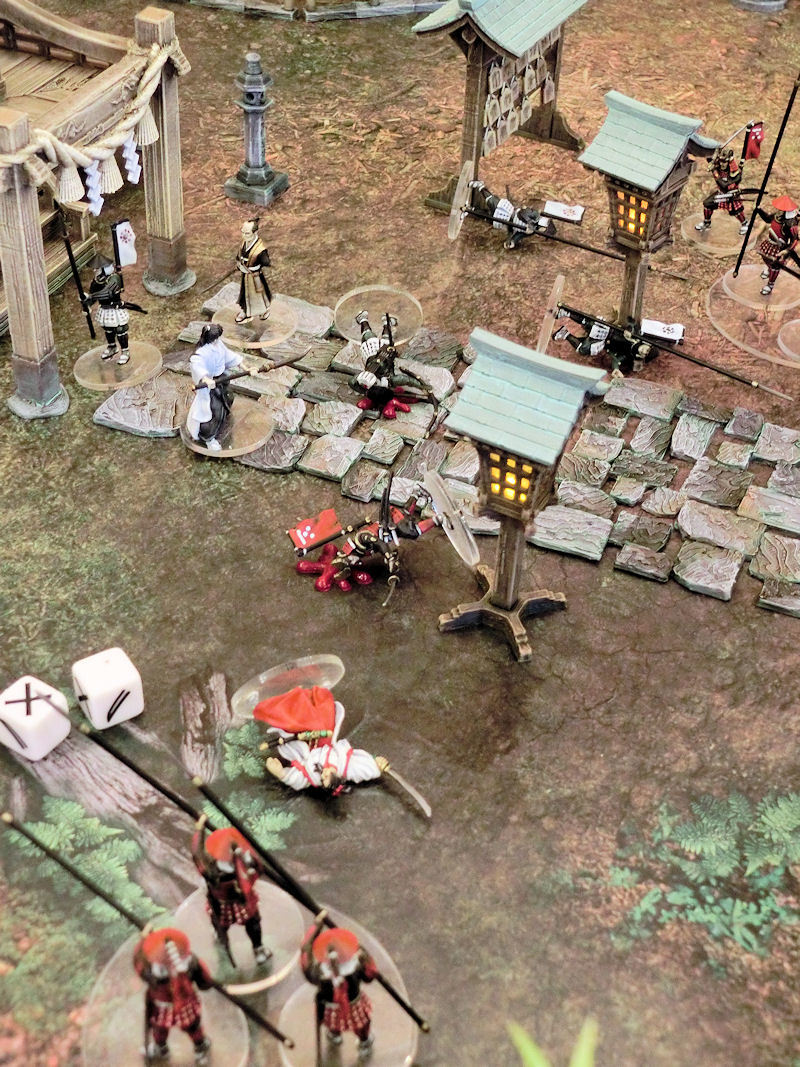
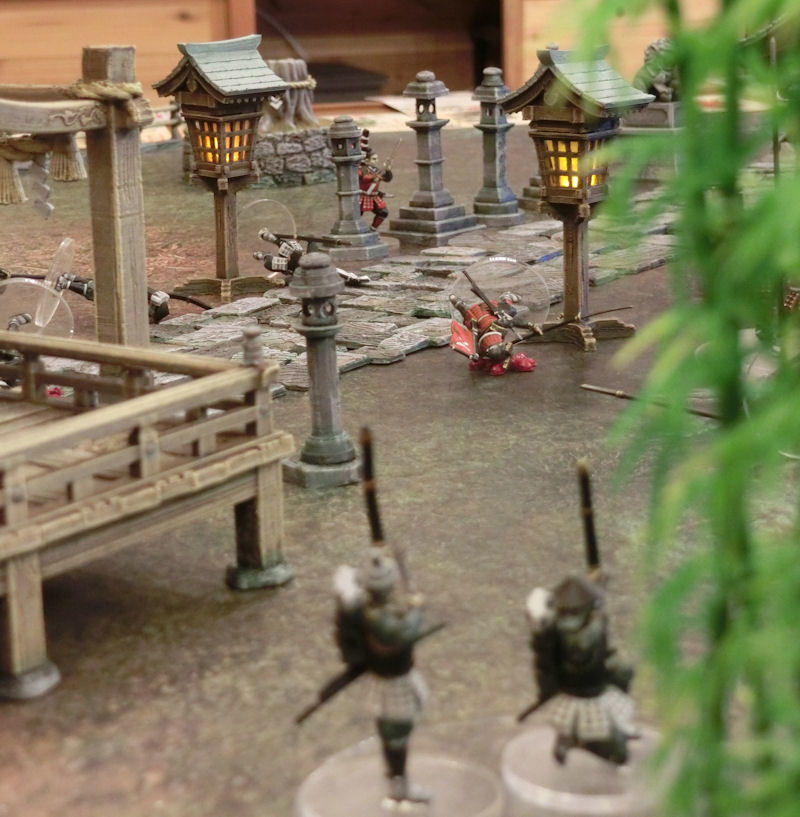
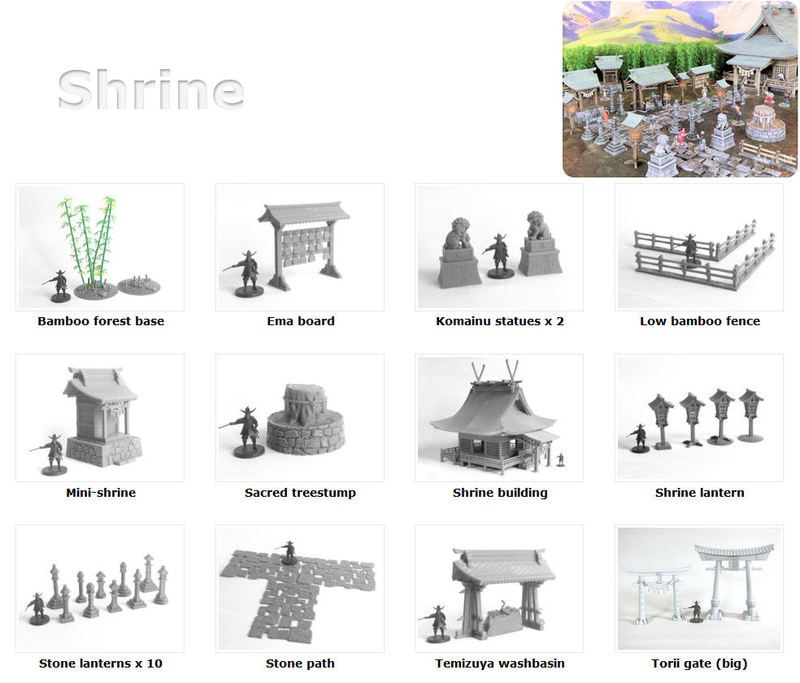
▲ This 3'x3' battlefield is comprised of the new Shrine Set, plus a single small Torii gate. The excellent photo-realistic mat is Swamp by PlayMats.eu. The layout is a realistic shrine arrangement, with the large shrine building at the end of a stone path in the middle of a bamboo forest. Alongside the path are various shrine structures; lanterns, statues, washbasins and smaller minishrines.
Forces: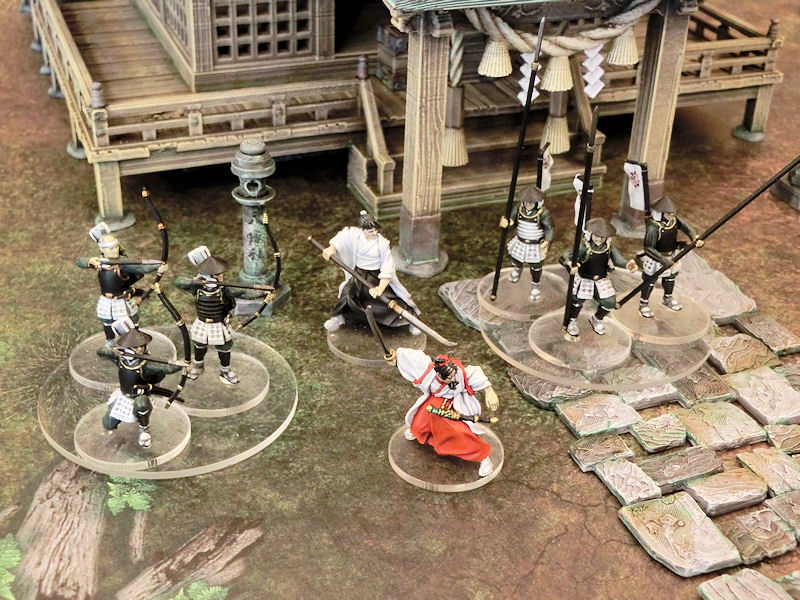
▲ Lady Reiko (in red, at the front) is visiting an ancient local shrine, accompanied by her loyal bodyguard Meiko (armed with a naginata) and a small force of household troops. This scenario suggests a 12-point force for the defenders, which means you can only take a single samurai hero (costing 5 points) - which will put Lady Reiko at a severe disadvantage!
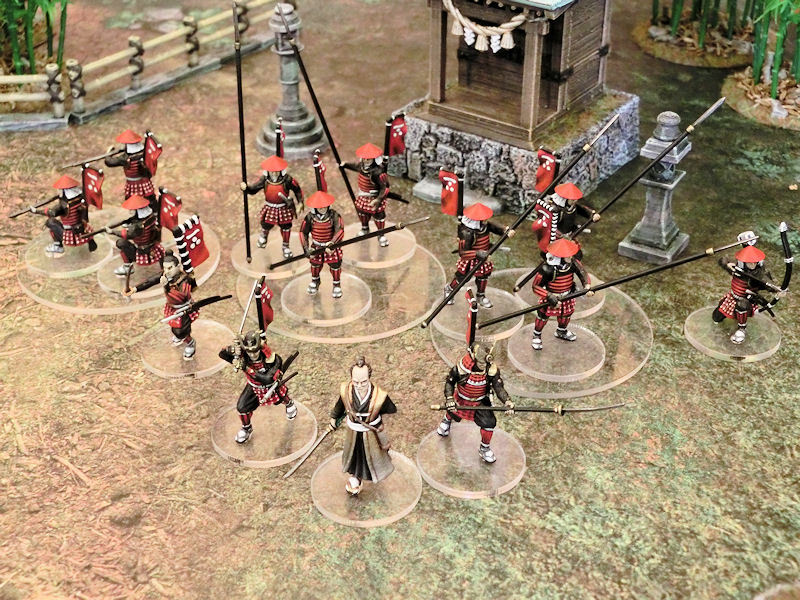
▲ Lord Nobu, on the other hand, has brought a massive ambushing force of 24 points! Since this force is double the size of the defending force, he has room to fit 2 samurai lieutenants, in addition to himself - which gives him a clear advantage! He has also brought some musketmen, a lone archer for sniping, two units of spearmen, and a sergeant to give the spearmen extra charging power.
Setup: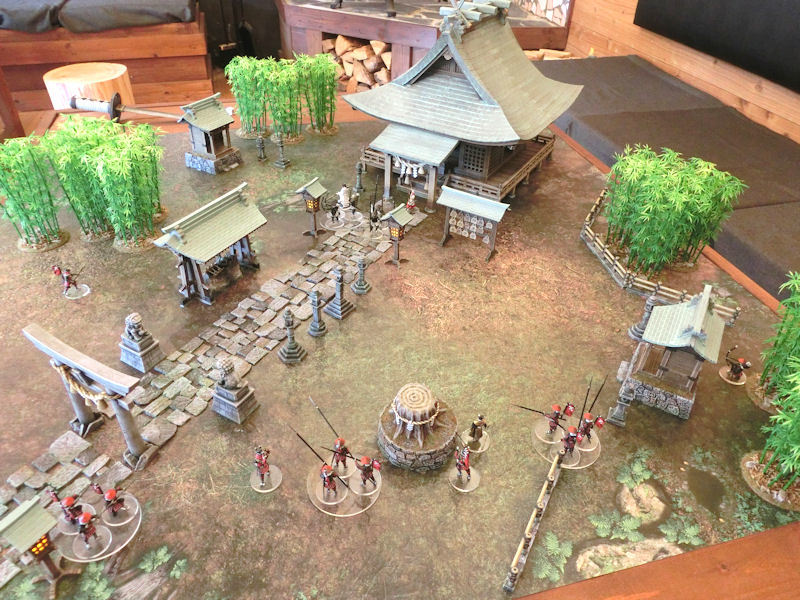
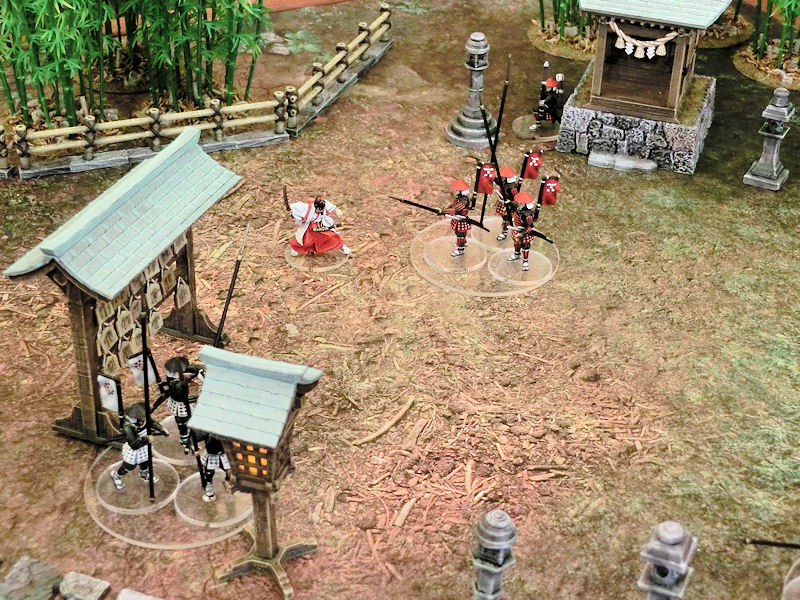
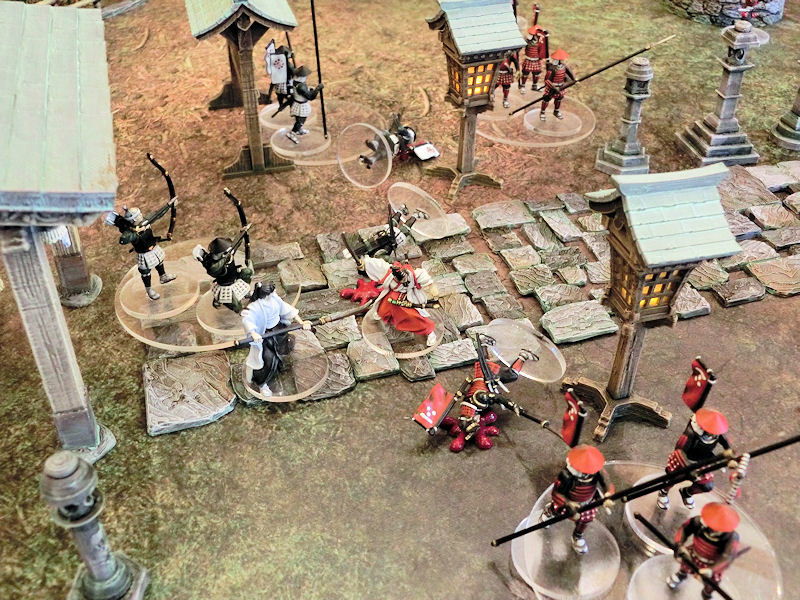
▲ One of Lord Nobu's spies has reported on Lady Reiko's planned visit to the shrine, and as she offers quiet prayers before the shrine, Lord Nobu's forces rush out of the surrounding bamboo forest!
The scenario requires the defenders to start in the centre of the board, with attackers within 6" of any edge. Victory conditions are quite simple; Lord Nobu (as attacker) has to kill all of the defending force before he loses a third of his own attacking force.
Let battle begin...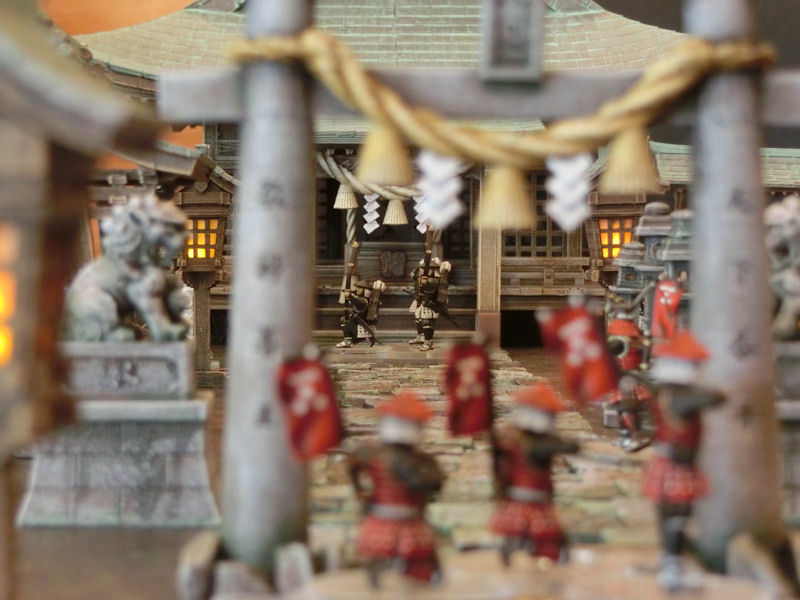
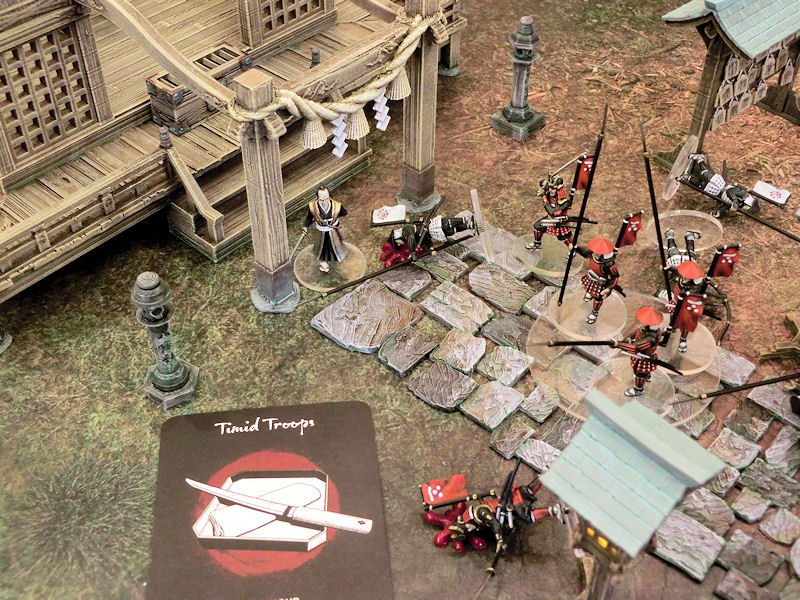
▲ Lord Nobu's plan was to attack in force simultaneously against all enemy models, so his troops advanced at a steady pace from the surrounding forest. His musketmen held back, out of combat range, and opened fire down the main path to the shrine, hoping to gain an early kill against the opposing archers. Alas, the shots went wide as the steps and ornate woodwork of the shrine exploded in a storm of splinters!
▲ Leaving her slower troops in front of the shrine, Lady Reiko dashed to one side, hoping to pull some ambushers out of position.
Lord Nobu decided to hang back by the sacred treestump while his troops moved in to surround the smaller enemy force, to deter Lady Reiko from getting too aggressive.
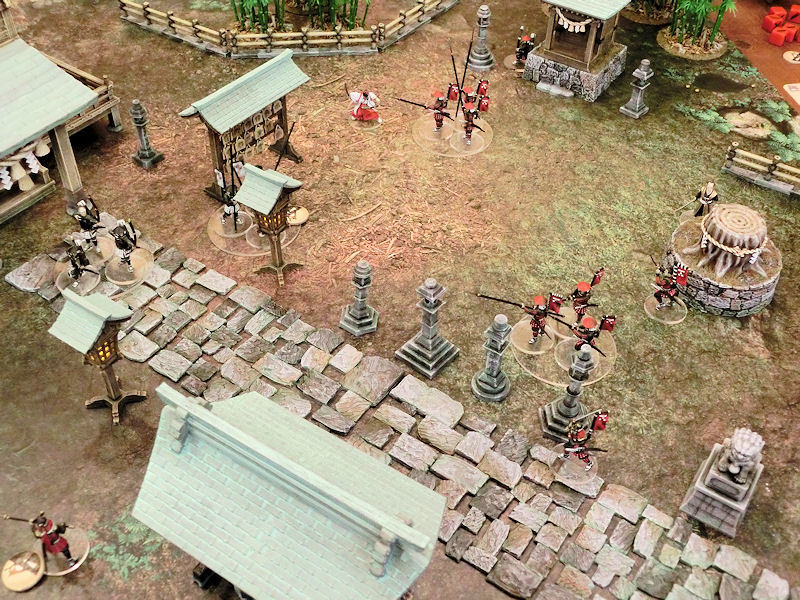
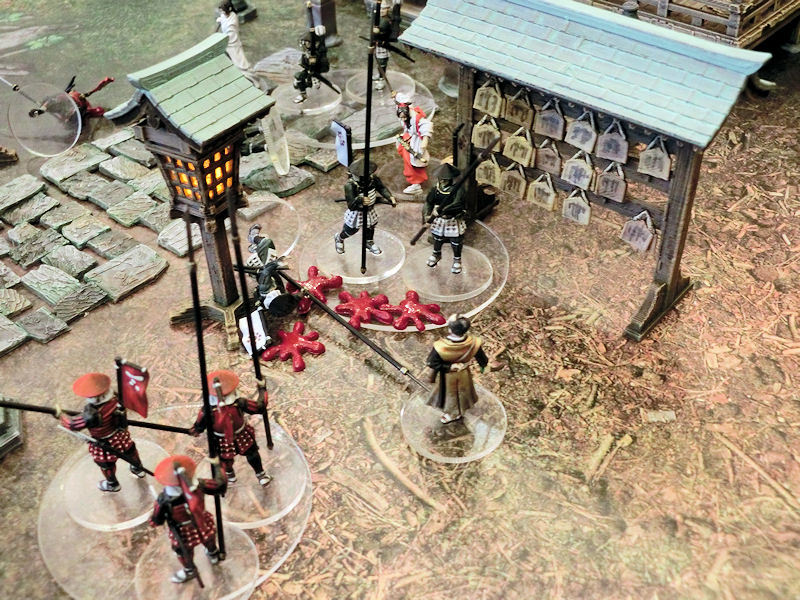
▲ As Lady Reiko emerged from behind the ema board rack, she spied a lone archer kneeling in the cover of a nearby mini-shrine....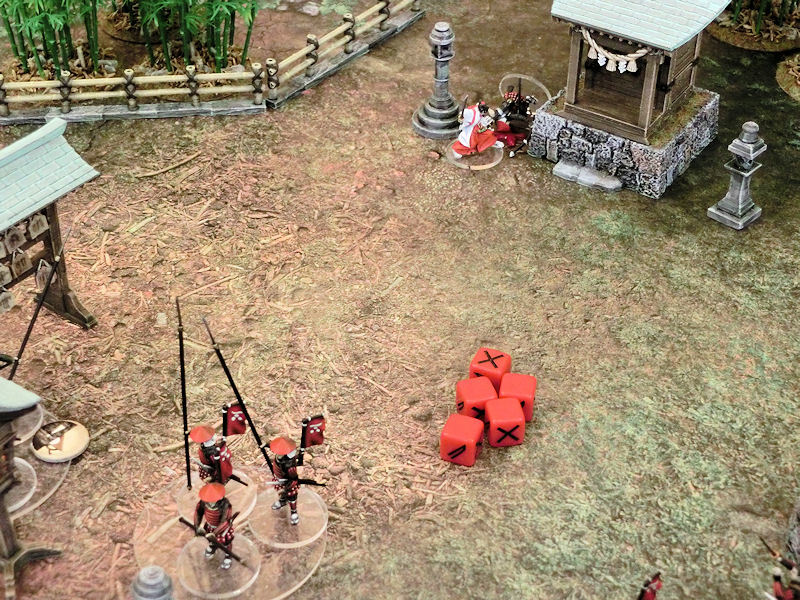
▲ ... and rushed to attack this lone trooper! To nobody's surprise, Lady Reiko quickly hacked down the enemy archer, and the nearby spearmen panicked and ran away from the enraged samurai!
(Lady Reiko had achieved 2 victory points by killing the archer, but she still had another 6 to get before she had defeated a third of the enemy force and could claim victory.)
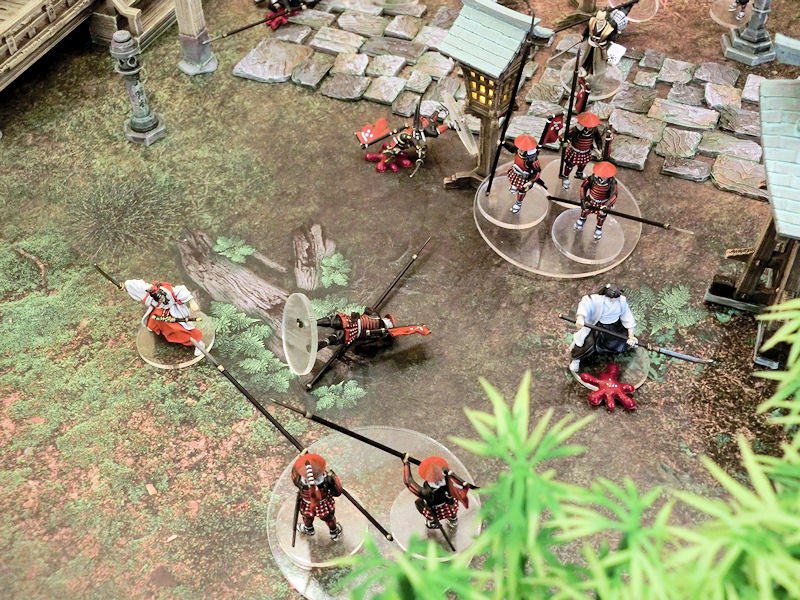
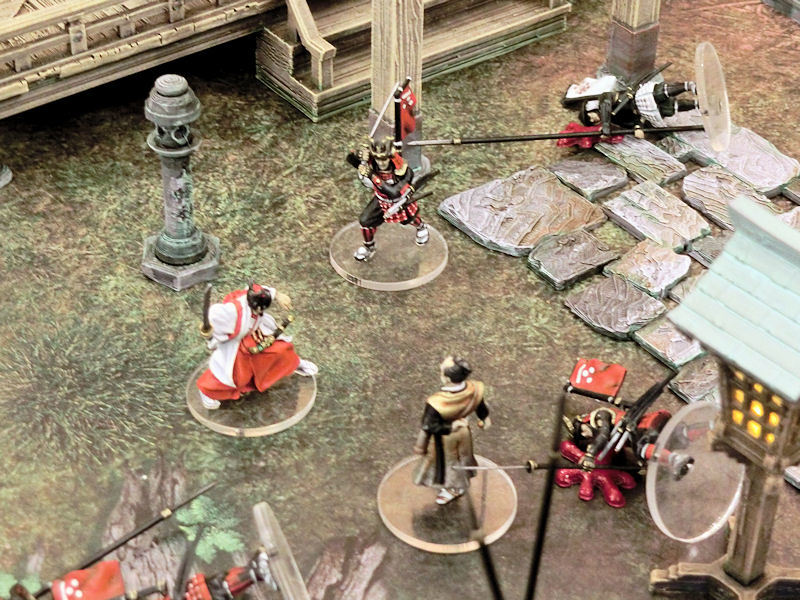
▲ One of Lord Nobu's samurai lieutenants saw that Lady Reiko had left her slower troops isolated in her rush to get an early kill, and rushed in to take advantage of the opportunity. He quickly cut down one of the defending archers in front of the steps to the sacred shrine!
▲ Lord Nobu's other samurai lieutenant dashed forward, inspired by his comrade's easy victory, and similarly cut down one of the defending spearmen.
Meanwhile, Lady Reiko cautiously headed back towards her troops, scanning for an opportunity for another quick kill, and her bodyguard Meiko jumped down from the balcony of the shrine building to defend the archers.
▲ Her bodyguard's skill with a naginata successfully held the enemy samurai at bay, and more importantly had exhausted his actions for the turn. Lady Reiko seized her chance, and rushed across to add her blade to the fight! The exhausted samurai lieutenant found himself outnumbered by the women's far superior bladework, and was cut down without mercy!
(In killing the enemy samurai lieutenant, Lady Reiko had grabbed another 4 victory points, bringing her total so far to 6. At this point she only needed another 2 victory points to win the game!)
▲ Angered by the ineptitude of his slain lieutenant, Lord Nobu decided to take matters into his own hands, and strode forward to attack the nearby spearmen. They proved surprisingly resilient, and failed to die as they were supposed to, but Lord Nobu did cover them head to toe with sheets of their own blood!!
▲ Lady Reiko's archers were desperate to defend their mistress from harm, and spotted a group of enemy musketmen in the distance carefully taking aim at their beloved Lady. They quickly drew back and loosed, their arrows flying true to take one of the musketmen in the shoulder, pushing the group back in alarm!
▲ Lady Reiko desperately looked around for an easy kill, and charged towards a group of enemy spearmen who had left themselves exposed. In the ensuing fight, she managed to trip and fall (look at all those fumbled dice!!!), leaving herself at their mercy. Could she recover in time?!
▲ Lord Nobu cut down another enemy spearman and panicked the remaining trooper, but stayed true to form by being utterly ruthless. Always keen to fight against a helpless and defeated foe, he strode towards the retreating lone spearman....
▲ ... and mercilessly took his head from his shoulders with a single stroke! Kneeling to lift the decapitated head, he tossed it into the offering box on the shrine steps.
His followers shivered at the display of ruthlessness, but after a moment they once more steeled themselves to continue the fight.
▲ The sacrifice of her loyal spearmen had given Lady Reiko enough time to scramble to her feet, and she quickly rushed forward once more to cut down another red spearman. Her bodyguard, Meiko, dashed forward to lend her strength to the fight.
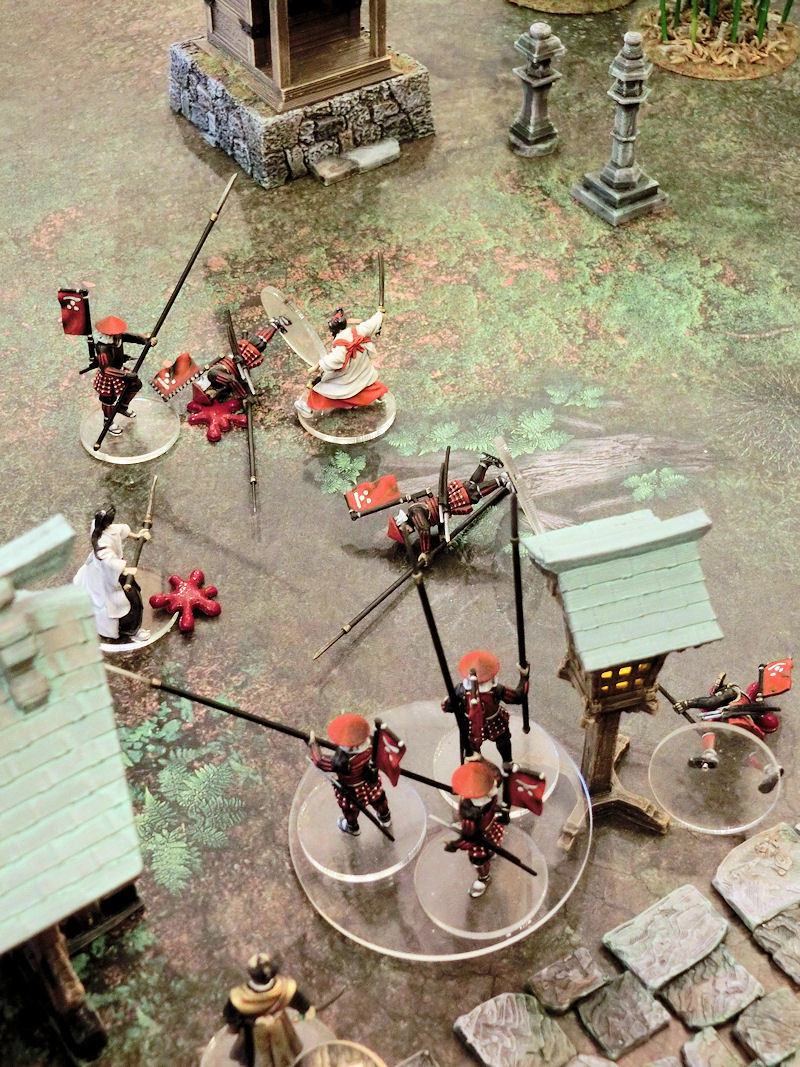
▲ Together, Lady Reiko and her bodyguard cut down another of the enemy spearmen, leaving only a single model from that unit alive. If they could just cut down that last trooper, then victory would be theirs!
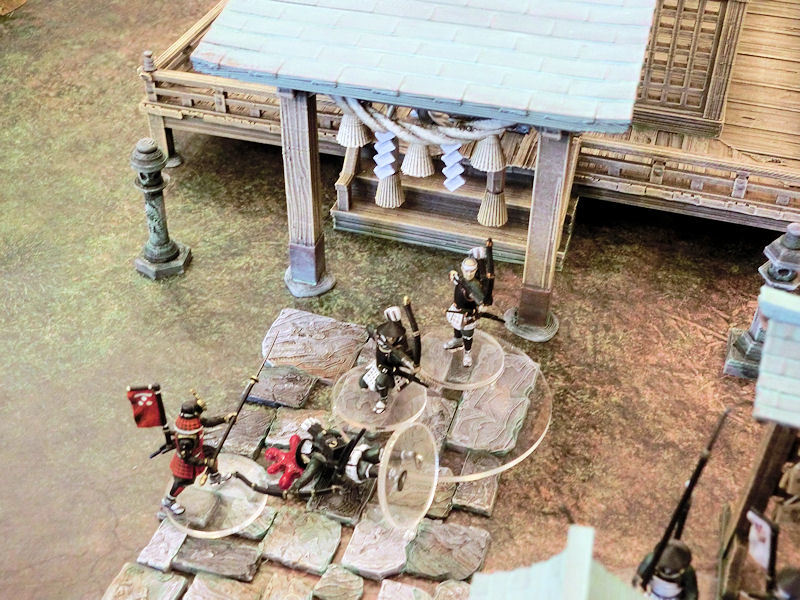
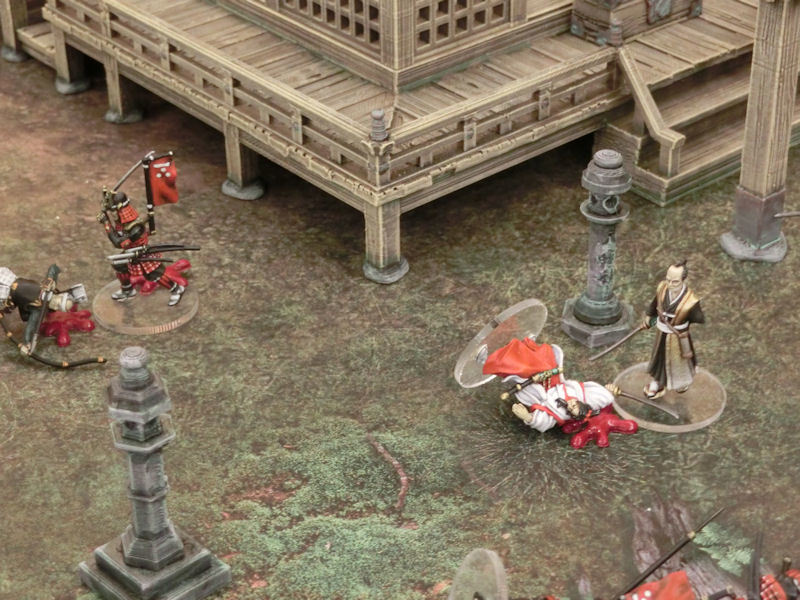
Lord Nobu, however, was not going to let that happen, and after moving around behind his spearmen he charged into the bodyguard Meiko. In an orgy of bloodletting, Lord Nobu struck her head from her shoulders, and nonchalantly tossed her decapitated head into the ritual washbasin nearby!
Aghast at this sacrilege, half his force promptly ran away, including the lone spearman! Oddly enough, this panic took him directly away from Lady Reiko and probably saved his life AND the game!
▲ The remaining pair of Lady Reiko's archers were still alive, and doing a fine job of keeping the enemy samurai occupied with a hail of arrows. At this moment, they spied a lone enemy sergeant and attempted to snipe him - doing so would also win them the game!
At the last moment, the enemy sergeant spotted the danger and ducked behind a stone lantern as the arrows hammered against it.
▲ It was the final showdown. Lady Reiko was alone, trying desperately to fend off the simultaneous attacks of Lord Nobu and his samurai lieutenant!
The only thing saving her life so far was a few lucky shots from her surviving archers, which succeeded in distracting the full attention of her bloodthirsty enemies!
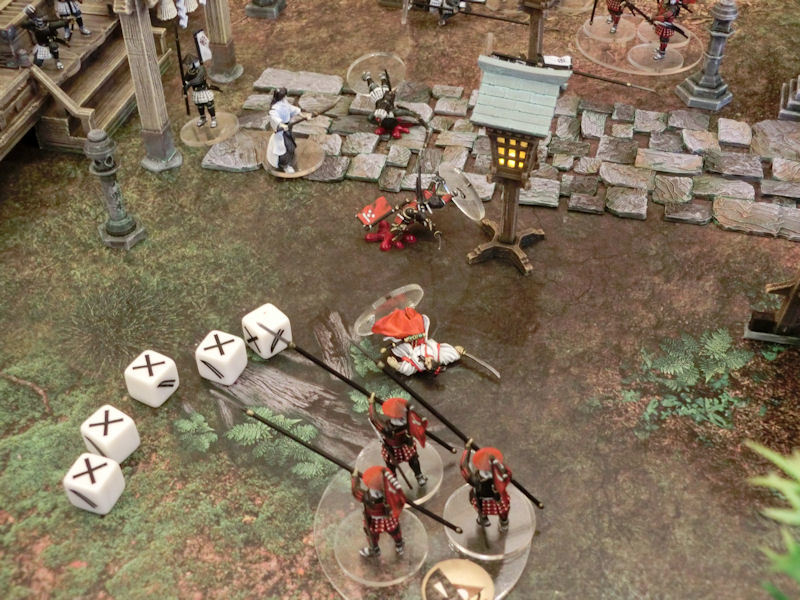
▲ Lord Nobu, growing increasingly frustrated at the impasse, shouted at his lieutenant to deal with the archers, and with one quickly cut down, the final archer fled the battlefield, leaving the exhausted Lady Reiko at his mercy.
Lord Nobu, however, had always been totally without mercy, and in the midst of frantic block and parry, managed to disarm Lady Reiko and slam his sword through her chest!
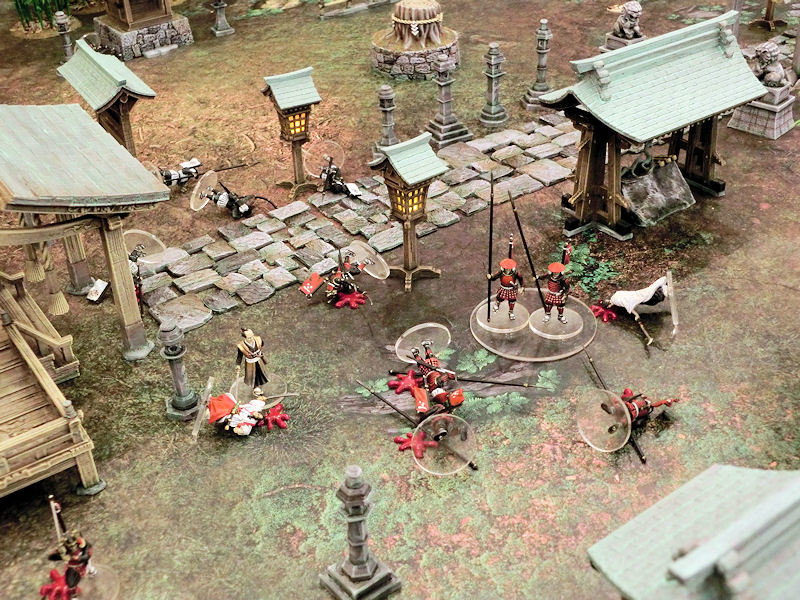
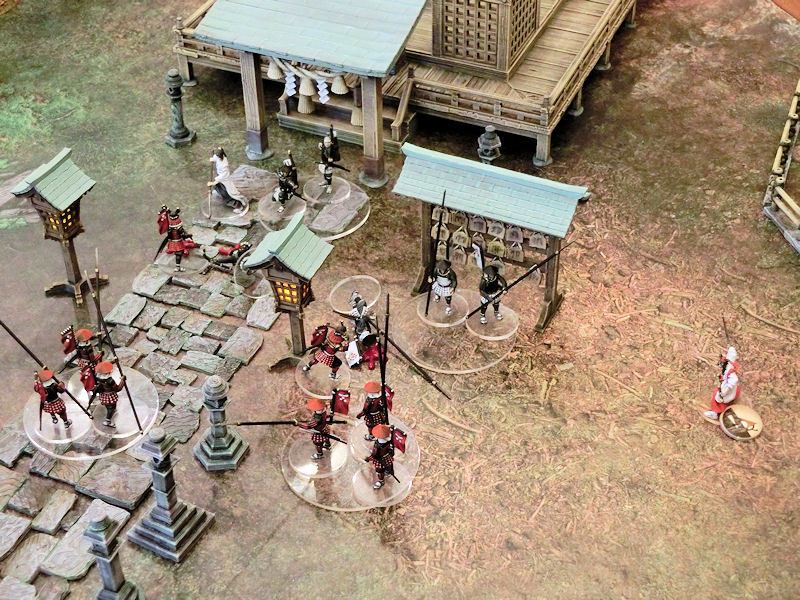
▲ Lord Nobu looked around him at the bloodsoaked shrine. Fully half his own force had been cut down in the ambush and lay twitching and groaning on the ground, pleading for help and assistance.
With a sneer, Lord Nobu turned on his heel and strode away from the shrine, leaving his injured men to their fates.
----------------------------
Soooo close!! Lady Reiko came so close to winning, gaining 6 of the 8 victory points she needed to win. But ultimately, Lord Nobu managed to keep his vulnerable models safe and instead surround her with hard-to-kill blocks of troops, and pushed her on to the defensive - a fight she could not win. Victory to Lord Nobu!


0 Comments :
Write a comment :