3d-printable terrain for all your samurai wargaming needs


Hot on the heels of last Monday's Fusion Reactor release comes another new Taui terrain piece - the Taui Gun Tower! This poseable building is available for download from today.
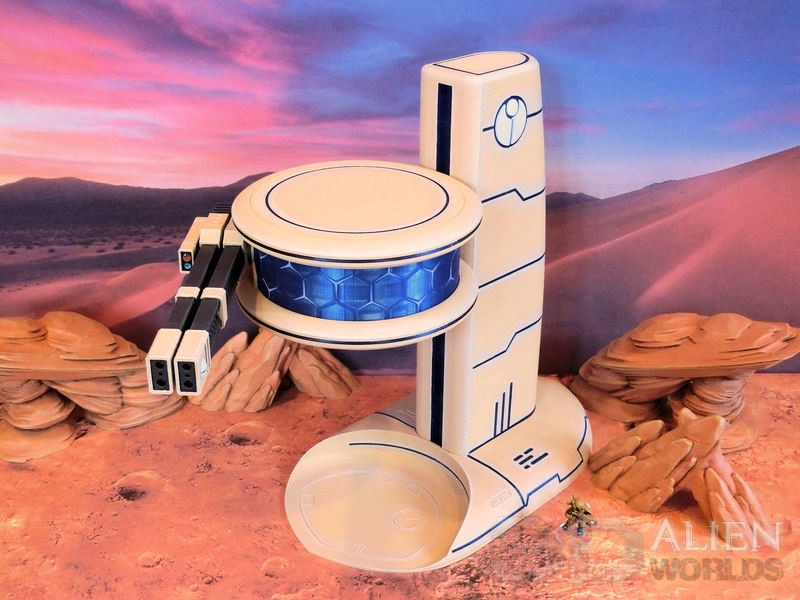
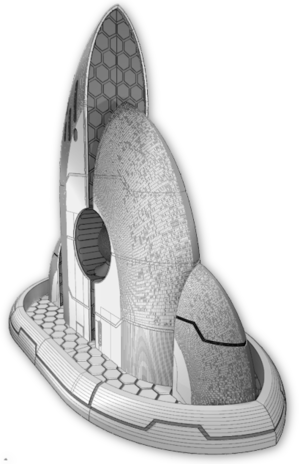
£ This 300mm-tall building was painted up in sandy desert colours, to match the rest of the Taui range, and looks pretty great on this Mars-themed battlemat!
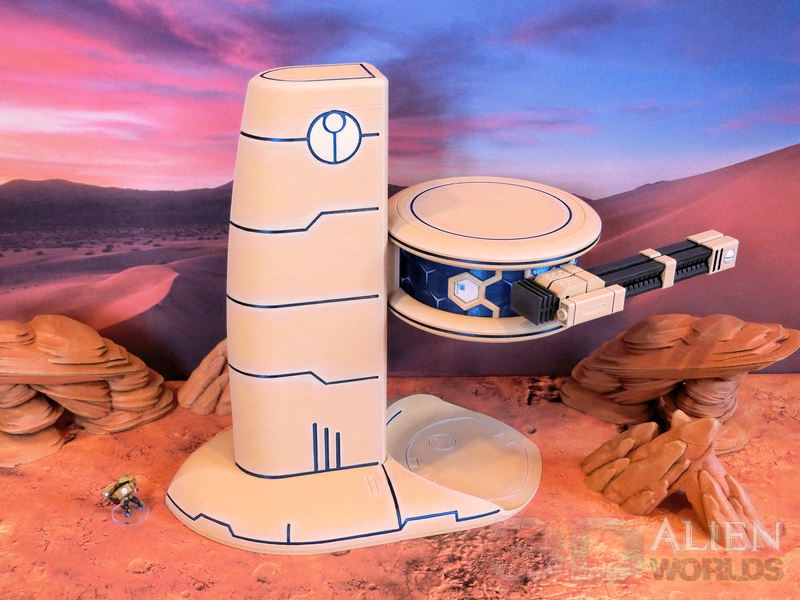
£ In this pic of the turret you can see the access hatch right behind the huge twin rail-gun weapon.
That would probably make a great mission objective, either to seize and control or to defend, before an imminent airstrike?
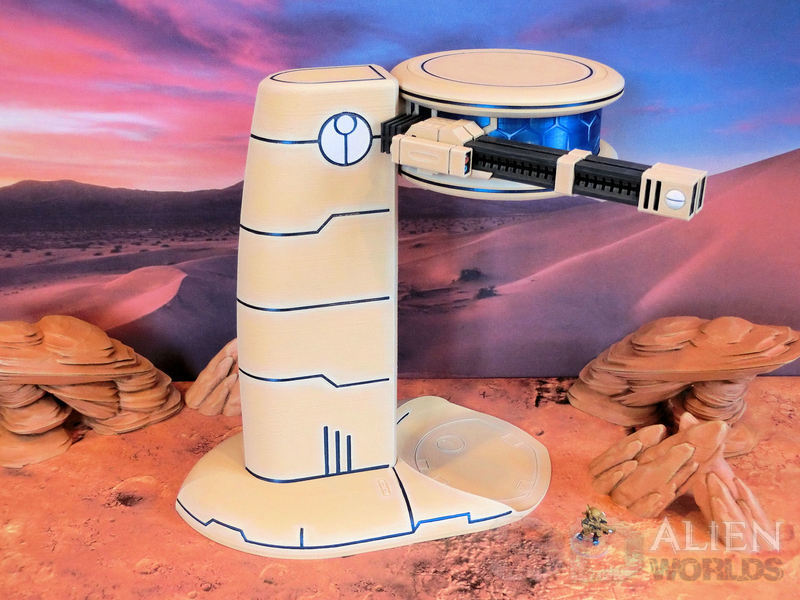
£ The turret and its weapon can be rotated about 250 degrees. With two of these gun towers you could cover any approach from enemy attack.
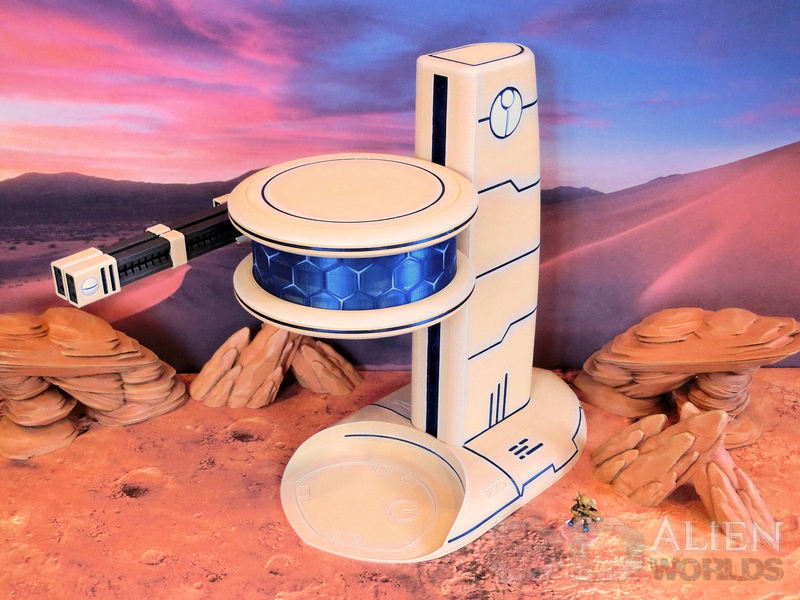
£ The turret can also be elevated during play, by simply tilting the front up and sliding along the tower track. It will lock into place automatically - gravity's a wonderful thing, eh?!
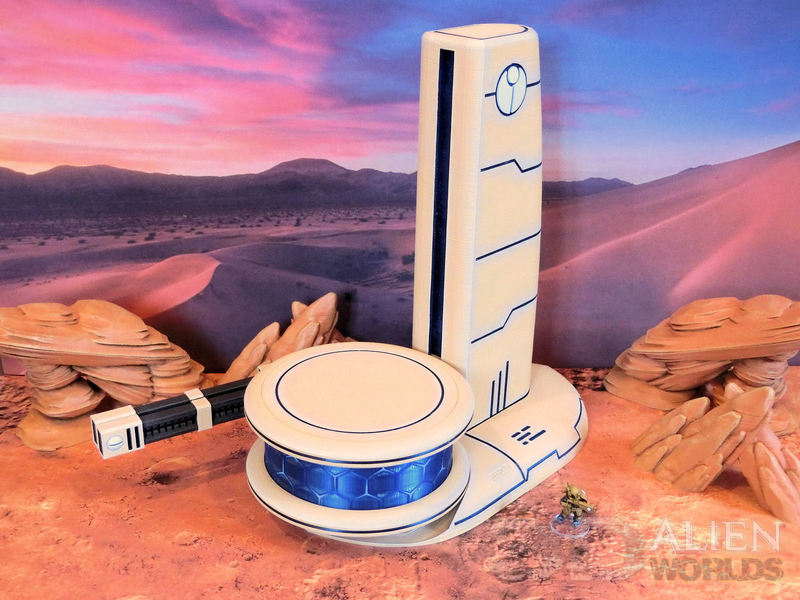
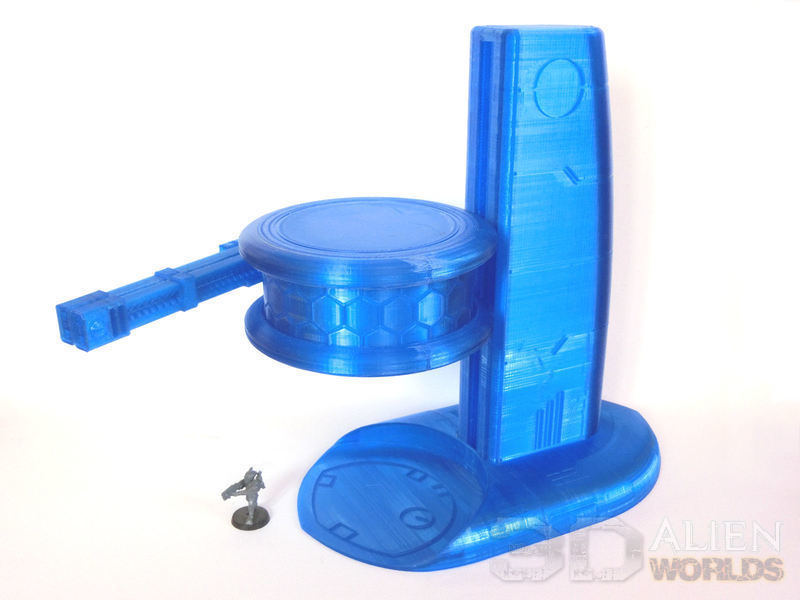
£ Of course it can also be dropped down to ground level, for access by friendly forces.
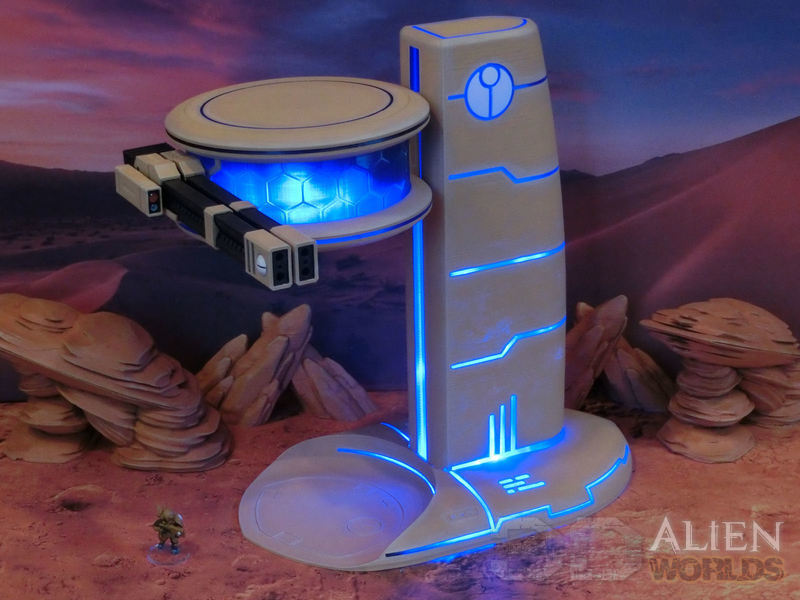
£ The whole gun tower, base section and turret are all hollow, and you can have some fun by printing it in clear filament and lighting it up with LEDs inside.

The Taui Gun Tower is available for download from today.
It's time for some alien sci-fi goodness! Today we are releasing the new Taui Fusion Reactor for download, so come and take a look!
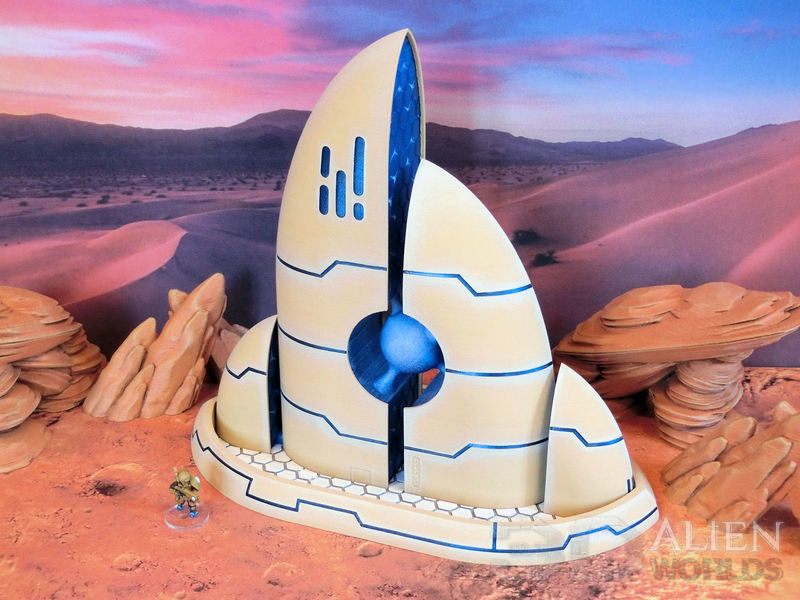
£ The fusion reactor is a pretty big model, measuring 303mm x 160mm (12" x 6½"), with a height of 270mm (11"). There's also plenty of space for models behind the low perimeter wall.

£ The rear of the reactor model has an entrance and the computer terminal can be located anywhere.

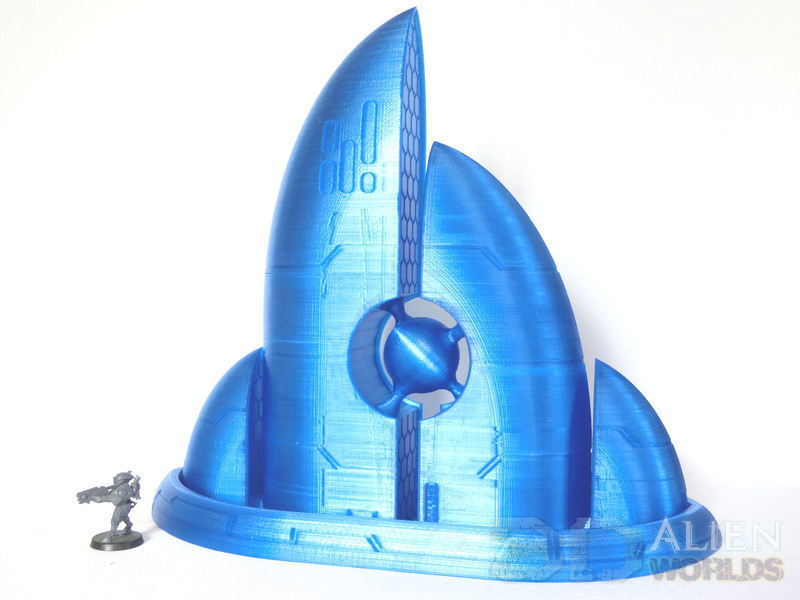
£ The fun really begins if you print it in clear PLA filament, and stuff some LED lights inside! I used a couple of blue string lights, with a battery pack inside each of the large towers. The central core also has holes, so you can carefully feed LEDs inside the core sphere.
The Taui Fusion Reactor is available for download from today.
Lots of pics to show you today for the new Taui Gun Tower. First of all, here's a quick assembly guide....
I plan to light up my model with LEDs, so almost all the parts were printed in clear PLA filament at 100% infill and a layer height of 0.2mm.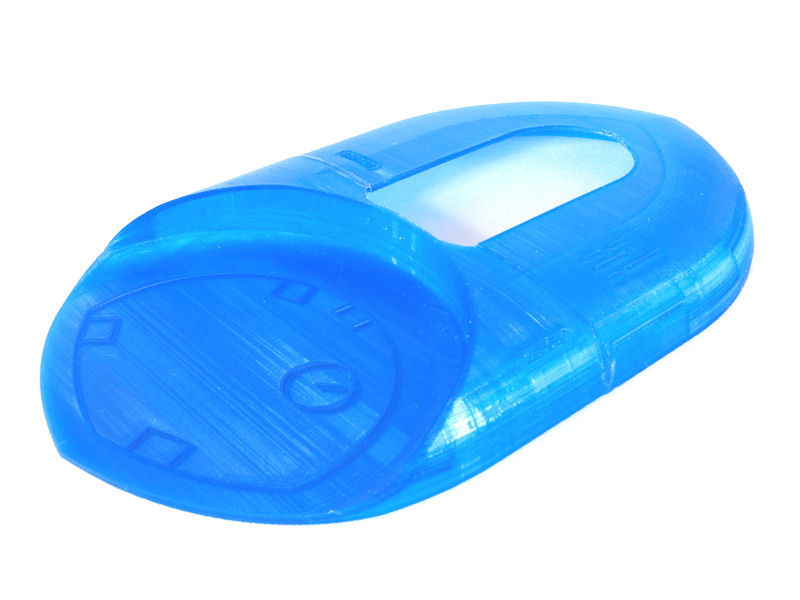
£ The base section is printed in two halves, both printed standing up. Only the front section requires a small amount of print supports to hold up the bottom edge of that recessed circle.
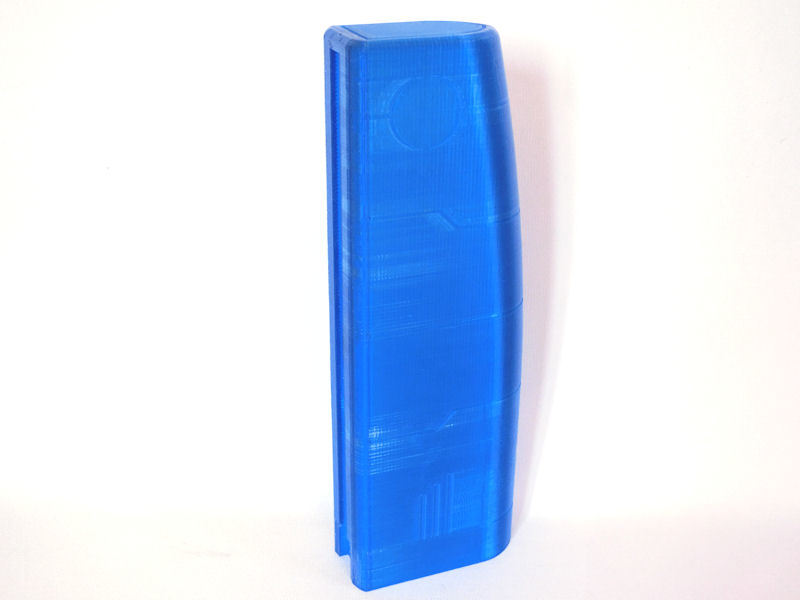
£ The body of the tower is next. I printed mine in one piece, 300mm (12") tall, but there are of course smaller cut versions included for smaller printers. This piece is hollow, and the separate top piece is simply glued into place.
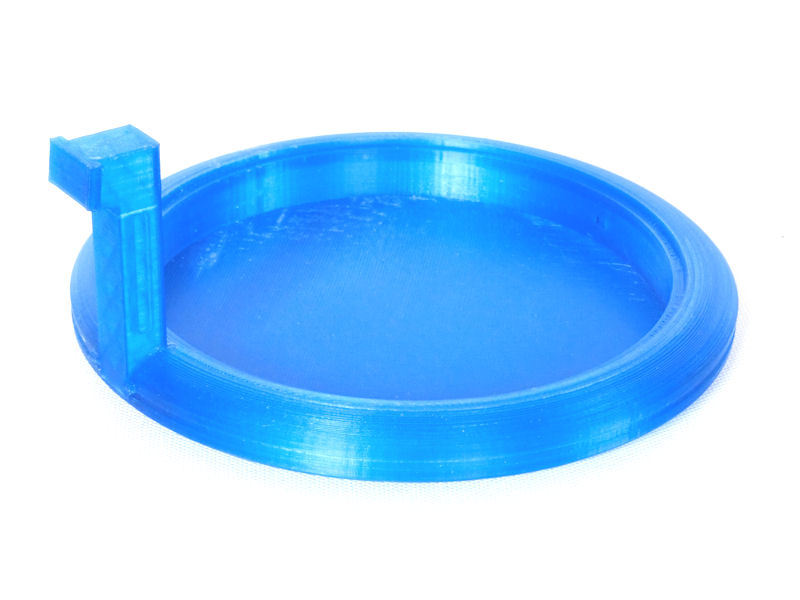
£ The 3rd part of this model is the turret section. Start by printing the bottom of the turret and the connecting piece. I used print supports on the bottom piece just to make the bottom curves as smooth as possible, and a quick bit of sanding finished them off. Oh, it may not look hollow, but it is!
I printed the connecting piece at 20% infill to save filament and time, but made sure it was strong enough to hold the weight of the turret and guns.
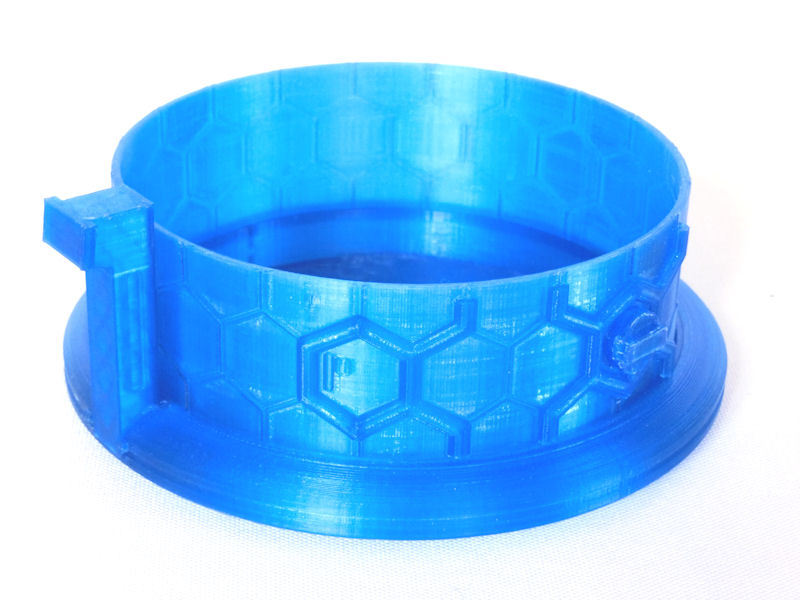
£ The circular turret's "window" is printed as one piece, and will require a small amount of support just to print the bump of the gun mount (shown on the right of the photo). DON'T glue this window in, as it is designed to rotate!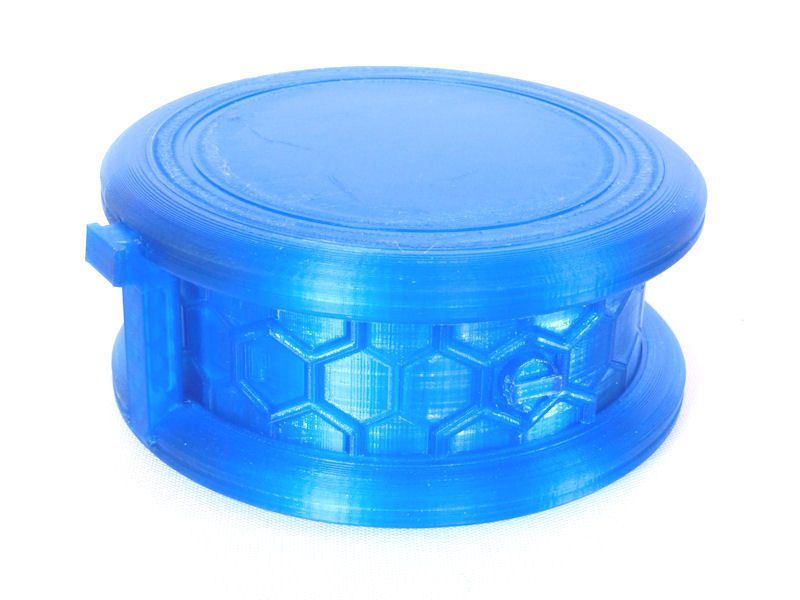
£ The top piece for the turret benefits from some print support to help keep the curved surface as smooth as possible. The lid is printed separately and then dropped in to place. I didn't glue the top piece to the connector yet, as it will be easier to paint the turret window separately. Similarly, I don't plan to glue the lid on to the top, as I will need access to the inside for LEDs.
There is a narrow channel running around the bottom of the top piece, into which the window should slot neatly. Make sure to sand the edges of the channel so it fits and rotates easily.
NOTE: For some unknown reason (i.e. my stupidity!!) I managed to create a lid and socket that are not 100% circular. It's about 1mm shorter in one direction, so if it doesn't fit perfectly, please try rotating it slightly!
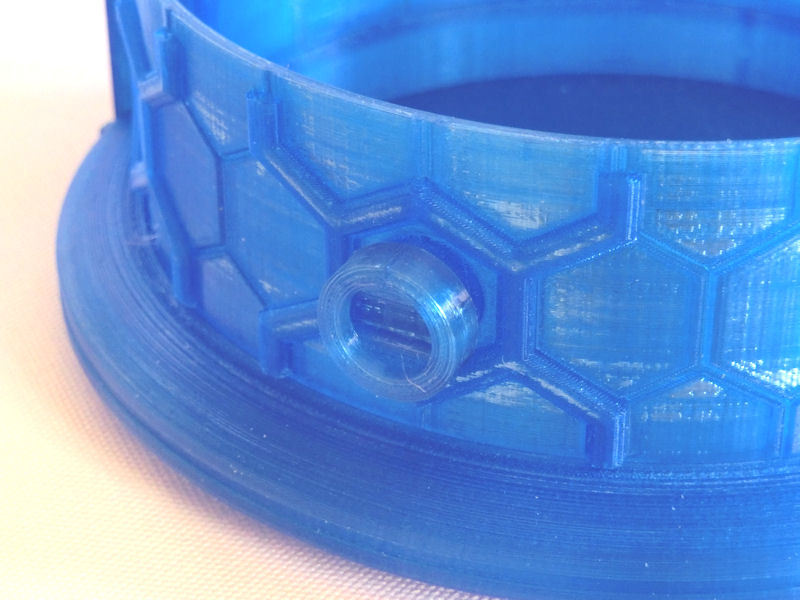
£ This is an extra fitting that is included in the model files. It is a separate magnet mount that fits on to the weapon mounting point, in case you want to magnetise different weapons from your own bits box. You can use a magnet up to 10mm diameter.
It is NOT required if you use the twin rail guns included with the model.
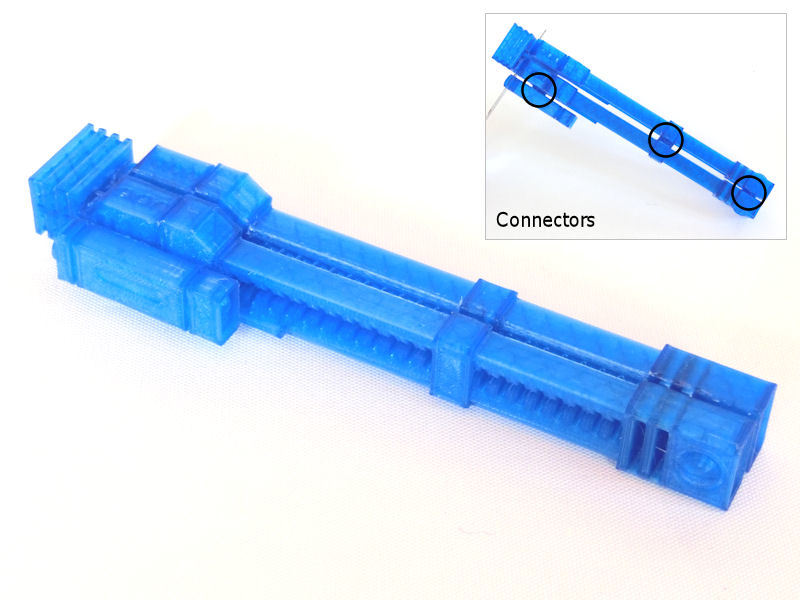
£ The massive twin rail guns are mirrors of each other, and should be connected as shown in the photo. The power pack bit slots to the back of the guns, and the small 2mm thick discs should be used in between the barrels to keep the guns evenly spaced.
There is also a sensor unit which can be glued on to the side using another connector disc. Please note which side will attach to the turret's window before gluing.... I didn't, and had to pull it off again! Oops!
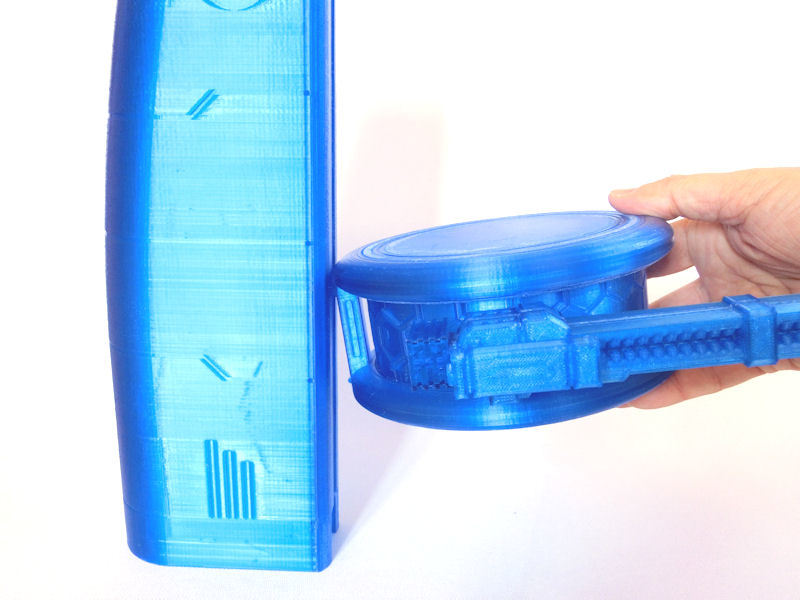
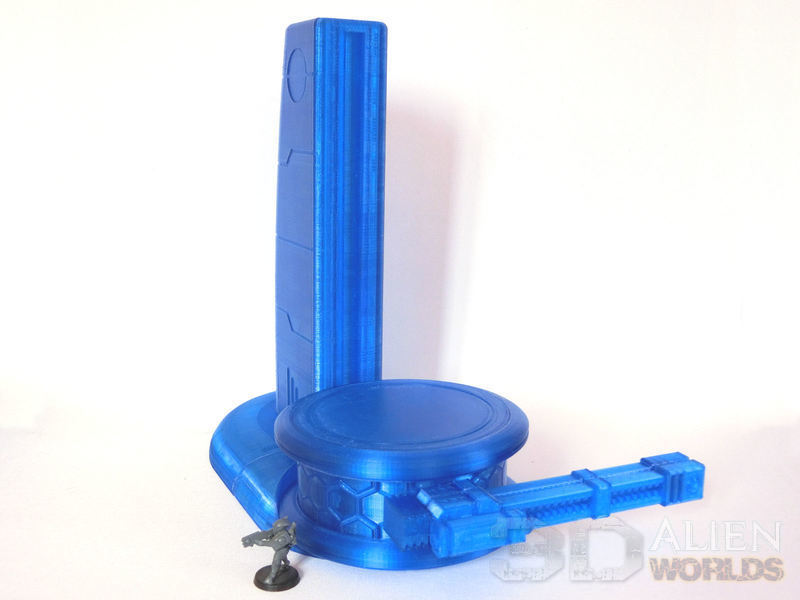
£ I recommend not gluing the main tower to the base at all, as the fit is quite tight and should hold fine without glue. If you do choose to glue the tower to the base, however, please make sure to insert the turret into the notched channel in the tower first!
Please note that this is a tight fit, and may require a little bit of force to insert the first couple of times. After that, you should be able to tilt the turret up at the front (as shown in the picture) to slide it up and down the tower. When you return the turret to a horizontal position, it should lock in place.
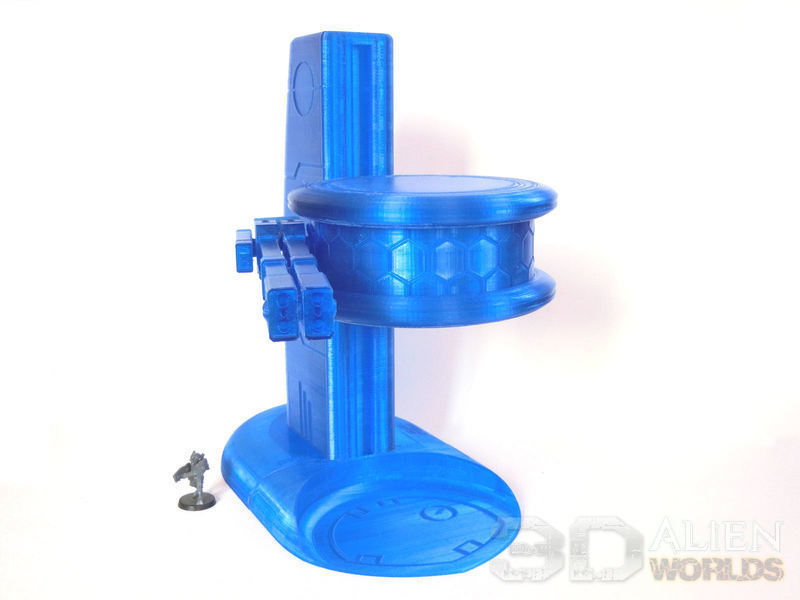
£ Time for some completed model pics!!! Here's the new gun tower in all its glory - it's BIG!!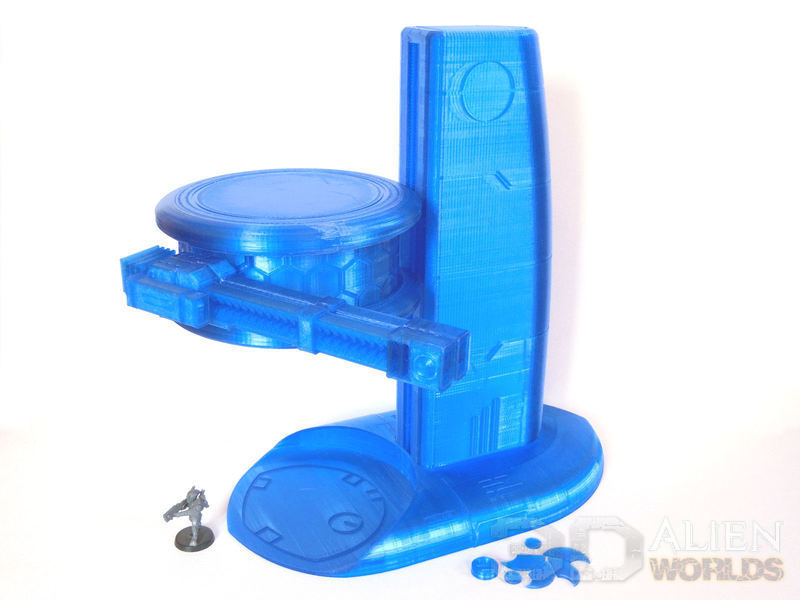
£ The gun and window can be spun around 250 degrees.
A few geometric shapes have also been included in the kit, which can be used to customise the circular panels at the top of the main tower.
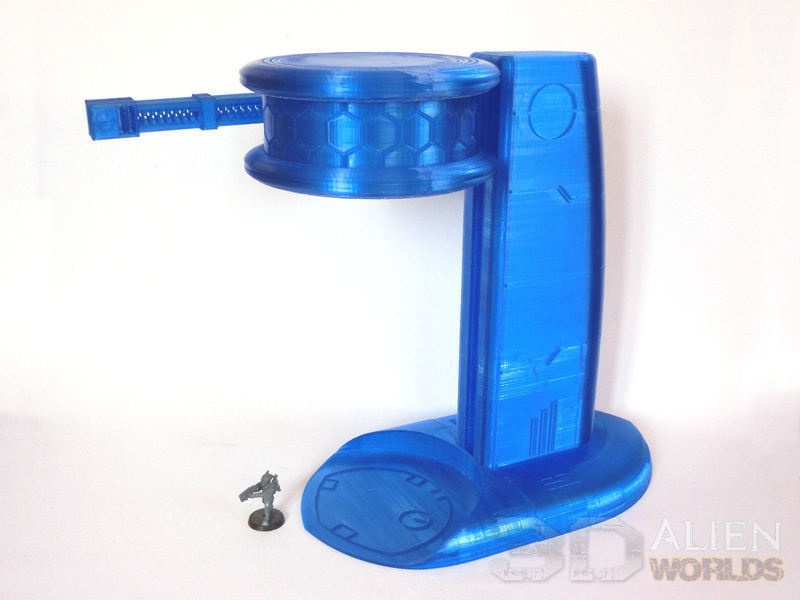
£ When elevated to its full height, this turret is pretty darn high!
£ The turret can also be dropped almost to ground level. There is a small door hatch behind the weapon mount, which could give access for a great game scenario.
£ You looking at me, punk?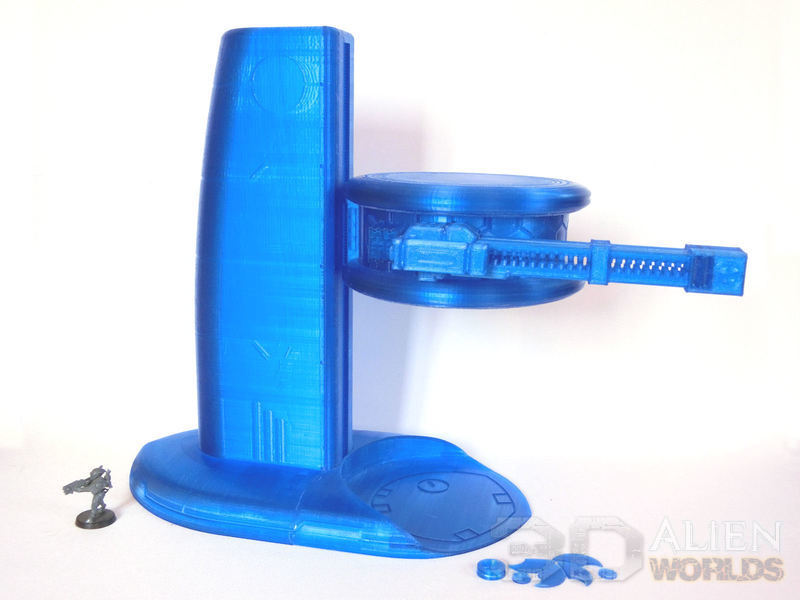
£ The new Gun Tower will be painted up over the next few days, and then we'll have a double Taui release for you very soon....
Here's a quick guide to painting the new Taui Fusion Reactor, with a super handy shortcut for saving some time on the base section!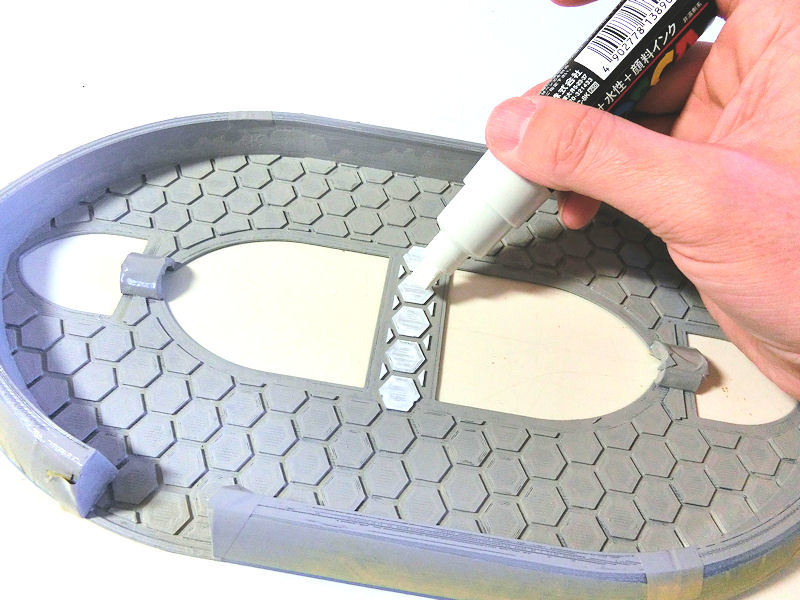
£ The base section was the first part to paint, and I saved some time by masking over the exterior lines I wanted to leave as clear filament, and then spraying with a rattlecan of light grey matt paint.
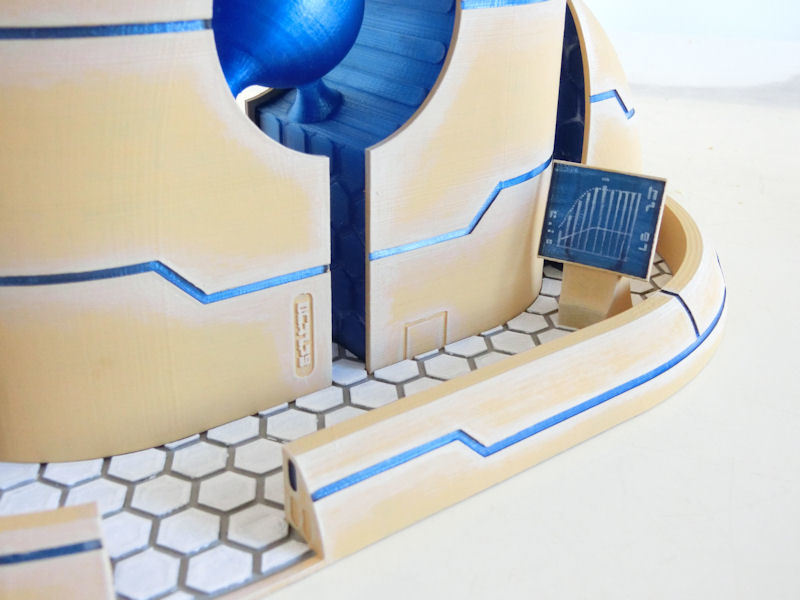
For the Taui Landing Pad, I had carefully painted each hexagon on the pad by brush, and it had taken hours and hours! Since the floor of this fusion reactor is not such a focal point, I decided to save lots of time by investing in a thick-nibbed paint pen. This probably would have taken hours to do with a brush (especially since it's white!), but this only took a few minutes! Strongly recommended!
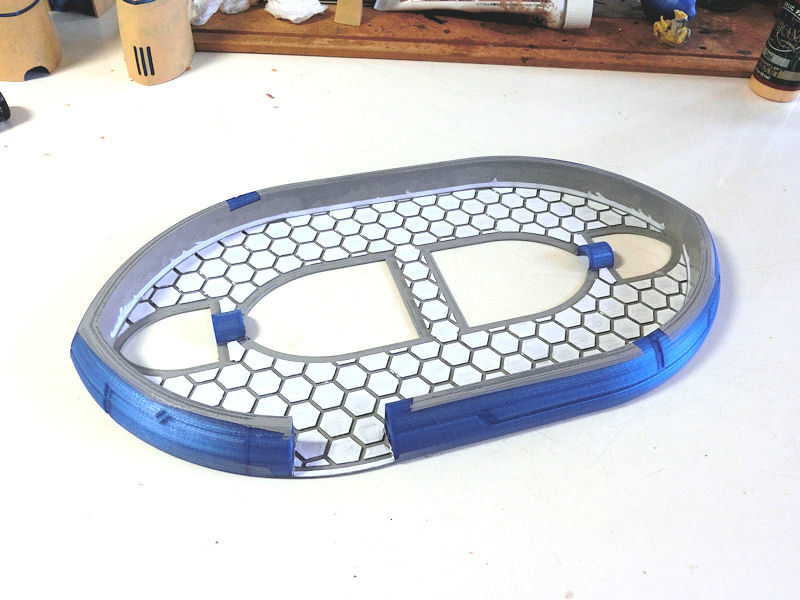
£ After pulling off the masking tape, the interior of the base section was complete.
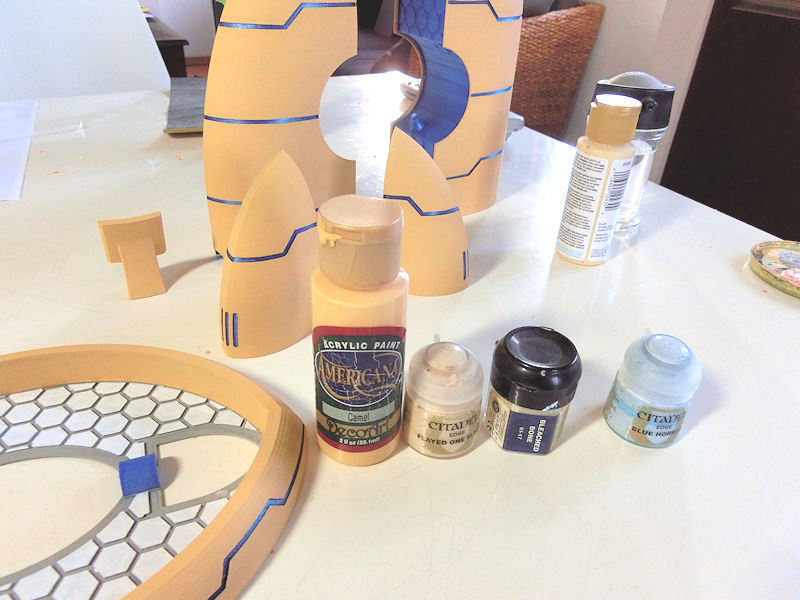
£ The next step was to paint the surfaces of the reactor in a sandy yellow. I used cheap Americana Camel acrylic paint to cover every surface of the model, except the recessed blue lines and the interior hexagons. This took 3 coats to get a smooth finish, but at least every coat was faster than the last!
£ I used GW's Flayed One Flesh to highlight the edges of each panel, and then an even thinner edge highlight of Bleached Bone to make it really pop.
For the monitor, I roughly painted a 'reactor powering up' kind of display, but if you have the time you could try printing a custom transfer from a sci-fi movie?
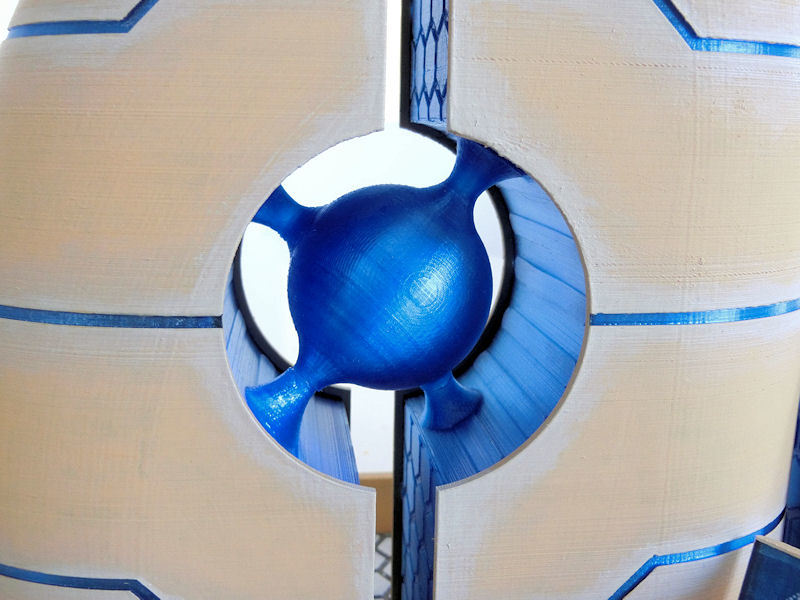
£ At this stage it was time to glue it together. I found it was easiest to do this by gluing the central core to only one tower, and gluing that tower to the base. Once that was properly dry, I glued the other tower into place on the base and to the core. Pretty perfect fit!
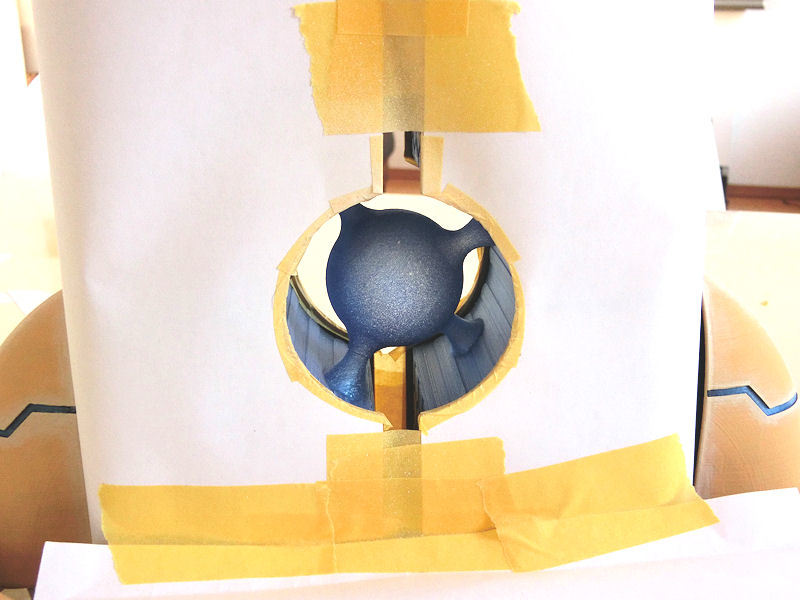
£ One last thing I wanted to do was brighten the central core. Although I plan to use LEDs to light up the model and the central core, there will be times when I'm not using LEDs so it seemed a good idea to lighten it slightly anyway. So I masked the two towers off, and pulled out my airbrush.
Oh no!! My airbrush had died!
So I couldn't use a light blue paint carefully and smoothly airbrushed on the central reactor core! What a pity! I had to use a cheap rattlecan of matt white instead, with one quick vertical spray pass from about 30cm away. It wasn't perfect (you can see the specks of paint in the photo), but I guess it will do okay?
Currently I'm just sorting through the pics and videos of the new fusion reactor, so it will be ready for release in a few days!
The new Fusion Reactor print is being painted up as we speak, so while you're waiting.... here's a new Gun Tower for the Taui collection! 
£ Yes, that's right - it's another pretty damn big design! This one towers (oh, sorry for the pun!) 300mm above the battlefield.
There are 2 unique features of this gun tower....
£ Firstly, the gun turret section can actually be raised and lowered during gaming, if you need to, or if you just want a different look to the table.
Secondly, those enormous twin-linked railguns (and the blue window section) can spin around about 250 degrees!
Of course it's a hollow model just like all the other Taui designs, and can be lit with LEDs inside for some cool effects!


0 Comments :
Write a comment :