3d-printable terrain for all your samurai wargaming needs


The first set from our Japanese samurai-themed grand temple project is being officially released today, so the Samurai Temple Walls are now available for download!
Plenty of lovely pics to show you today, and even a short video!
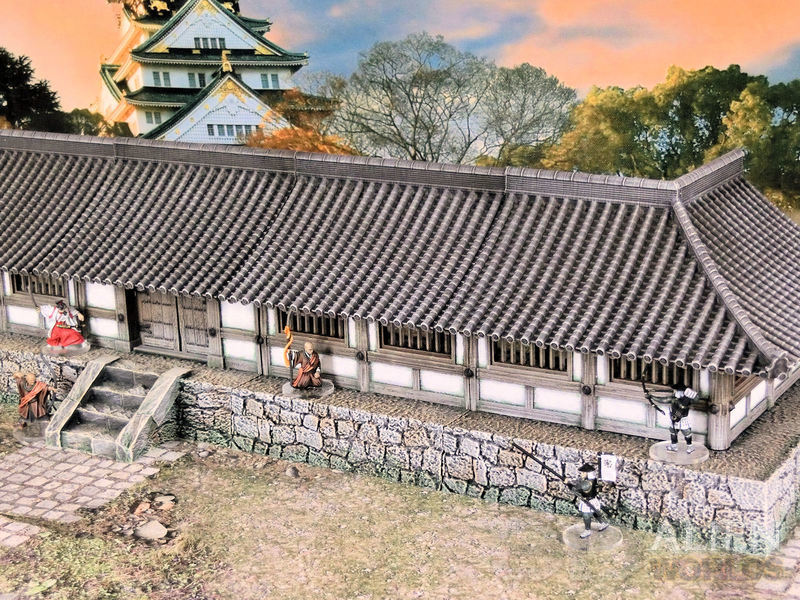
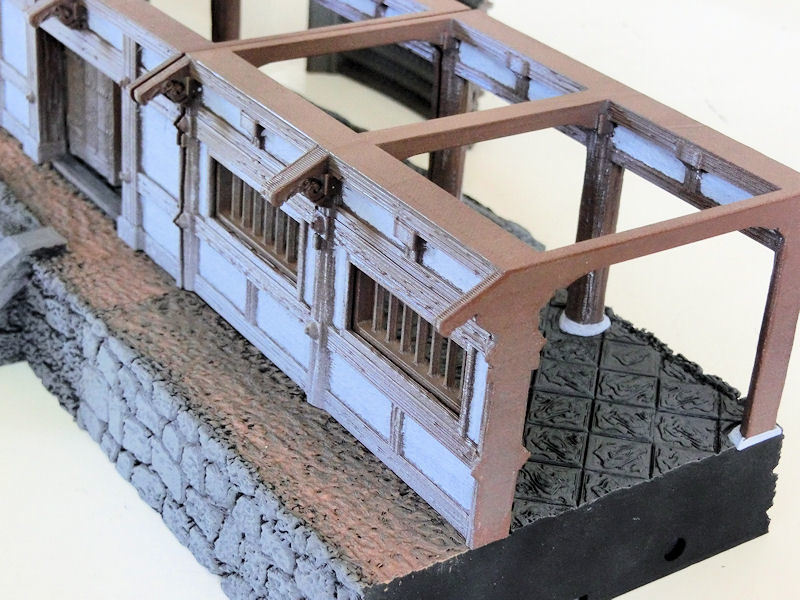
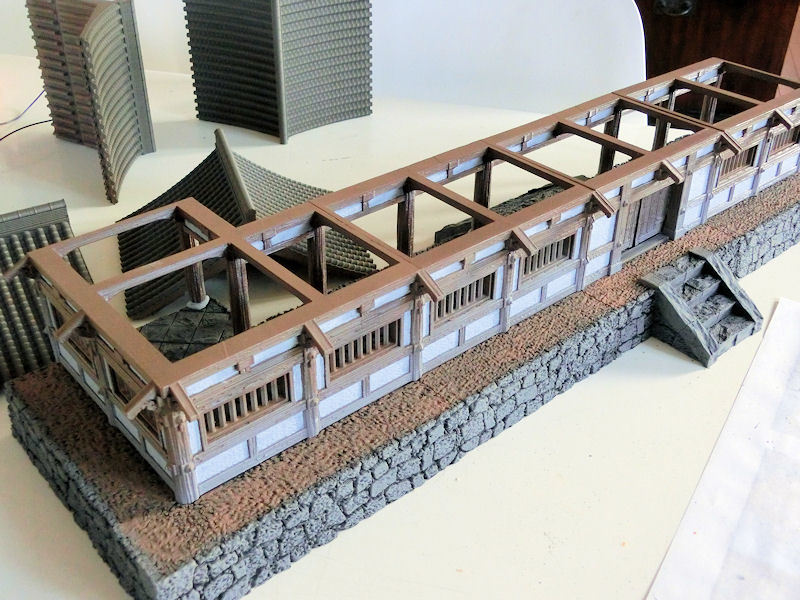
£ The set consists of 3 parts - straight sections, doorway sections, and a corner section. All of these come with stone bases too, so you can customise your layout in lots of ways!

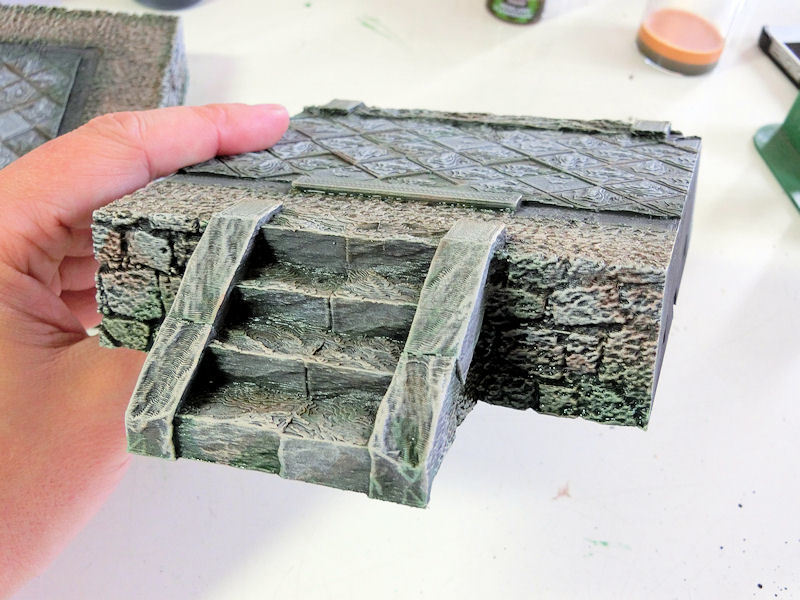
£ The doorway section features narrow steps on the outside, leading up to the heavy wooden door, and then wide steps down again on the other side.
He we see one of the temple priests turning away a passing beggar, at the pointed end of a naginata!

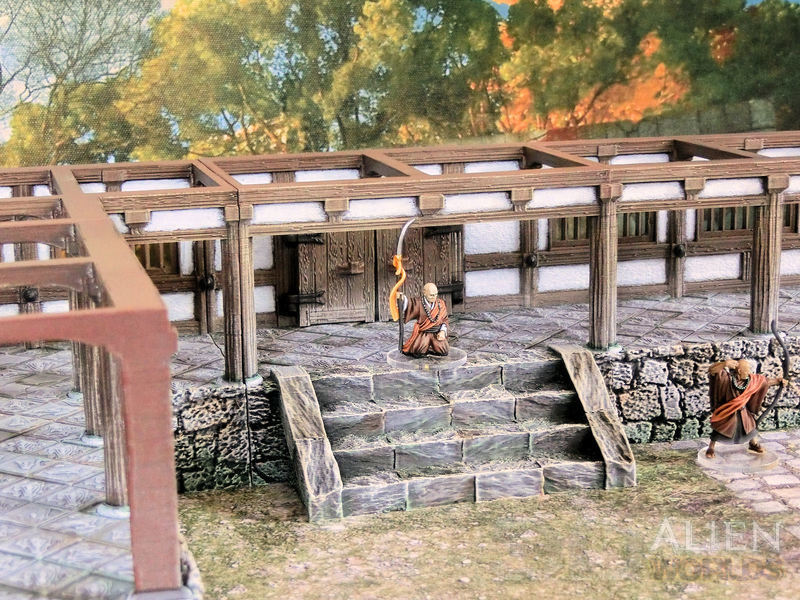
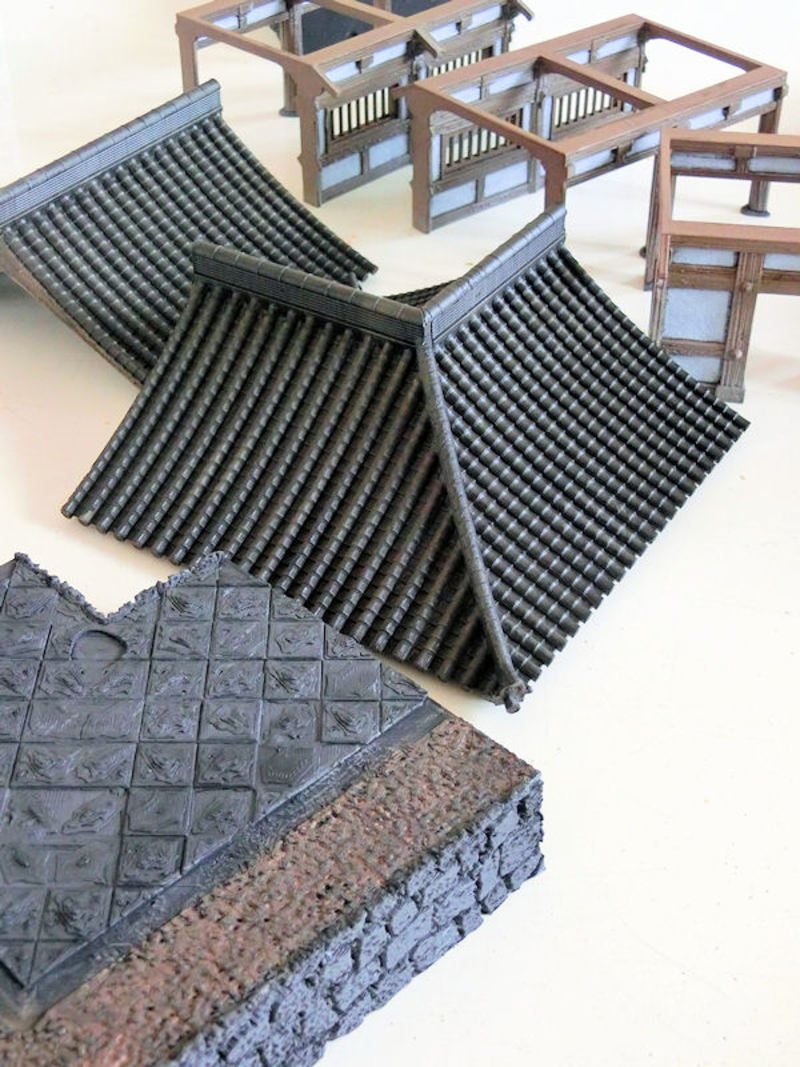
£ The inside of the temple walls feature this paved walkway covered by the wide curved roof, and these wide stone steps.

£ You don't even need to glue the roof sections in place, providing even more options for gameplay!
£ The heavy wooden door can be barred and closed, or opened during play.
£ This set also makes a pretty good background for photographing your models!
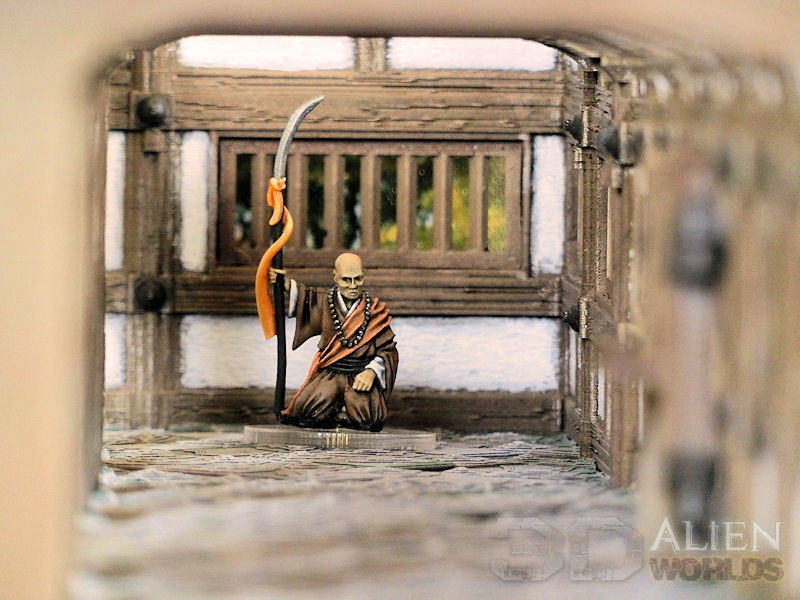
Here we can see one of the priests kneeling at the end of one of the walkways, readying himself for the coming fight!
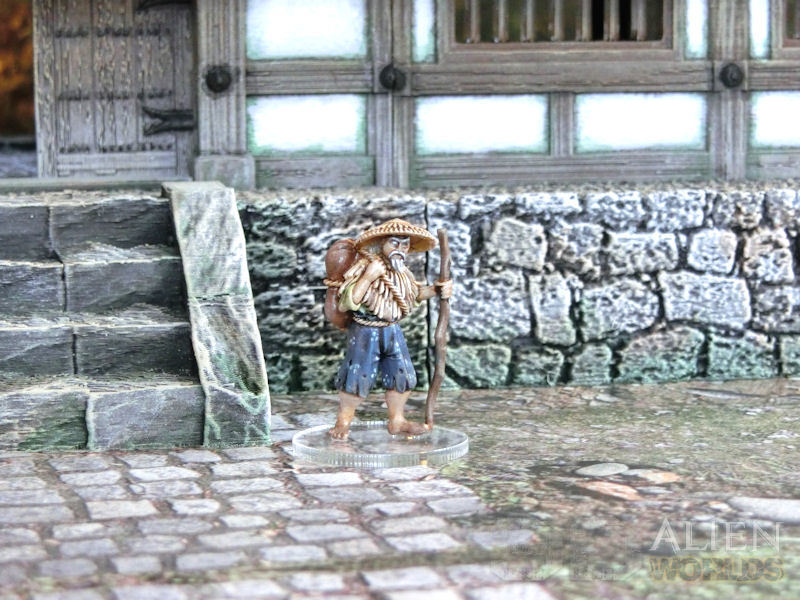
£ This penniless beggar is another great model from the "Unlikely Allies" set by Grey for Now Games, and makes a colourful addition to a gameboard. Here he is, trudging around outside the temple walls.
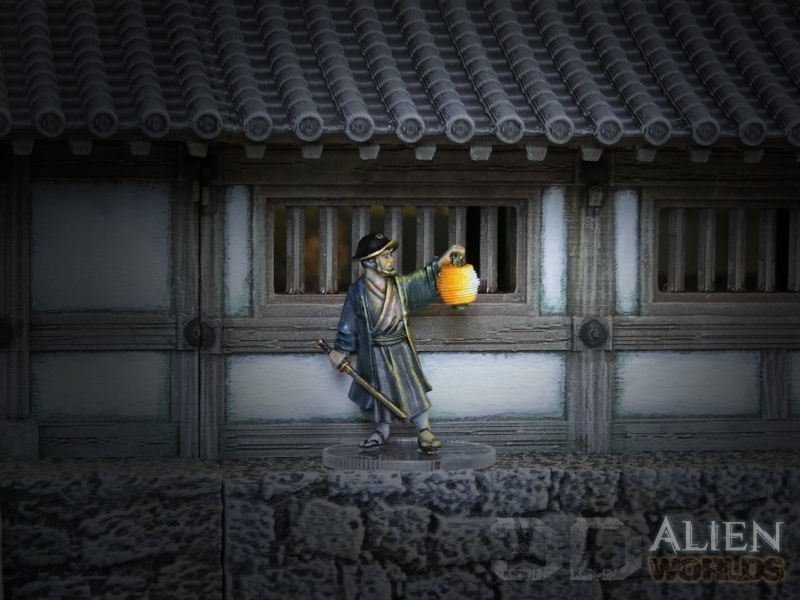
£ This final pic is the watchman from the same "Unlikely Allies" set, with a dark edged filter placed over the photo. It really sets the scene for those ninja-based night missions!
We also have a short video for you, to set the scene for a clash between temple priests and some marauding samurai forces....
The Samurai Temple Walls are available for download from today!
The first decision you have to make is what colour you want to paint your temple walls! You've basically got two choices - brown or red?
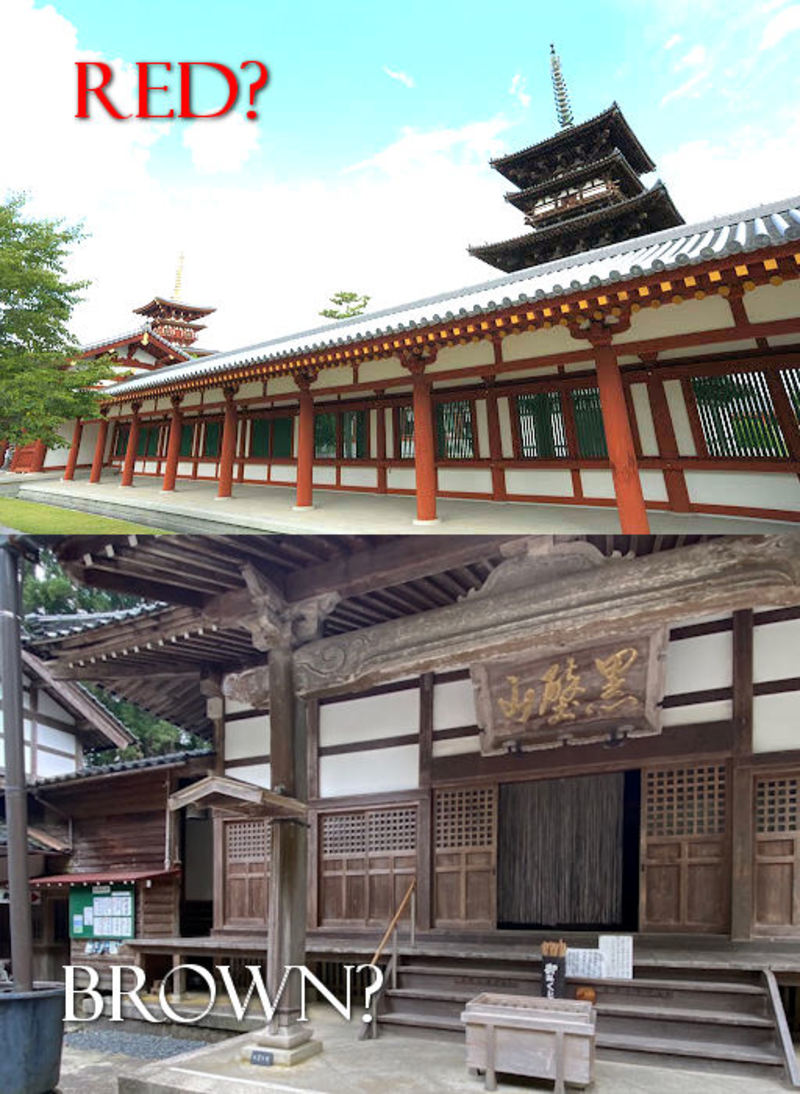
£ Red-painted temple walls (and buildings) are rarer in Japan, although they do exist. Shinto shrines are more usually painted in red, and you can use these temple walls as shrine walls if you want, but Buddhist temples are more usually just left as natural unpainted wood.
So I recommend you do a quick image search to find the colour scheme you like. I asked everybody on Facebook which scheme they preferred, and unfortunately the votes came back pretty much tied! So no help there.
Red temples are perhaps more often found in city settings, where the money is available for grander buildings and regular repainting. But after some thought, I decided to paint mine in old wood colours.... mostly because I enjoy adding aging and weathering to models.
So with that decision out of the way, it's on to the painting guide...
£ Whenever possible I like to speed things along with rattle-can spray undercoats doing double-duty as base colours. So the wall bases were sprayed with matt black, the walls and roof undersides were sprayed in matt brown, and then the roof topsides were sprayed in a dark matt grey.
As a last touch for basecoating, I also sprayed a gentle mist of light grey on the bottom 2cm or so of the outside of the walls. This will work later as water damage and weathering.
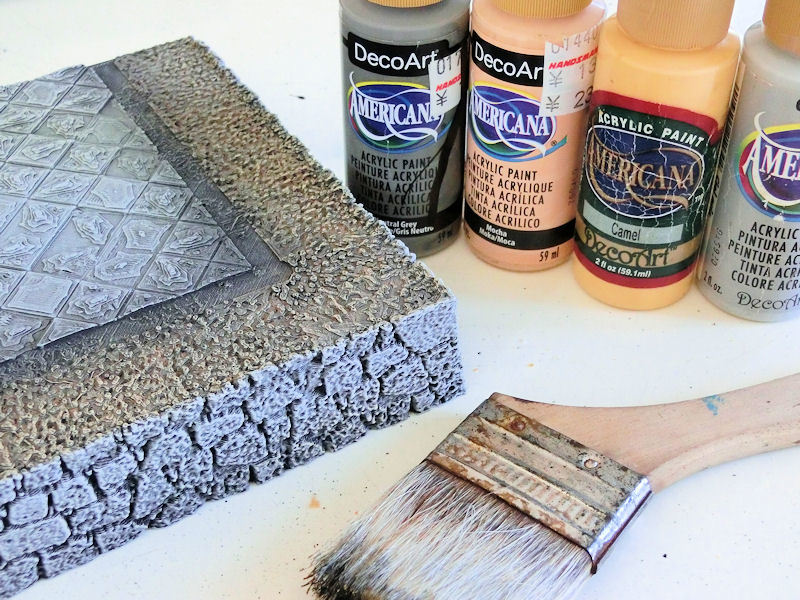
£ There were a few more things that needed basecoats, so I roughly painted the stonework with a medium grey (Neutral Grey by DecoArt), and the dirt path with a brown (Sable Brown by DecoArt).
The most time consuming step was to then paint the wall panels in a light grey with a flat-edged 1cm-wide brush. These would later be finished in white, but I wanted to do the hardest part now, before washes were added - so the edges would blend a little better with a wash on top.
£ Here we are at the halfway stage. The base colours are done, so it's time to see how it looks all lined up!
£ Time for washes! The base sections and roof sections all got a heavy black wash to darken things down and add shadows.
The wooden sections got a brown wash just to add some shadows and lines to the wooden areas. I tried to avoid adding wash to the light grey wall panels, but it's not too hard to wipe away smudges.
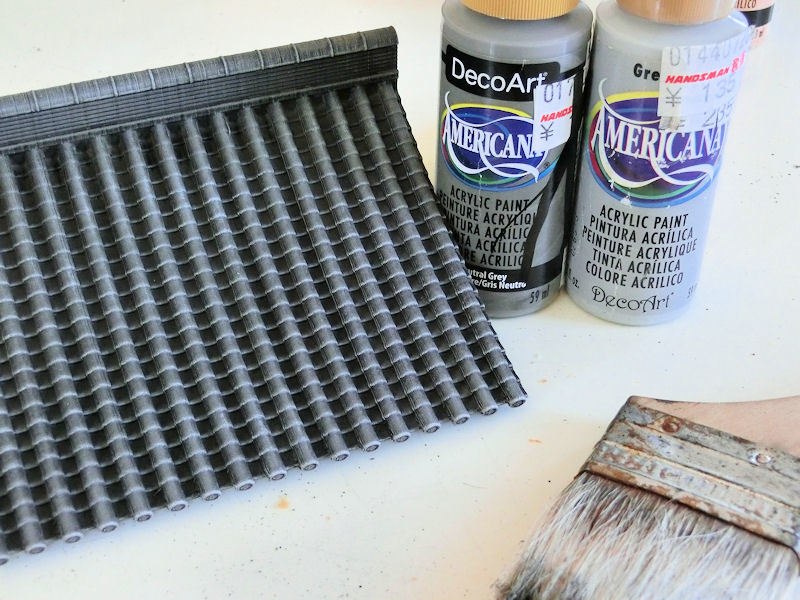
£ Next comes the drybushing, which I did with a 2" wide paintbrush. I first drybrushed the roof sections in a medium grey, and then again very lightly with a light grey. For the light grey drybrush, I recommend gently dragging the brush UP the rooftiles, so it will catch the very edges.
The roof sections were finished!
£ The base sections similarly received heavy drybrushing in medium grey and then light grey for the stonework, and also some skin and sand-coloured drybrushes on the dirt areas. I didn't worry too much about keeping it neat, as rocks and dirt tend to blend together anyway in real life.
£ With the drybrushing complete, you'll probably find that the stones are too uniform and neat. I started adding washes in various colours to some stones - brown wash on some, red-brown wash on others. You can see some of them on this close-up pics above and below.
One other wash colour I strongly recommend is green! Adding a few millimetres of green wash all along the bottom edge of each section, and pushing it heavily into nooks and crevices, gives a great sense of age. You'll often see this on Japanese stonework, where the sun doesn't burn hot enough to remove the mold. The green on the bottom edge also helps to blend the base sections into a tabletop mat, I find.
£ The paving stones on the top of each base section also got washes pushed at random into crevices and cracks, just to make it more interesting and less uniform.
The base sections were now complete - just the wall sections to go!
£ Using a 1cm-wide brush, I carefully drybrushed the wooden edges very lightly with a sand colour (Camel by DecoArt), just to bring out the woodgrain, and then switched to a light grey drybrush for the bottom 2cm of each wall section. You don't need to do this on the inside of the walls, but on the outside walls (and doors) it looks great - it's where rain and sun will fade the bottom pieces of wood naturally.
There are metal studs every metre or so along the walls (and the door hinges), and I painted mine in dark grey (Charadon Granite by GW) then gave them a black wash to add some depth.
£ Using a firm rounded brush, I then carefully stippled on white to the centre of each wall panel, and pushed it out from there to blend it with the light grey at the edges. One more pass with white stippled on the very centre of each panel, and the walls were ready for their final weathering.
I jabbed some green wash into the bottom corners of the lower wall panels, and the recesses of the thick upright timbers.
£ All done! With the painting completed, I was finally able to glue the walls to their base sections - although you could leave them separate to give you more gaming opportunities?
Some truly epic photos to show you today, from Thomas (Lascaris on various forums) who has just finished his massive Japanese display board. He used 11kg of filament and over a thousand hours of print time to produce this huge castle layout, which he then shipped off to his brother to have painted! His poor brother....... 😂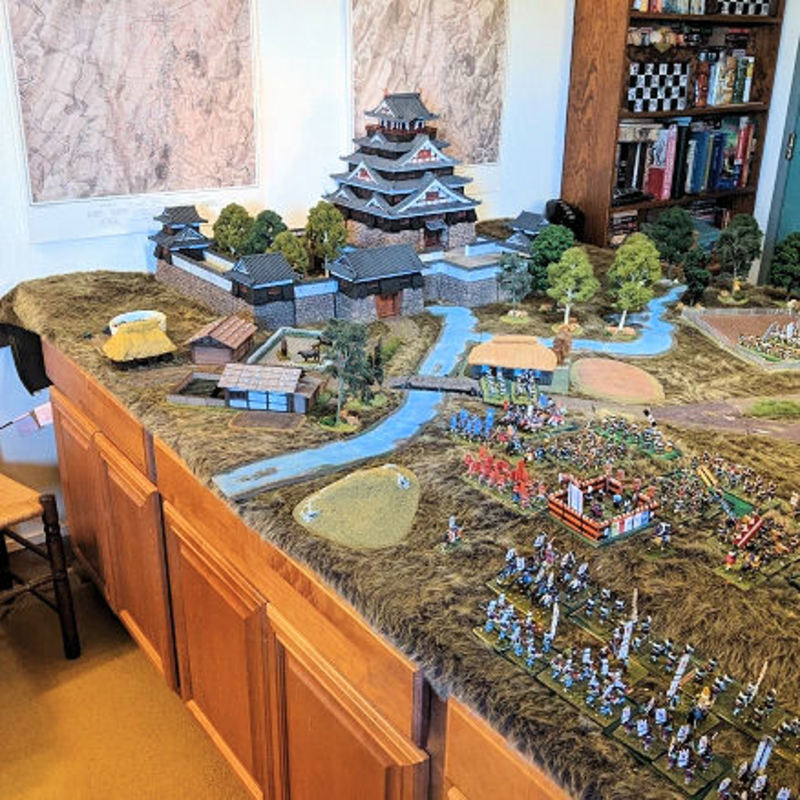
£ Just. WOW.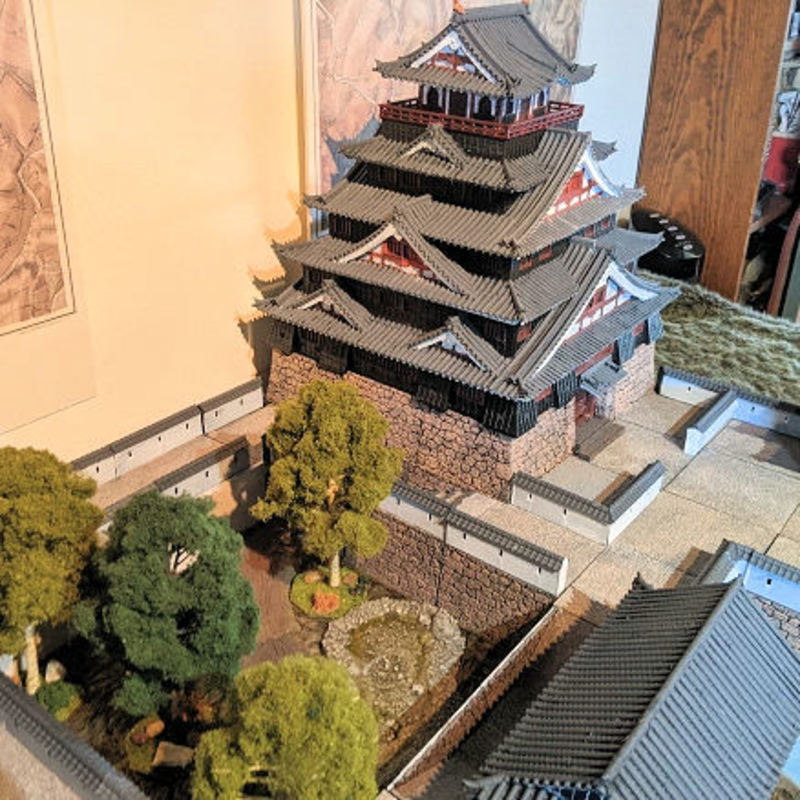
£ He's obviously put a lot of thought into the layout of those castle grounds, with 3 corner towers, a castle gatetower and a large central garden on a lower level.
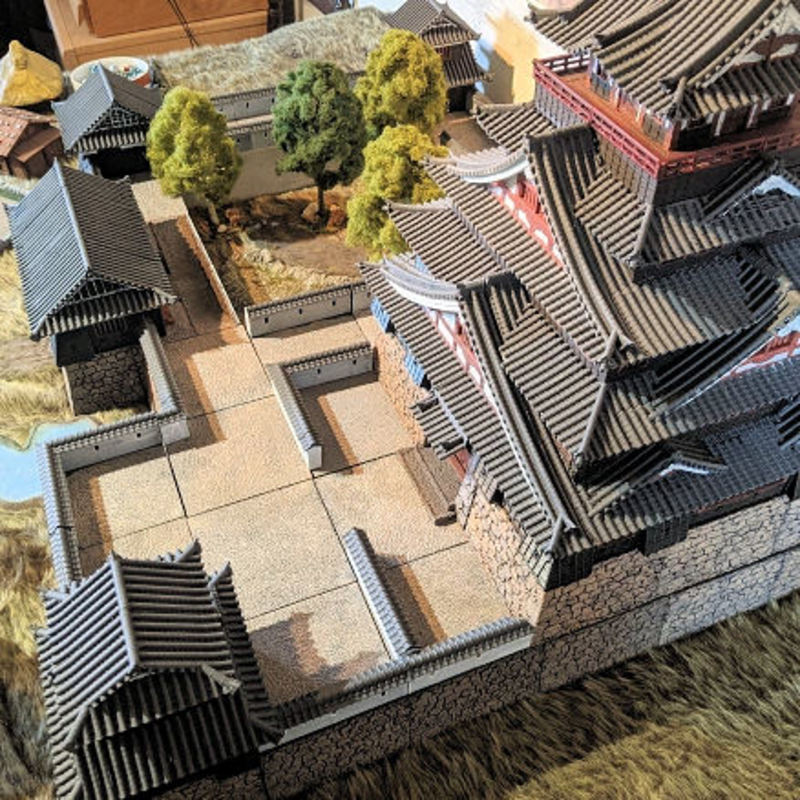
£ Great colour scheme for the castle too, with a striking red chosen for the timber beams.
Absolutely awesome work, Thomas!
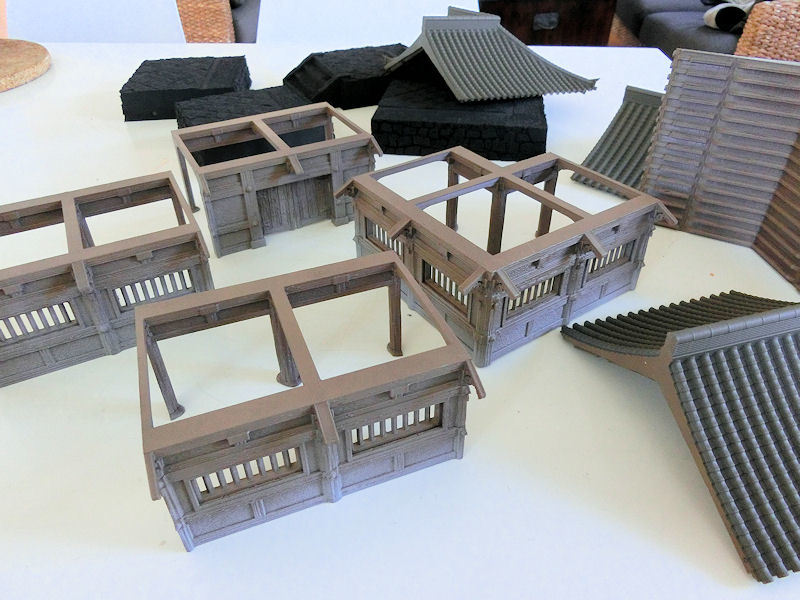
The new samurai temple walls have all been test printed, so it's time for an assembly guide and some photos!
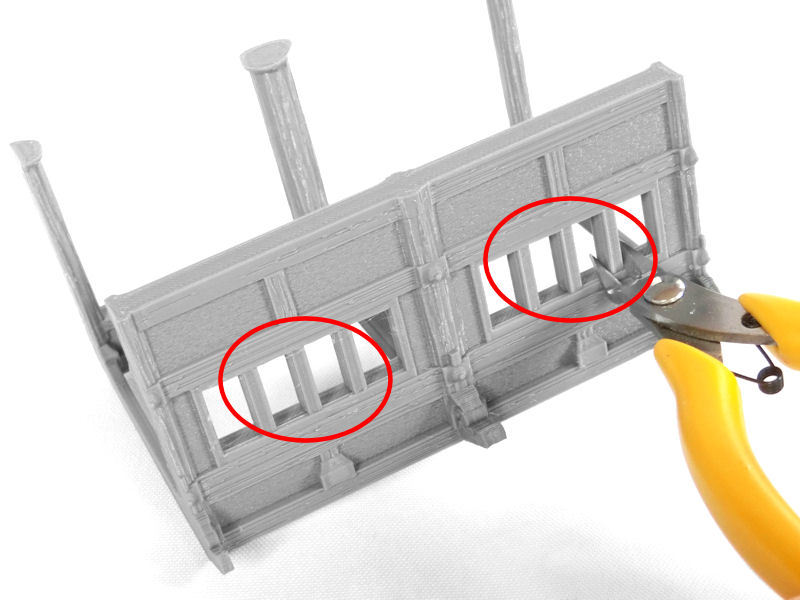
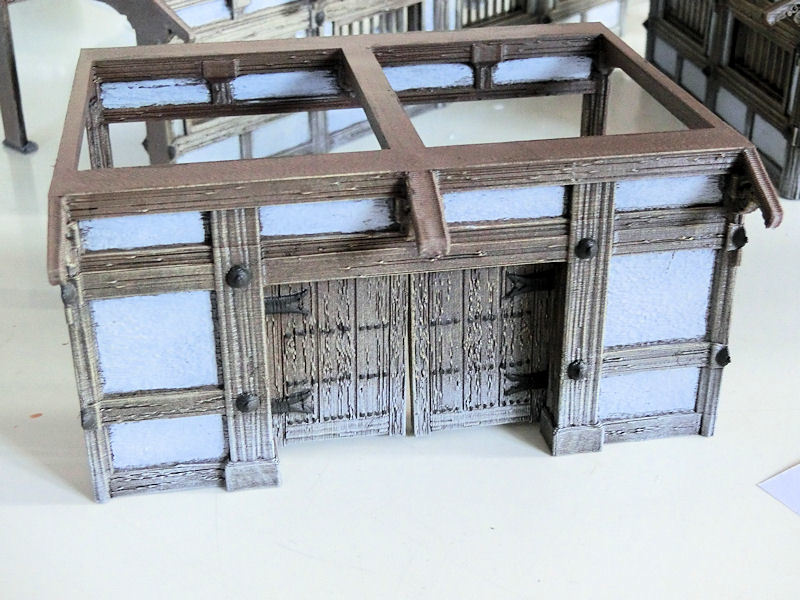
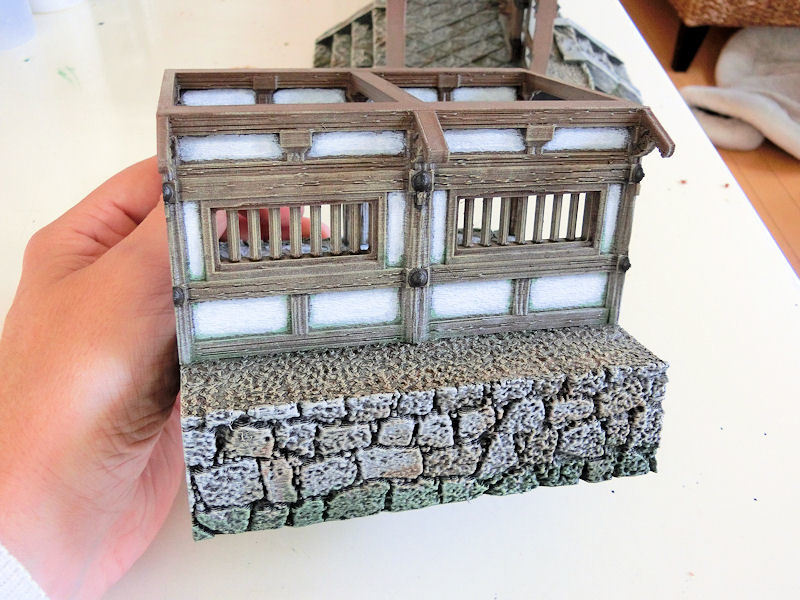
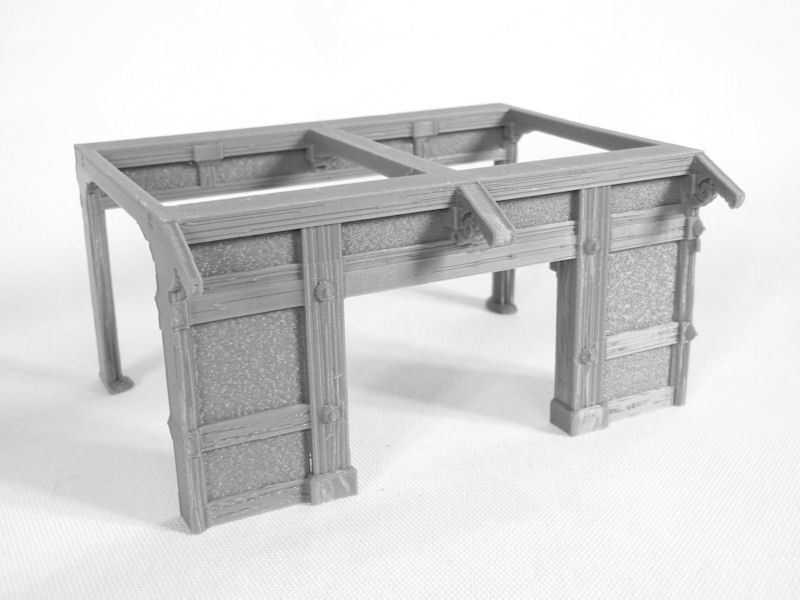
£ We'll start with the straight wall section, which prints upside down. Like EVERY piece in the temple walls set, you won't need print supports! You'll need to carefully remove the 3 built-in print supports from each window, however.
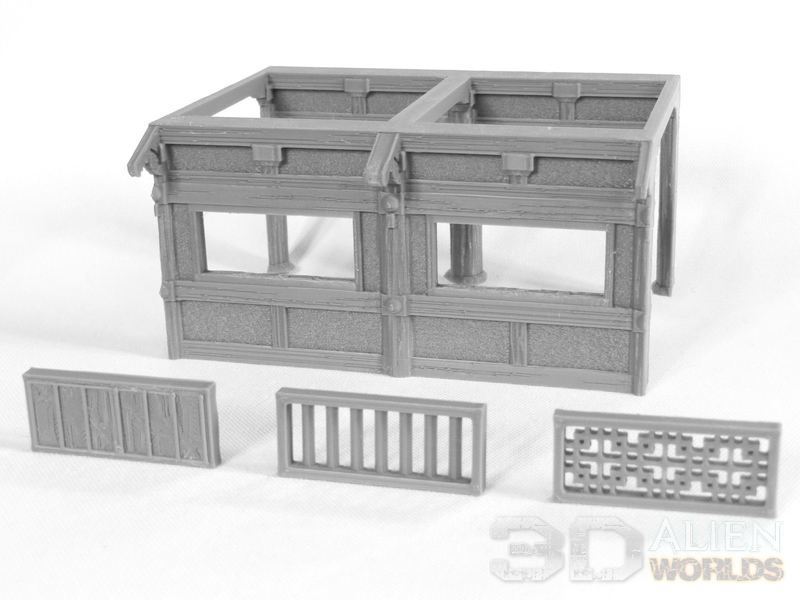
£ With the window frames empty, you can choose which window design you'll print. You have a choice of 3 types - a shuttered window (bars are on the 'inside'), a window with vertical bars, and an ornamental version with a traditional pattern. These will just slot in on the inside of the window frame.
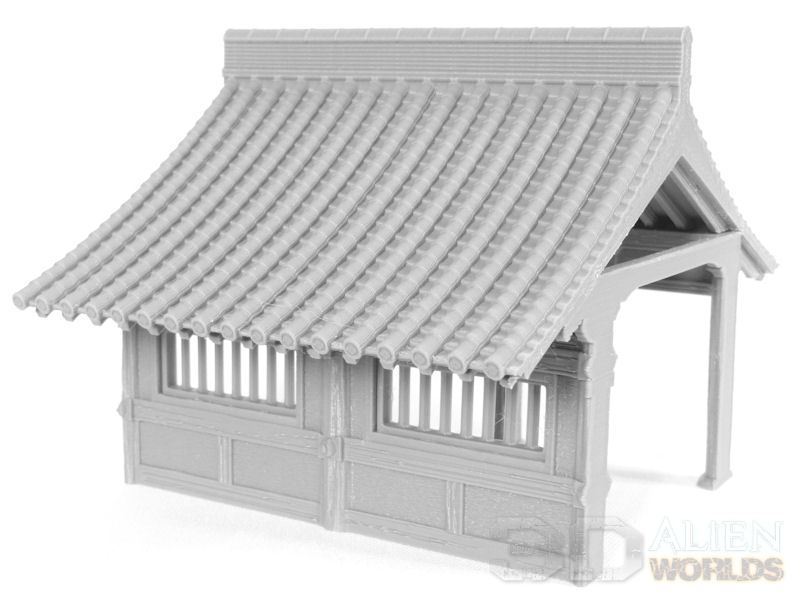
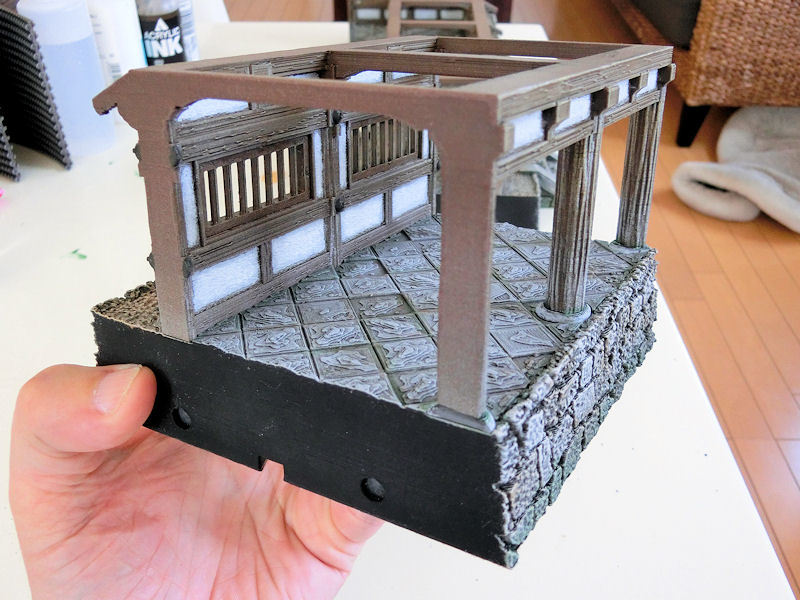
£ You'll need to print a roof section. Again, this does not require print supports, and can be fitted to the wall with some gentle pressure..... so if you want to remove it during play, it should be possible.
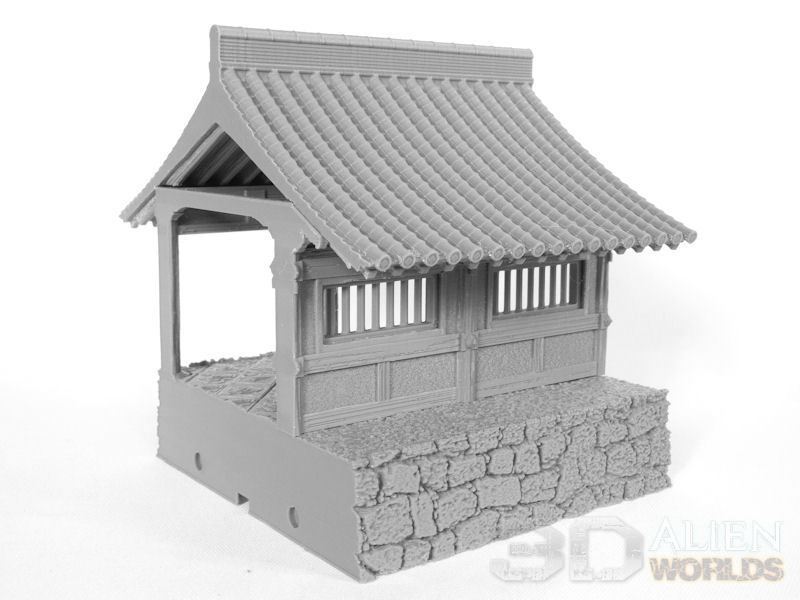
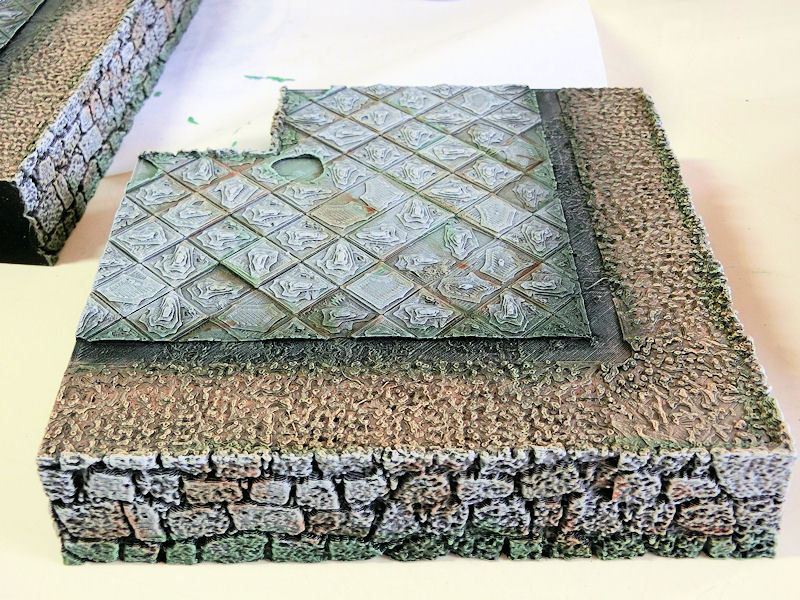
£ The base section is optional, and features a 30mm wide dirt path on the outside, and a wide stone-paved pathway on the inside.
£ The doorway section is similar to the straight section. It should be printed upside-down, and does not require supports.
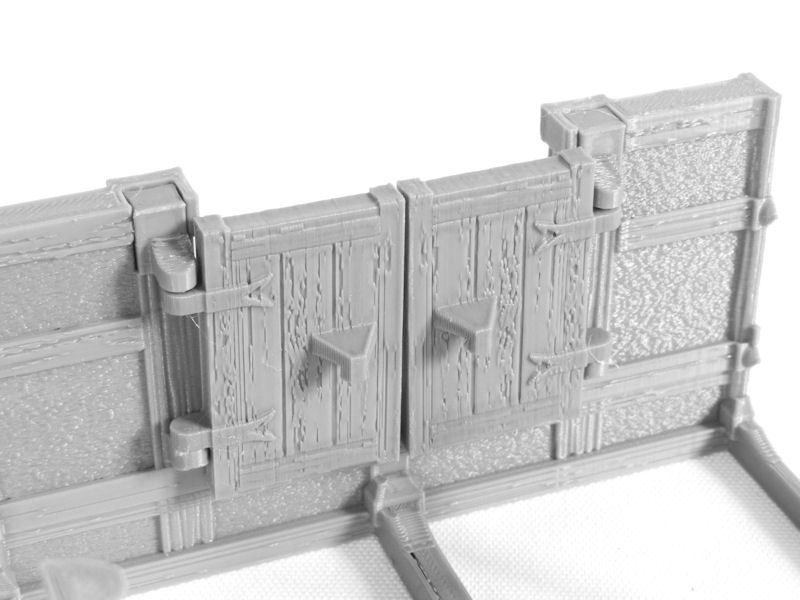
£ The STL file for the doors includes 2 hinge blocks, which should be inserted in the door frame as shown in the photo above. A locking bar is also included, and can be slotted in to the grooves.
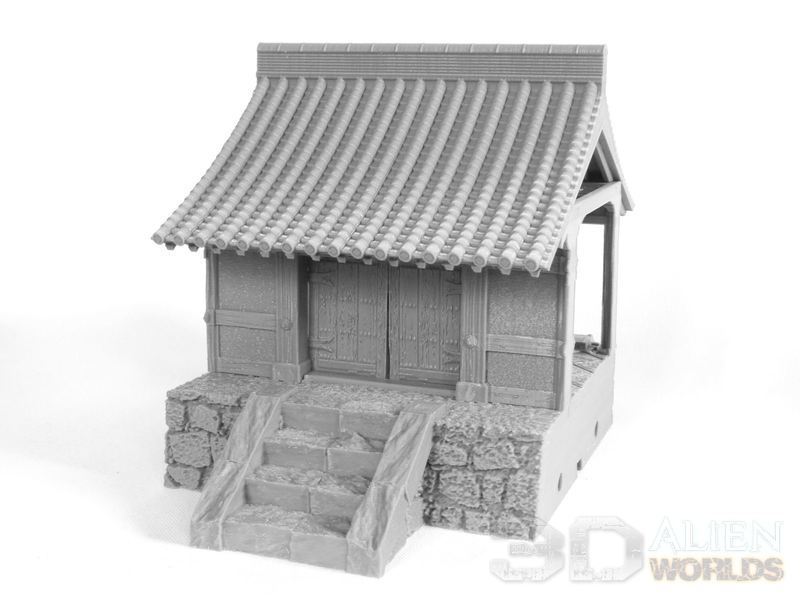
£ The roof for the doorway section is the same as for the straight section, and can be push fitted if you don't want to glue it. The optional base can be printed in one piece on larger printers, but there is also a 2-part version for smaller printers. There are some narrow steps on the outside, leading up to the doorway.......
£ ... and some wider stone steps on the other side. As with each piece of this model, every surface has been realistically textured.
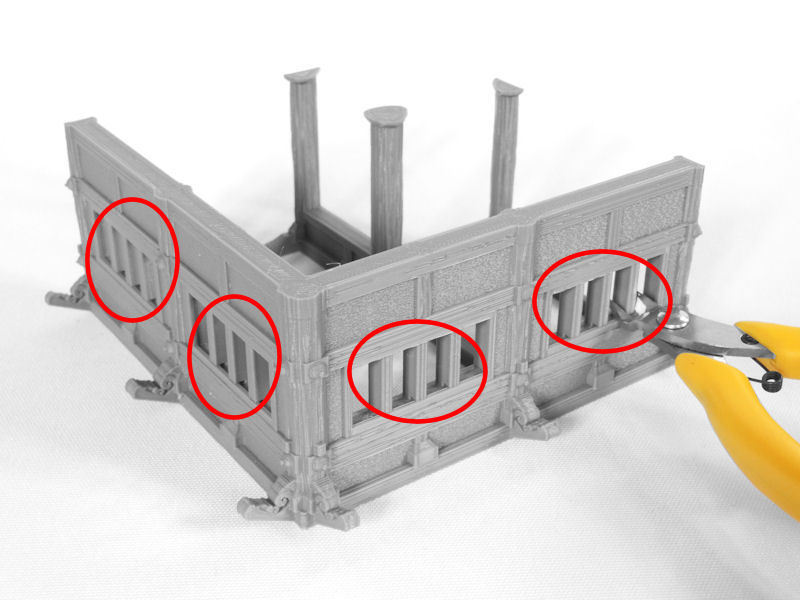
£ The corner section also features window frames, and you will need to carefully remove the built-in print supports again (circled in red), and then insert your choice of window designs.
£ The roof has been designed to print in two pieces, which can both be printed without print supports. There are a couple of tiny built-in print supports on the corners, howvere, which should be carefully trimmed off.
£ The base section for the corner has been provided as a one-piece print for larger printers, or sliced into 3 pieces for smaller (125mm² bed) printers.
Okay, so that's the assembly guide done. It's time for some bigger pics........

£ It's getting BIG!! Each roof section is 120mm long, but actually about 150mm wide from edge to edge - so the layout starts to get big quite quickly! Temple priests will get great protection from the wind and rain.
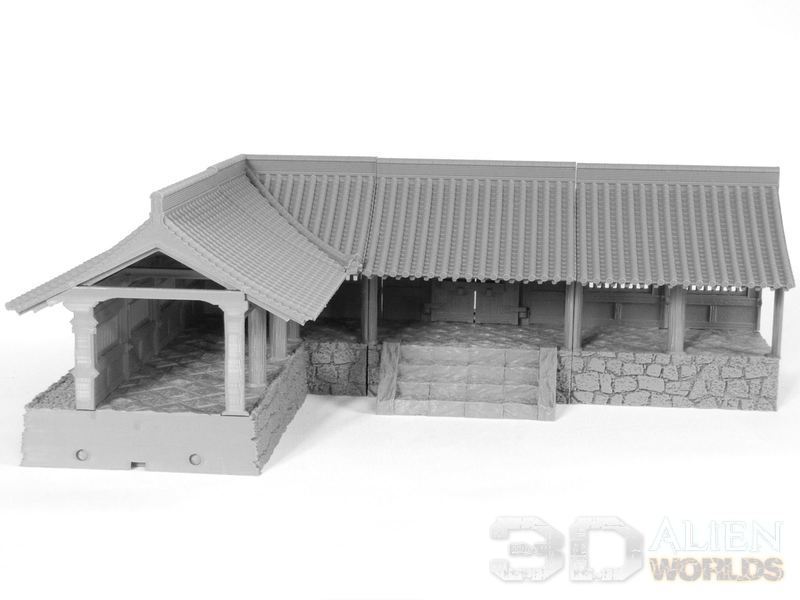
£ Of course the gentle curves on the roof sections will also allow ninja models to run along the tops, on their sneaky night missions!
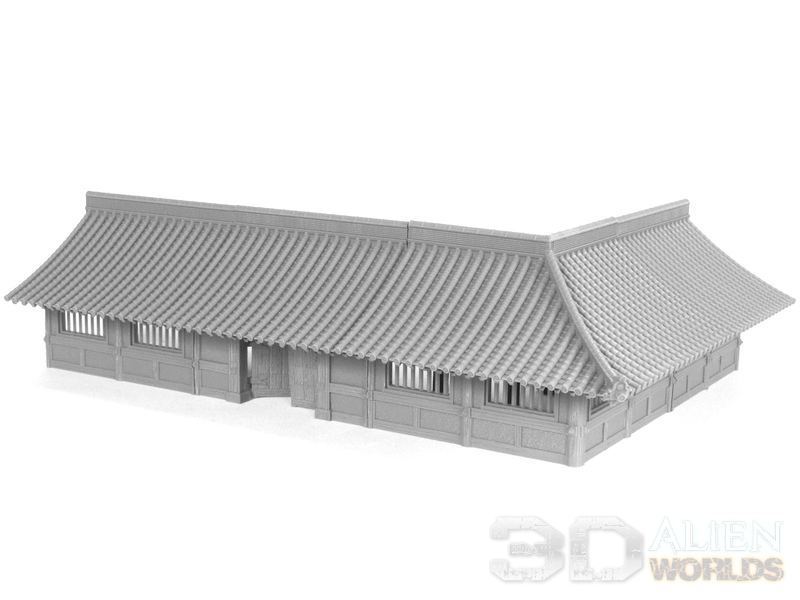
£ You can of course use these walls without the base sections, and they'll still look great! You could even use them in castle and shrine layouts.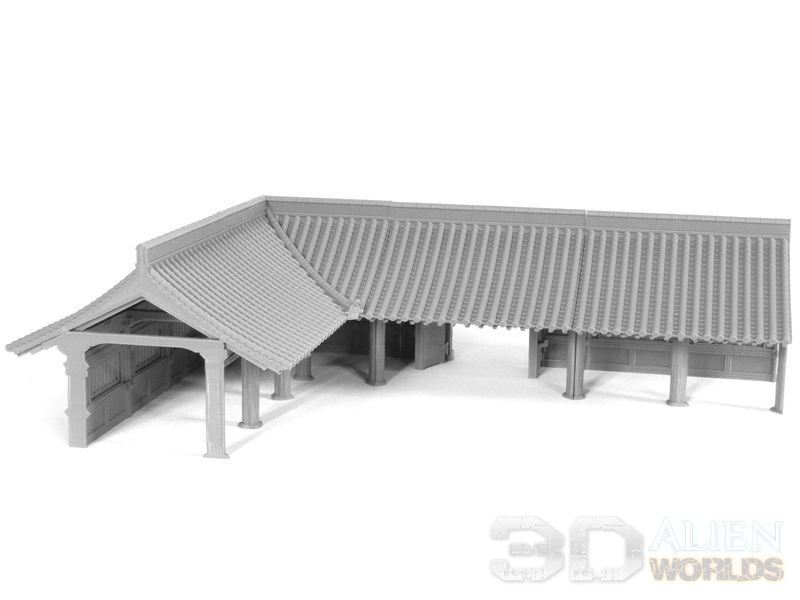
£ I'm looking forward to getting some great photos along those interior pathways, once the models are painted up! The roof beams and detailed supports should make for instagram-worthy backgrounds.
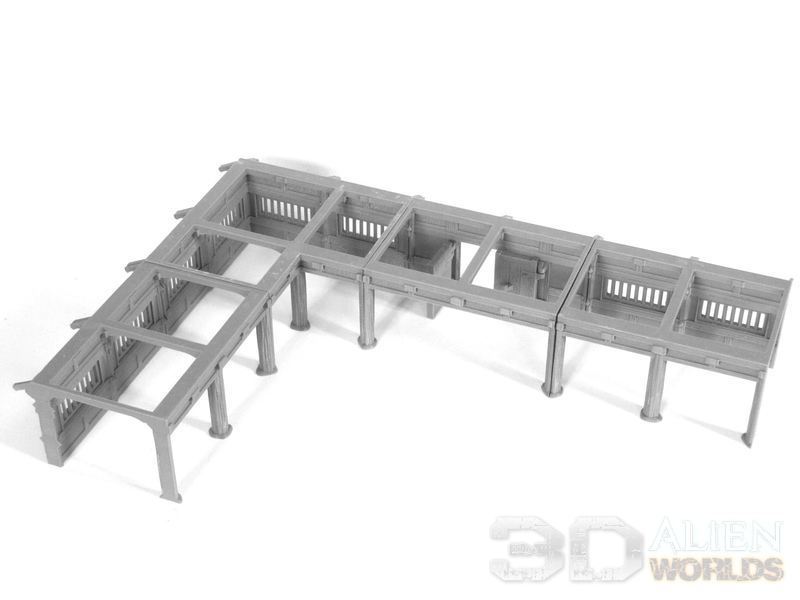
£ Without the roofs, these sections are completely playable too. It's got a more D&D feel to it, don't you think?
These models will be hitting the paint desk just as soon as I decide whether to paint them as wood or paint them red, and will be released shortly.
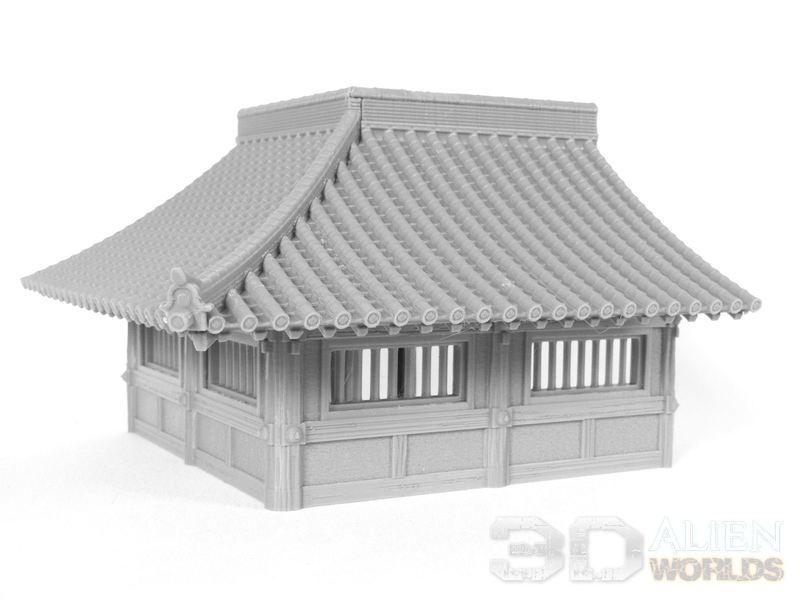
After our little detour into sci-fi terrain, it's time to get back to some more feudal Japanese terrain! Today we have some new designs to show off - a set of modular temple walls!
This eventually be part of a massive collection of temple-themed structures, so you can go mad and make an entire table styled after Sucker Punch, Kill Bill, and 47 Ronin!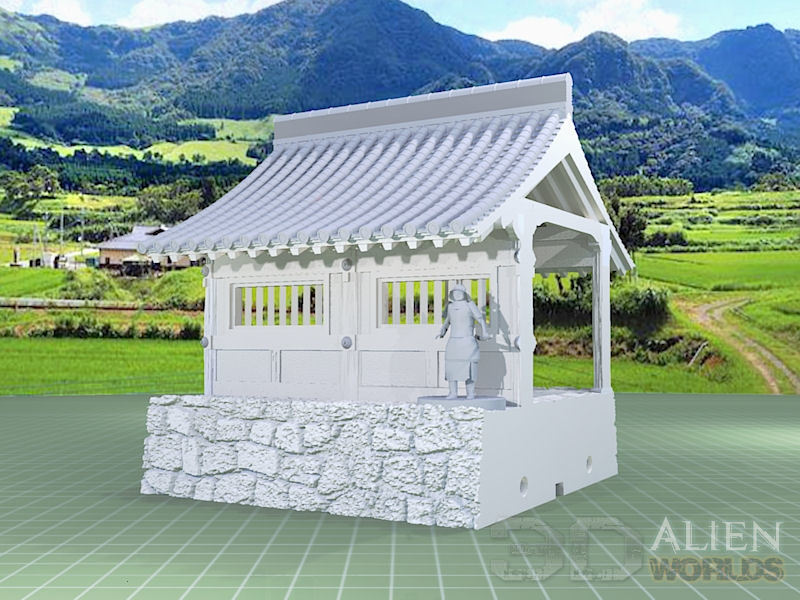
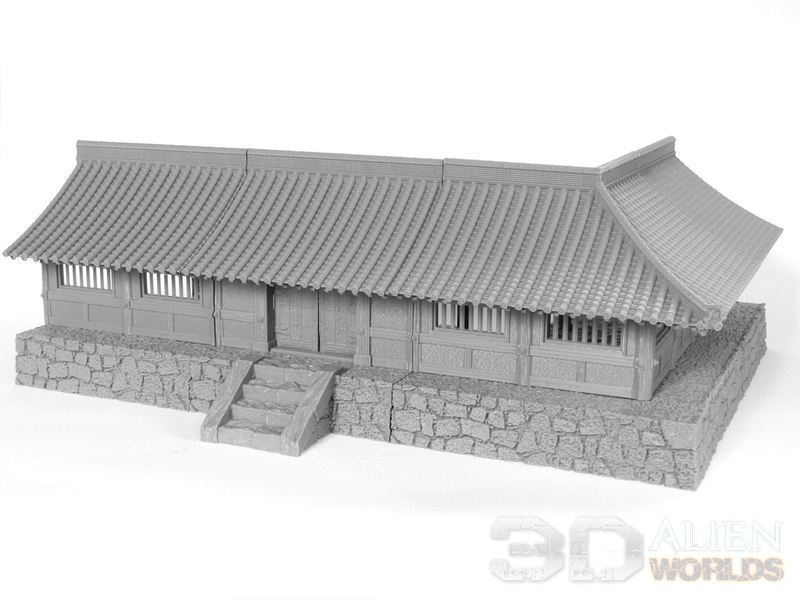
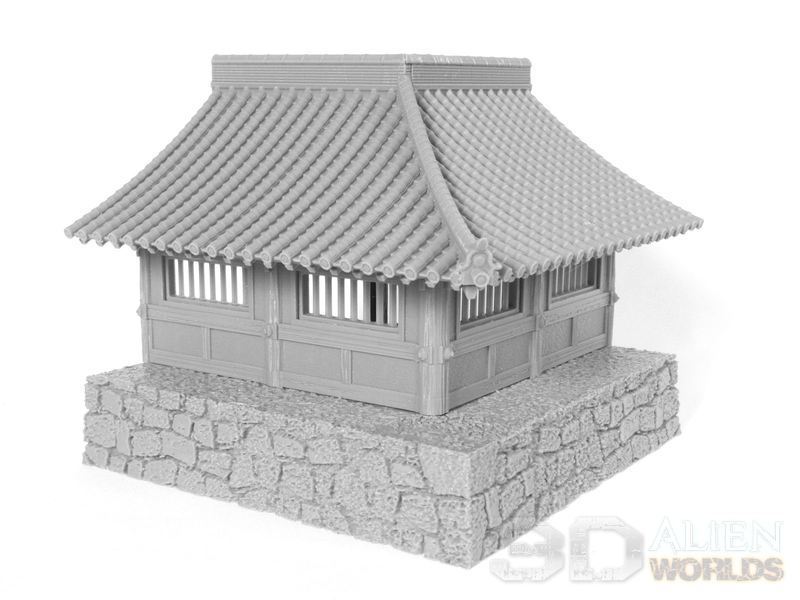
£ The basic block is this 120mm section of straight temple wall. The base section is optional, and lifts everything up by 30mm. On the exterior of the walls, you've got a narrow covered dirt path about 30mm wide....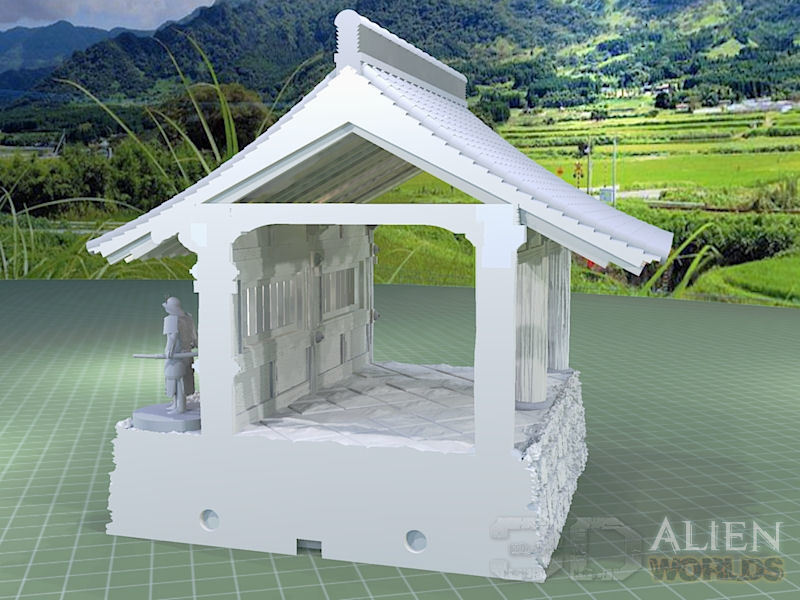
£ ... and on the other side of the wall you have a 70mm wide paved walkway, for the temple priests. The roof is gently curved (so you can stand ninja assassins on it!), and tiled with the same ornamental rooftiles as on castle buildings.
The set will contain this straight section, another straight section with a doorway and steps, and a corner section.
A large gatehouse building will be coming later, designed to fit this set.


4 Comments :
Ja
2021-03-28 (Sun) 23:02PM
These look great! The hardest part is deciding what color to go with.
2021-03-29 (Mon) 7:50AM
After deciding on the colour, the next hardest part was getting them to all fit in one photo!
Siarhei
2024-07-11 (Thu) 20:07PM
Great job.
I have a question about the characters.
Where can I purchase miniatures of the figures that you use in your designs?
2024-07-11 (Thu) 21:00PM
Thanks, Siarhei! The archer priest model is by Warlord Games, and the rest are from the Unlikely Allies box set by Grey for Now Games.
Write a comment :