3d-printable terrain for all your samurai wargaming needs


This is the 3rd time I've played this Test of Honour scenario, and every single time it's been an absolute blast. So when we got the chance to play face to face after months of virus-related hiatus, this one seemed a good one to try!
"A spy has been uncovered in your lord's household, and they have fled carrying who knows what information that your enemies would benefit from knowing. Your master has tasked you with finding the traitor and returning them, unharmed, for questioning and punishment."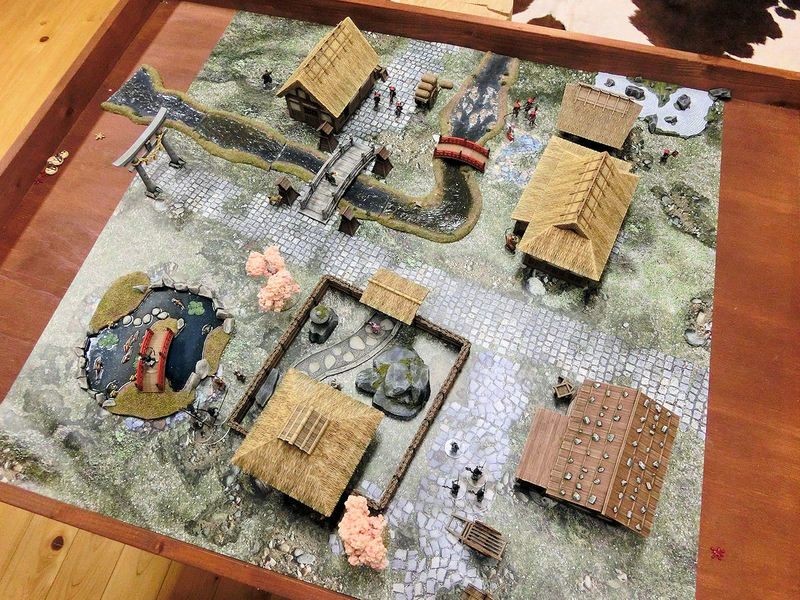
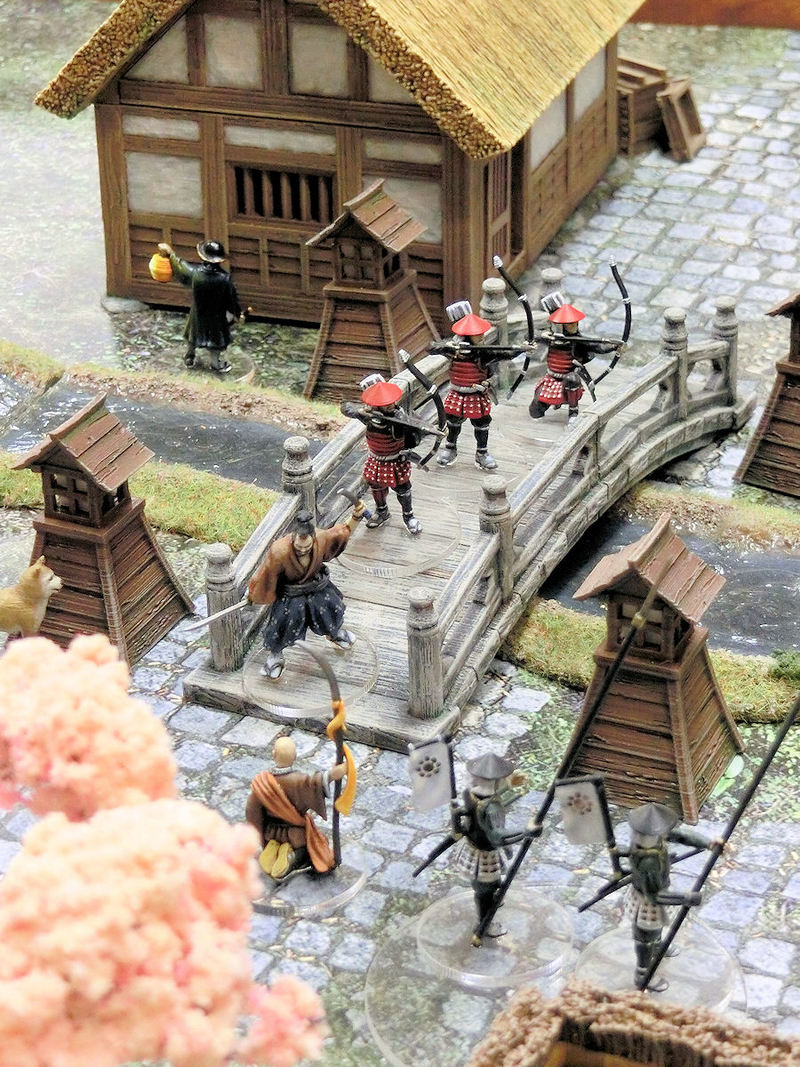
£ We chose a rural village setting for this scenario, with several farmhouse buildings, a small stream with bridges, and a teahouse. These would make great locations for the spy to conceal themselves from the enemy searches until rescue could arrive.
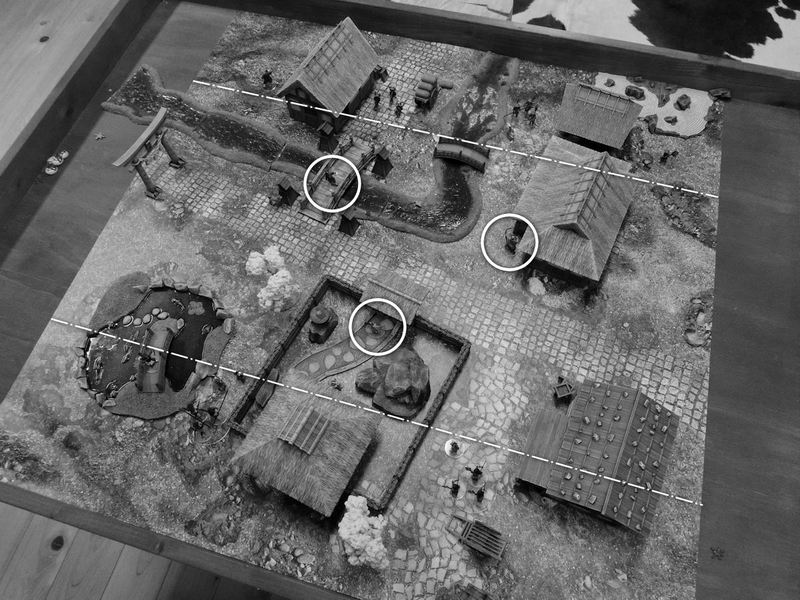
£ In this black and white photo you can see the 3 possible locations of the spy. Is the spy a simple watchman standing on the bridge (left circle), a suspicious-looking geisha outside the teahouse (centre circle) or the lowly priest standing outside the farmhouse (right circle)?
The mission for both sides is to rush towards those three locations and check the identities of those three civilians. The first player to do so and successfully pass a "Test of Wits" will identify the spy and will then have to escort them back off their own table edge to win the game.
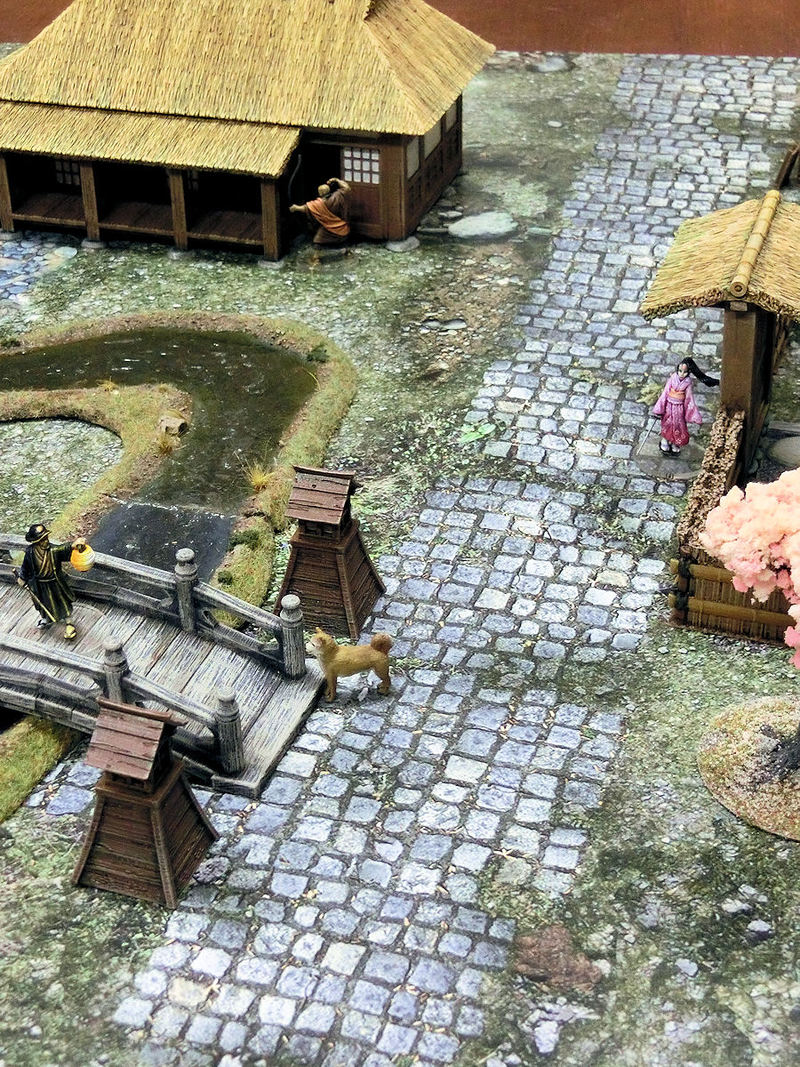
£ Here are our three suspicious-looking villagers, and of course Pochi the dog. Who could the spy be, do you think?

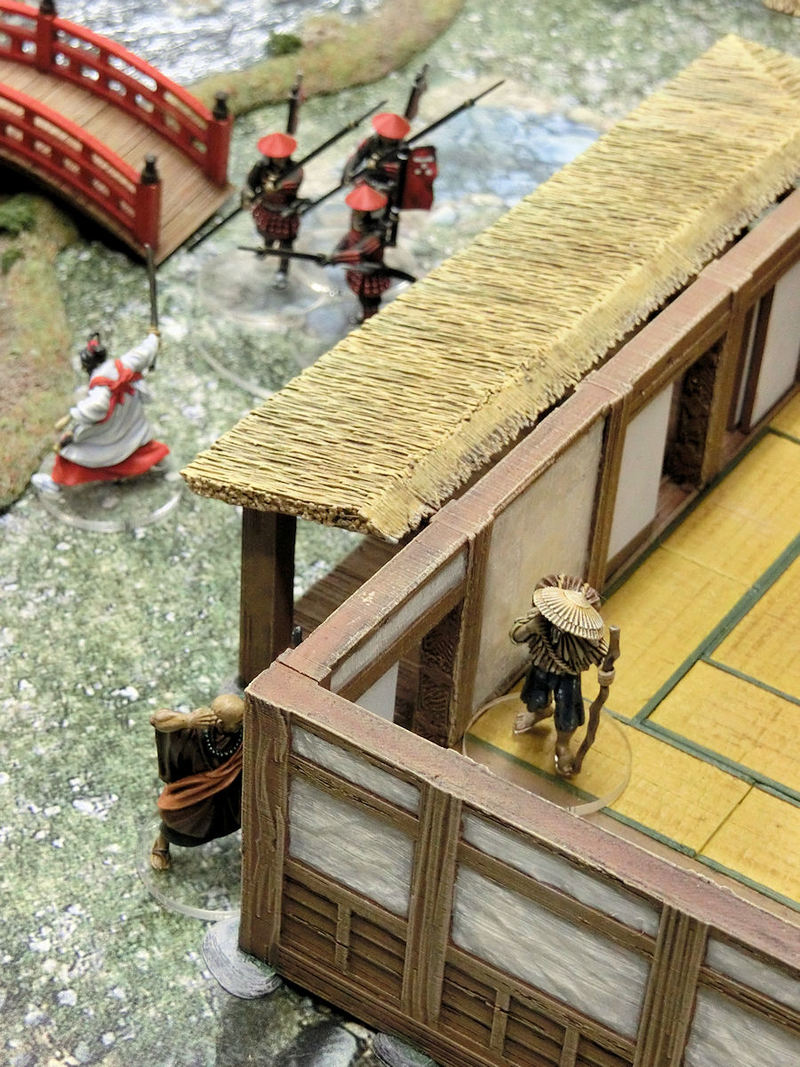
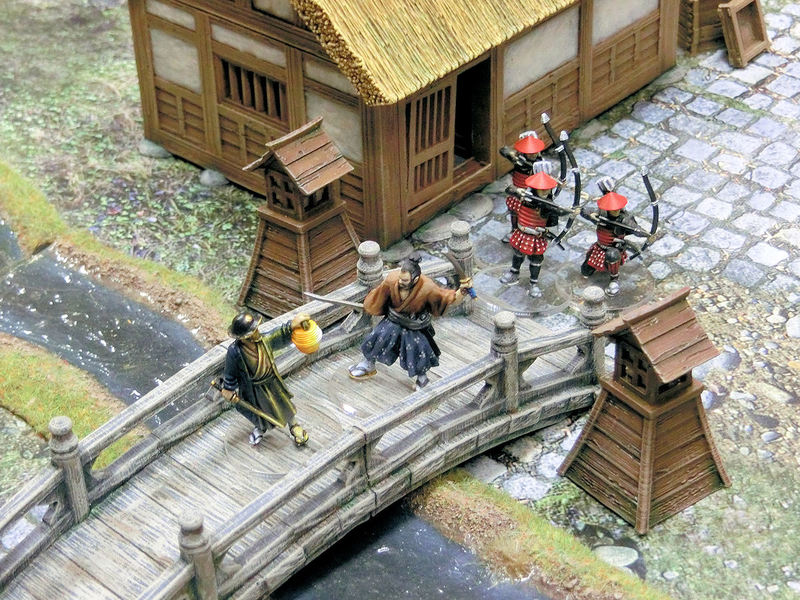
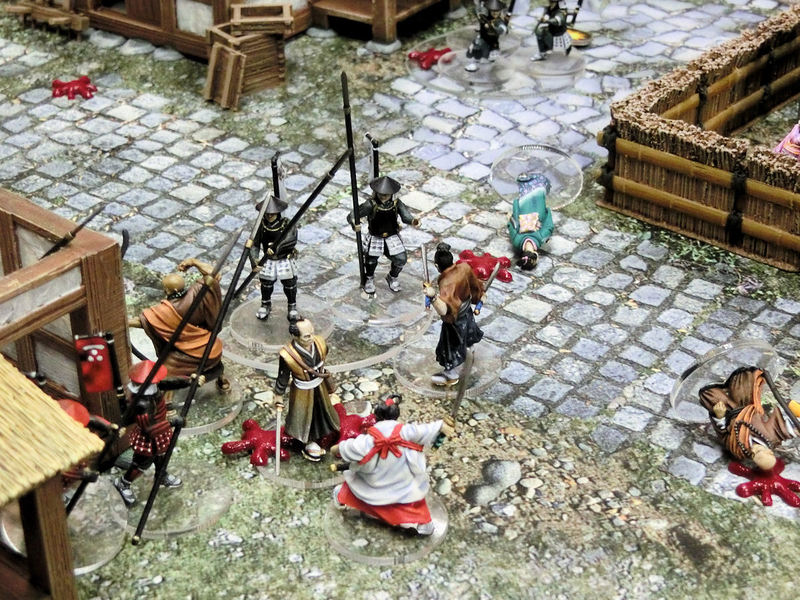
£ The mission started with the white-uniformed Hosokawa musketmen quickly climbing up onto the low roof of a farmhouse. They opened fire to try and take down Lady Reiko (by the bridge) as she dashed forward, but they couldn't hit the fast-moving samurai.
The lone Mori musketman (in red, top right of the photo) returned fire and managed to injure one of the enemy gunners on the roof. First blood to Clan Mori! We also decided to roll to see if they stayed on the roof, but it seems they lost their footing and fell to the ground below. Their Lord would not be pleased with their incompetence.
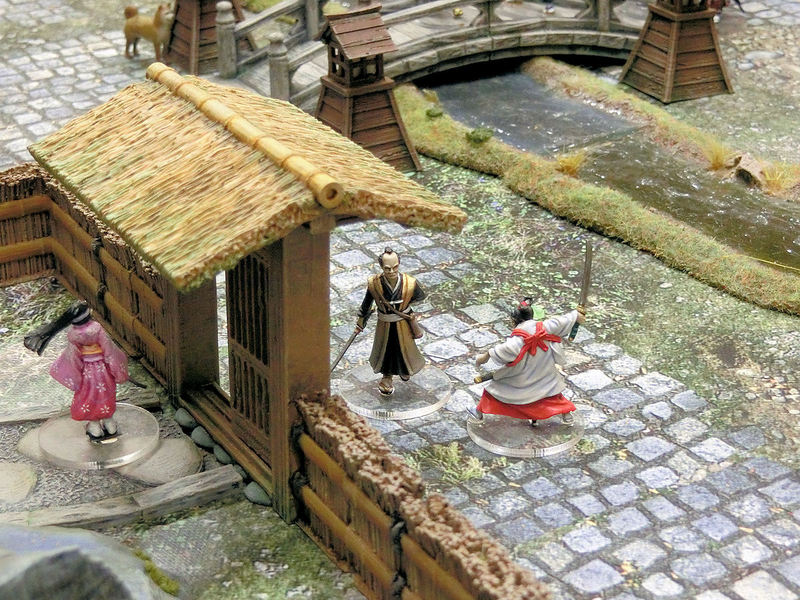
£ The wise old man, working in the employ of Lady Reiko, proved himself wise enough to sneak through the large farmhouse where he would be safe from flying musketballs! He sidled closer to the priest and thought about the best way to check if he was the spy or not.
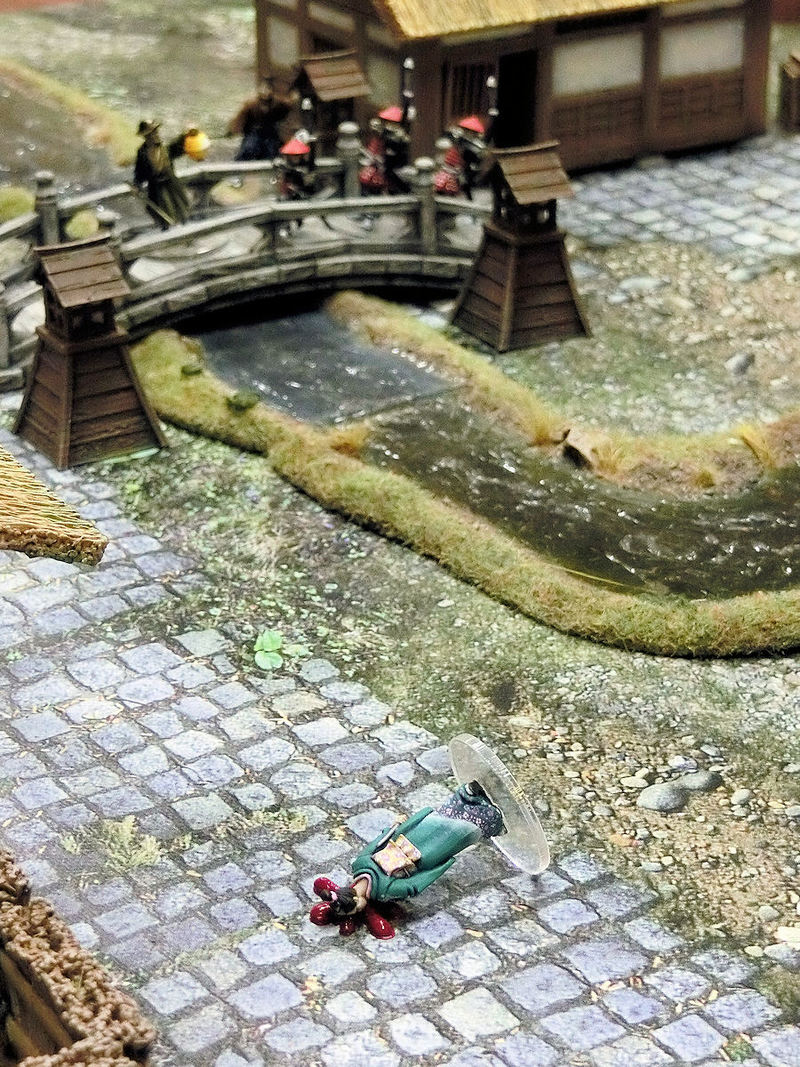
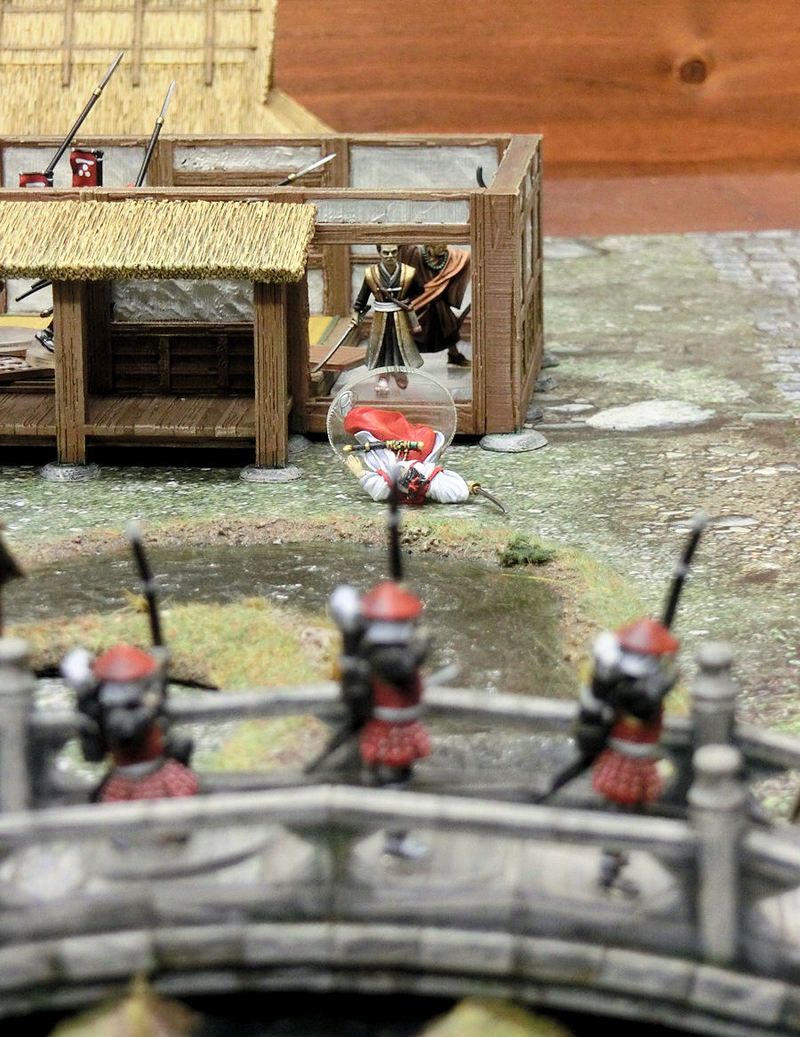
£ Tomoko the geisha, herself once a deadly spy in the pay of evil Lord Nobu, also attempted to rush forward towards the priest in an effort to prevent the enemy's wise old man from checking his identity. Alas, in her headlong dash, she left herself open to enemy bowfire from the bridge, and they scored a lucky hit which pierced her beautiful kimono and left her lying facedown in a pool of blood. First kill goes to the red Mori clan!
£ The lord of the Hosokawa clan forces, cruel Lord Nobu, saw the slaying of his cohort Tomoko and decided to rush forward to interrogate the geisha at the teahouse himself. However, he was quickly interrupted by the enemy commander Lady Reiko, as she blocked his efforts to identify the spy. Swords flashed, but both samurai were expert fighters and easily evaded each other's attacks. A stalemate for now!
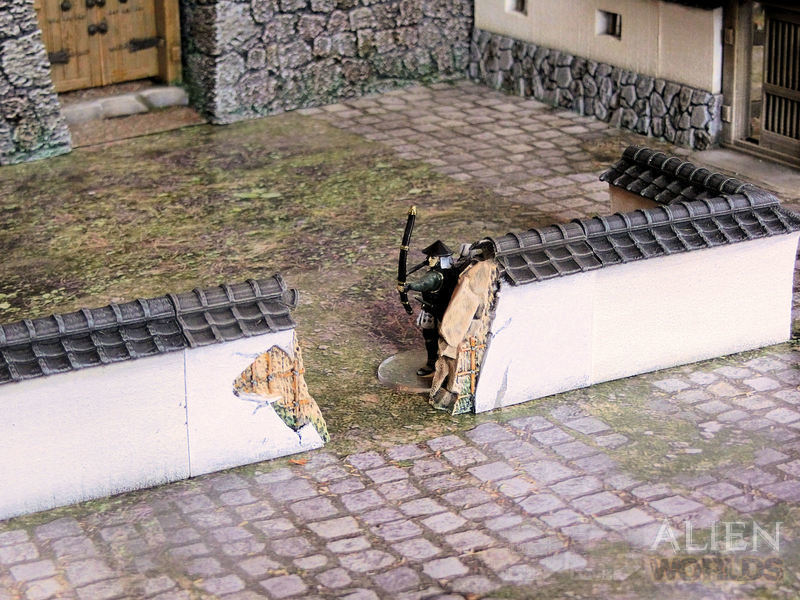
£ Lady Reiko's lieutenant, her faithful ronin, advanced past the bowmen and prepared to interrogate the third potential spy - the watchman on the bridge.
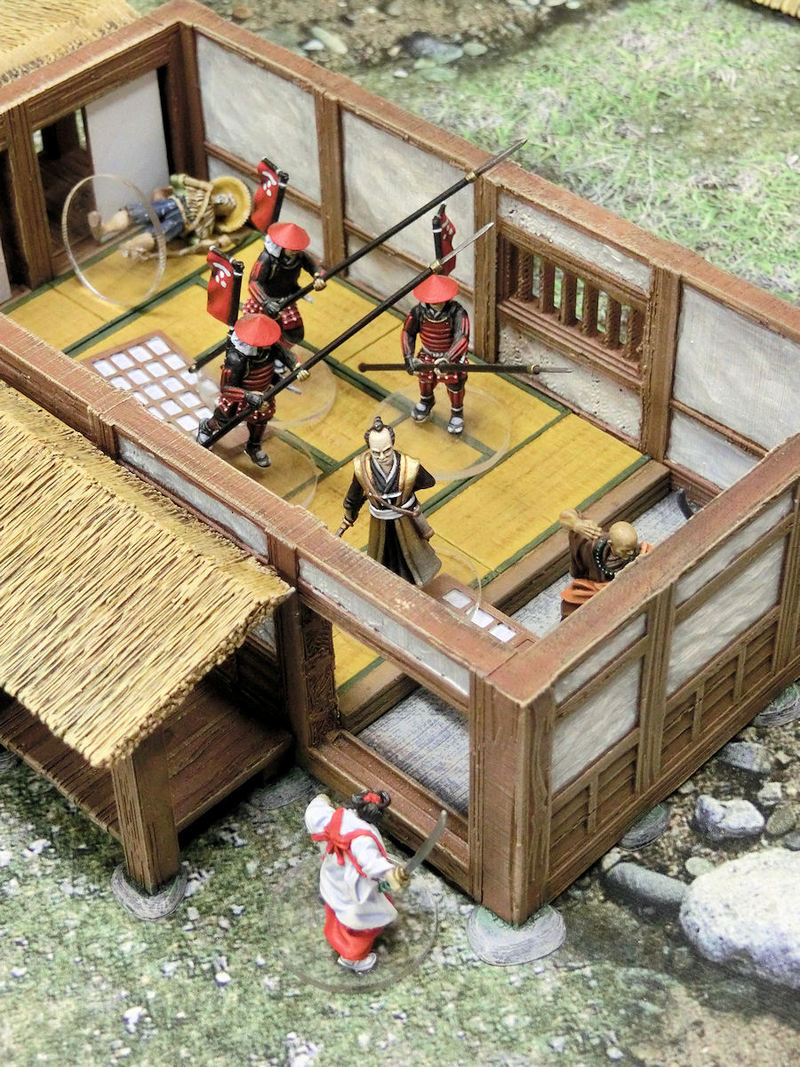
£ The wise old man had sidled up to the priest by the farmhouse, and was smart enough to instantly recognise him as the spy! Now he just had to escort him safely off the battlefield!
However, this was easier said than done because the enemy commander, Lord Nobu, had also been watching the priest out of the corner of his eye. He quickly sidestepped out of his fight with Lady Reiko, and rushed across to the farmhouse in pursuit of the wise old man and the priestly spy. As the wise old man attempted to usher the spy out of the back of the farmhouse, Lord Nobu rushed through the doorway and wasted no time in running his sword straight through the old man's back!
The tables had turned, and the enemy spy was now in Lord Nobu's hands!
£ The spy had been identified, so there was no reason to interrogate any more of the townspeople. Instead, Lord Reiko's ronin follower slowly advanced across the bridge towards the waiting enemy forces. Both were hesitant to engage, as they knew perhaps their support would be needed elsewhere to regain the spy.
£ Lady Reiko had seen the cowardly murder of the wise old man, and ordered her spearmen to trap the enemy lord inside the farmhouse while she attacked from the front. As she kicked down the front door to attack Lord Nobu, her spearmen followers simultaneously smashed their way inside behind him.
£ Once again swords flashed out, and this time Lord Nobu managed to push Lady Reiko backwards out of the farmhouse, but she stumbled over the doorway and fell to the ground.
Her loyal archers had been watching the fight from the bridge and were horrified to see their commander in such danger, and quickly took the opportunity to open fire on Lord Nobu. As Lady Reiko scrambled backwards to safety, arrows flew over her and one struck the Lord Nobu in the shoulder! She grinned as she shouted her thanks for their quick reactions and sharp shooting!
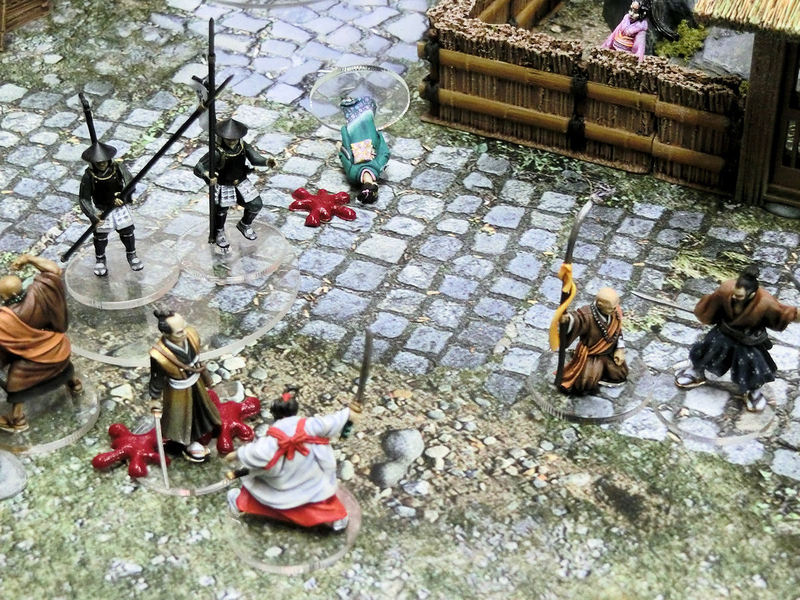
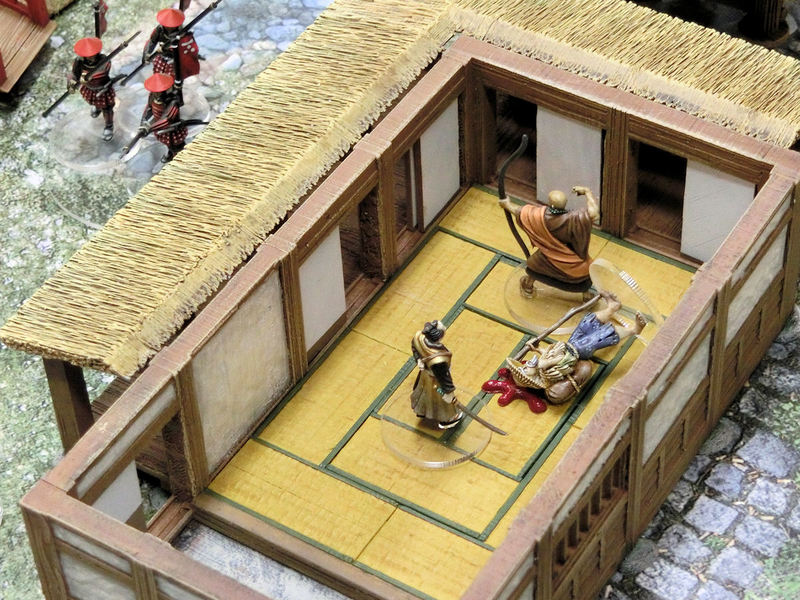
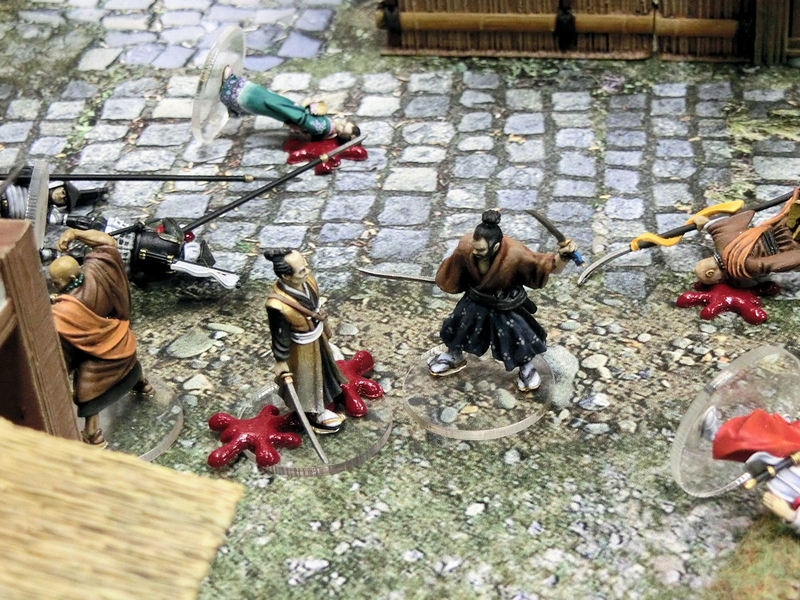
£ Lord Nobu, bleeding from his shoulder, dragged the captured spy out of the farmhouse and looked around for the closest route to safety. His white-uniformed spearmen rushed to help him, as Lady Reiko engaged him from the front in an effort to stop him escaping. Her faithful ronin follower charged the kneeling enemy priest as they both dashed to lend support to their commanders' deadly duel.
£ A single blow was enough to take the enemy priest out of the fight, and the ronin quickly charged onwards into the enemy spearmen. His twin blades quickly cut down one of the spearmen, and pushed them back away from the fight. Would he be in time to help his Lady Reiko in her fight with Lord Nobu?
£ Lord Nobu fought with all the skill of his many years, and again knocked down Lady Reiko. Just as he lunged fowards to finish her off once and for all, the ronin bravely jumped between them in a last ditch effort to save his mistress.
With a snarl, Lord Nobu's blade struck against that of the ronin, and then his eyes went wide as he looked down ....
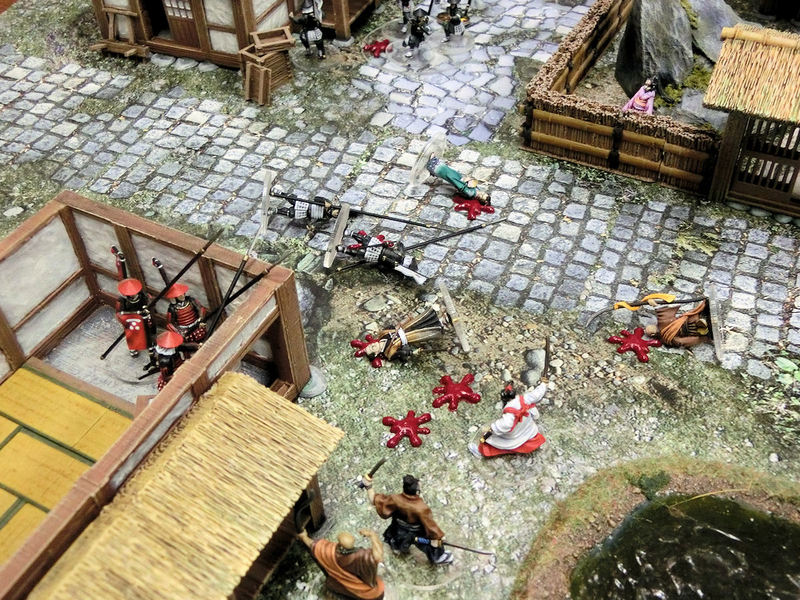
£ .... to see that the ronin's second sword was lodged firmly in Lord Nobu's side!
As he slumped to the ground, Lord Nobu's thoughts were not of the escaping spy, but of the indignity of being bested by a penniless ronin. He'd never live it down.... oh, wait.....
So there we have it! The forces of Lady Reiko were victorious in rescuing their spy, and perhaps there was some salvation for the lowly ronin warrior after all.
Hot on the heels of yesterday's Ruined Castle Wall release, we have another ruined model for you to take a look at! The Ruined Stone Wall section is officially released today!

£ Tora-san the old beggar does a lot of wandering. Today he's looking for somewhere to spend the night, and can't help but peek inside this broken section of wall for somewhere cosy to rest his head.
The ruined stone wall is a 4-part model, with 2 sections of highly detailed upper walls, and 2 base sections. Together they make a perfect 120mm length of broken wall to fit the Stone Walls set.
£ Tora-san thinks this might be a safe place to spend the night, as the rubble is covered in broken tiles which haven't been tidied in a long time. Before long the bamboo and twine in the walls will probably fall apart, too!
£ If you want a lower wall, you can also remove the stone bases and make a man-high gap to hide behind.
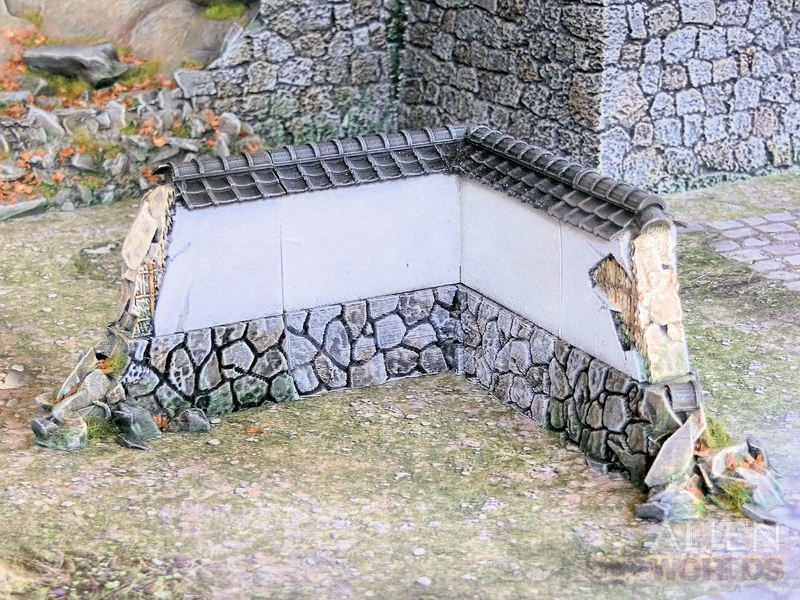
£ Here's an example of the ruined wall pieces used on the ends of a corner section from the Stone Walls set. A great little place to take cover!
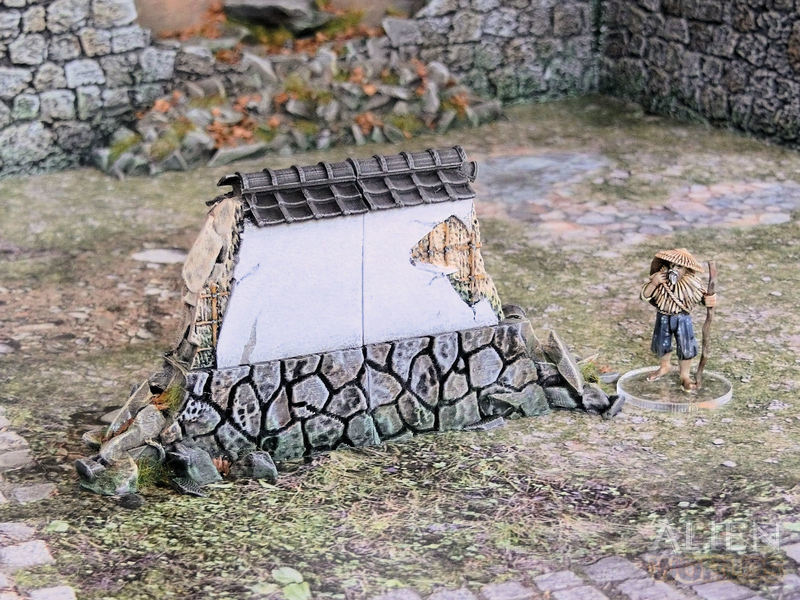
£ Or you could simply use the ruined wall pieces on their own, to make a small section of long-abandoned wall. Tora-san the beggar is not too impressed with this one - looks a bit dangerous!
The Ruined Stone Wall section is available for download now:
The paint has been flying fast over some new terrain models for our samurai range, and the Ruined Castle Wall section is now available for download! The second set, a Ruined Stone Wall section, will be previewed later this week.
£ Here's the painted terrain piece, with some suitably cinematic models!
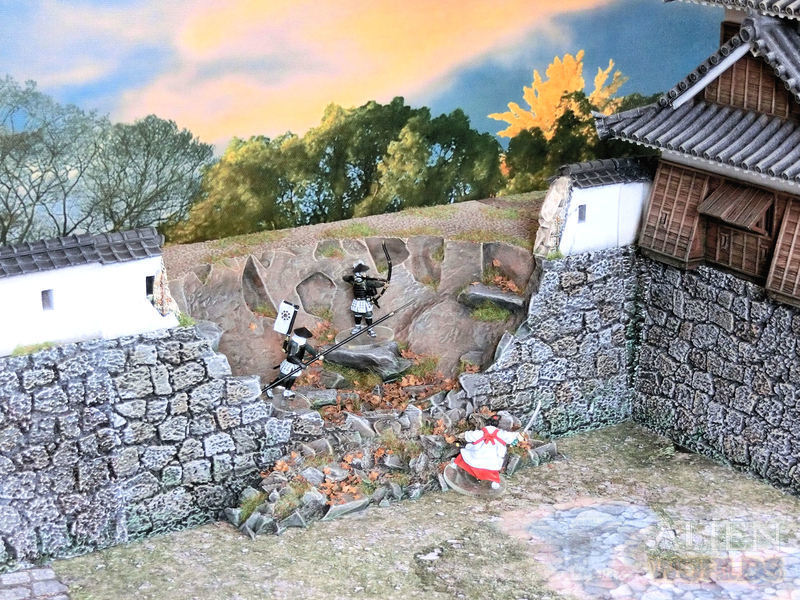
Reiko rushes to cut her way into the castle grounds, by quickly scaling a long-collapsed gap in the walls. The defenders have mere moments to react....
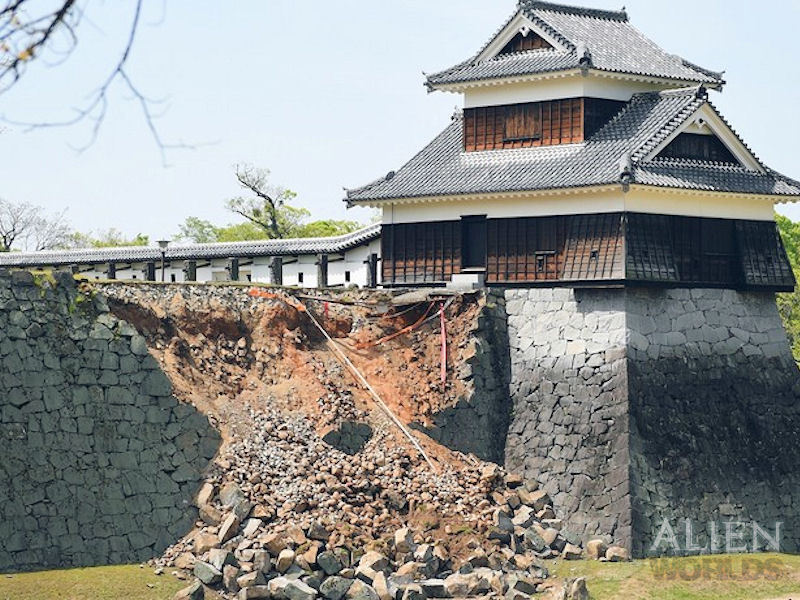
£ This is the real-life version of the scene, from a wall section at Kumamoto Castle, hit by a serious earthquake in 2016.
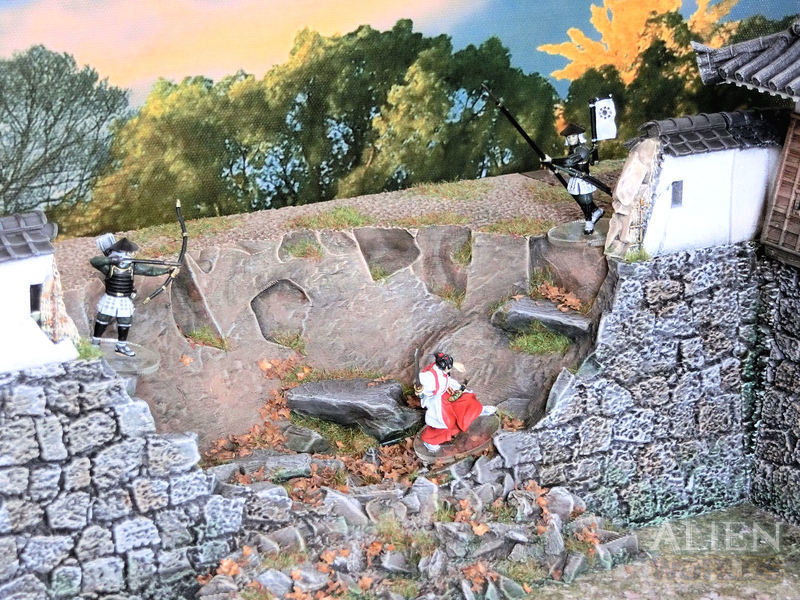
£ The walls were painted to match the existing sections, with simple drybrushes and washes bringing out the sculpted texture details. In this photo you can see Reiko scrambling across a patches of old leaves ('Leaf Litter' by Secret Weapon) amongst the rubble of the wall, while the defenders try to use their elevated position to their advantage.
The ruined section features several flat surfaces for you to place models, and get the best from your games!
£ The ruined castle wall section is available to download from today!
Following on from this week's reveal of the upcoming Ruined Castle Wall section, today we have another damaged terrain piece to announce - the Ruined Stone Wall!
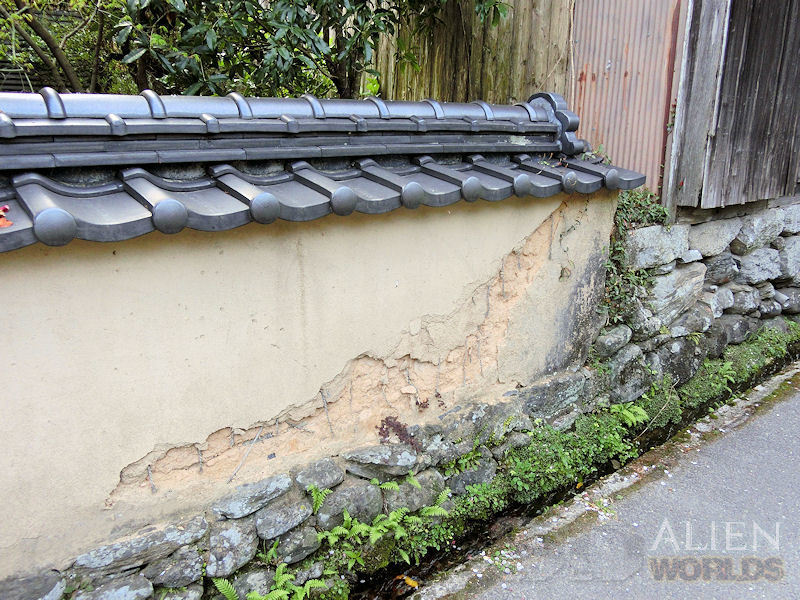
£ This was the inspiration for the ruined wall section, which I photographed a while back on one of my little wanderings through old Japanese villages. The construction is quite interesting - a rough frame of bamboo is held together with twine (you can see this poking out of the damaged parts), and then the wall's core is built up with rocks and dried mud. Finally, the outer facing is plastered on, and this is the part that tends to fall off first, due to age, bumps or earthquakes.
So the goal was to incorporate some of those details into this new ruined section, to give your tables some extra realism. Here's how it looks....

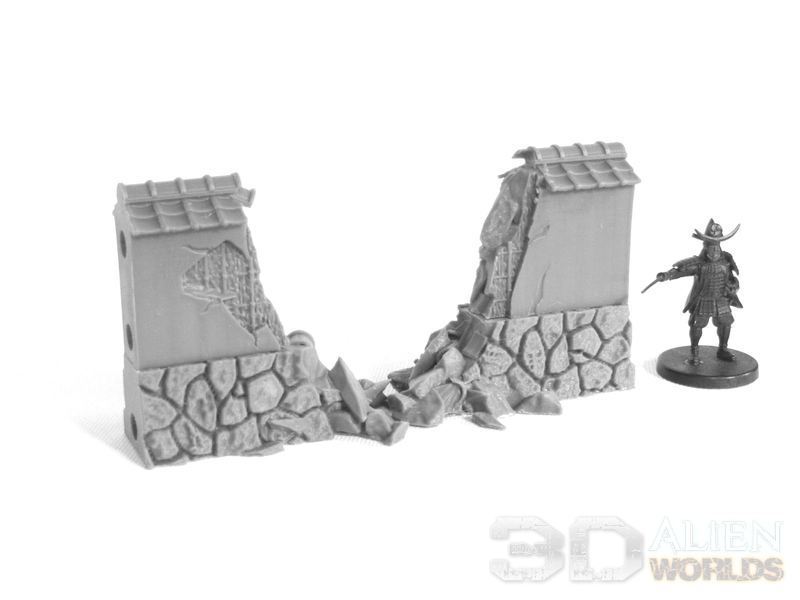
£ This ruined section comes in 4 parts, and simply replaces an undamaged 120mm section of stone wall from the existing set.

£ If you look closely you should be able to make out the bamboo and twine frame inside the damaged wall, and there are also some tiles from the roof scattered in the broken rocks and rubble at the base.
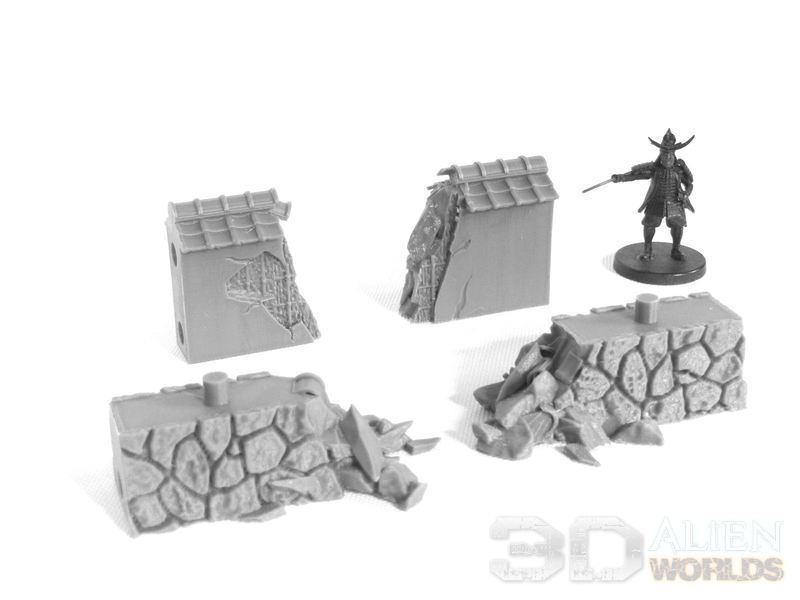
£ Here's a look at how the 4 parts separate. The upper walls have holes for magnets in the ends, and also holes in the bottom to fit onto the stone bases.
They can all be printed without supports, and I printed these at 0.1mm layers since they are pretty small and fast to make.
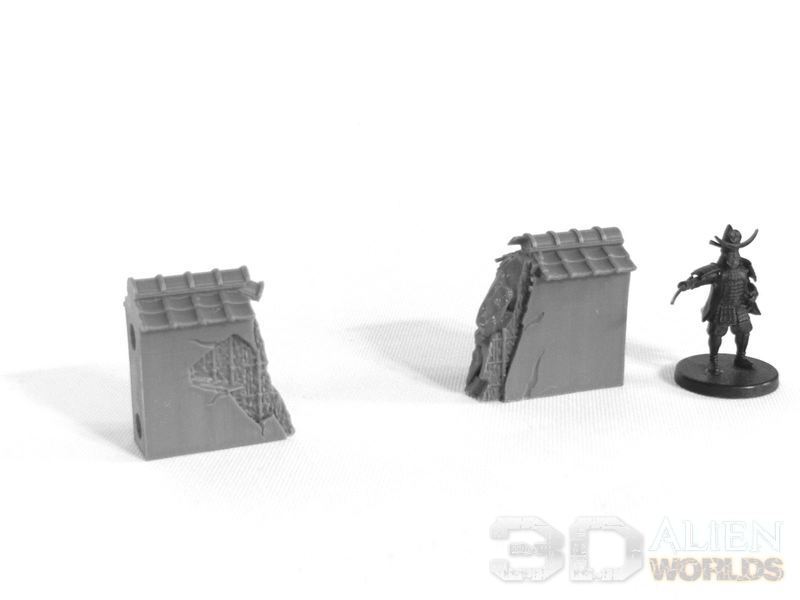
£ If you want, you can also use the upper walls without the stone bases, for lower height walls.
These ruined stone walls are currently on the paint desk along with the ruined castle walls, and will be released very shortly. Watch this space!
There was such a great response to the Temple Walls set released at the weekend, that I wanted to push on quickly to bring out 2 little additions to the samurai collection.
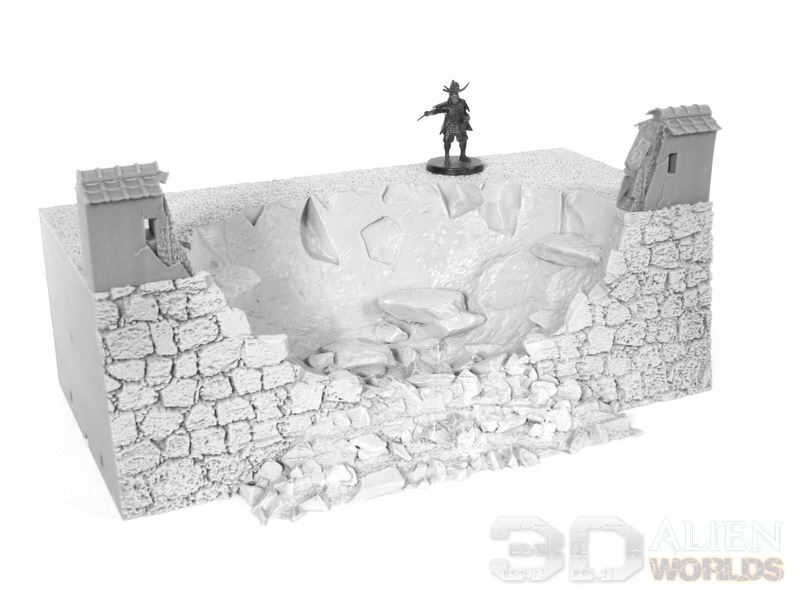
The first of these new releases will be a ruined castle wall section, to fit into the existing castle wall pieces.
£ Here's a photo of the real-life inspiration for the ruined section - the famous Kumamoto castle, after its walls collapsed during the big 2016 earthquake.

£ Our castle walls are slightly smaller in scale, but this ruined section can slot neatly into a double-width section in your castle wall layout. You could either model it as a quake-collapsed section, or possibly a breach in the walls caused by battle damage or an explosion!

£ You can also choose to model it without the top wall pieces, if you prefer.

£ The collapsed section has been modelled with playability in mind, with a slightly flattened bottom and some handy 25mm-base-sized rocks at variousl points, rather than a solid slope all the way up.

£ Here's a close-up of the wall tops. They feature the arrow slits from the undamaged walls, with cracks, broken tiles and missing plaster sections on the outside, plus glimpses of the bamboo pieces used to hold the walls together. A whole lot of authentic details there!


2 Comments :
AngusH
2021-05-10 (Mon) 20:44PM
Great write up and kick-ass looking table! Been diligently printing the last 2 weeks and hoping to end up with something similar! Did you craft the modular river, or 3D printed?
2021-05-10 (Mon) 21:02PM
The river was a resin one bought years ago. There's a pretty good 3d printing set on Thingiverse, I think.
Write a comment :