3d-printable terrain for all your samurai wargaming needs


As promised, we have a little mini-release for you today! For the ninja fans amongst you, here are some cool little rooftop-themed bases.....
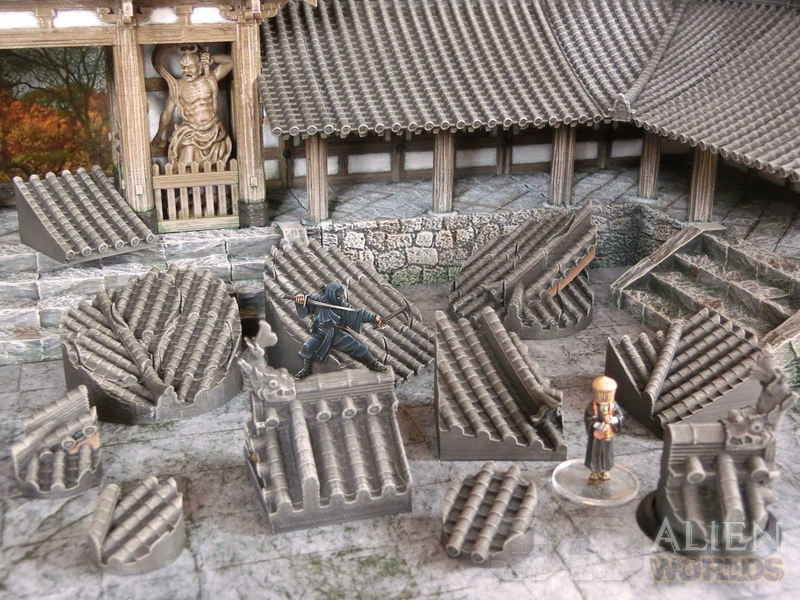
£ Yes, in this picture you have to wonder exactly who the ninja is, right? Is it the flashy git standing on the rooftop next to the dragon fish, or is it the musician monk standing innocently nearby?

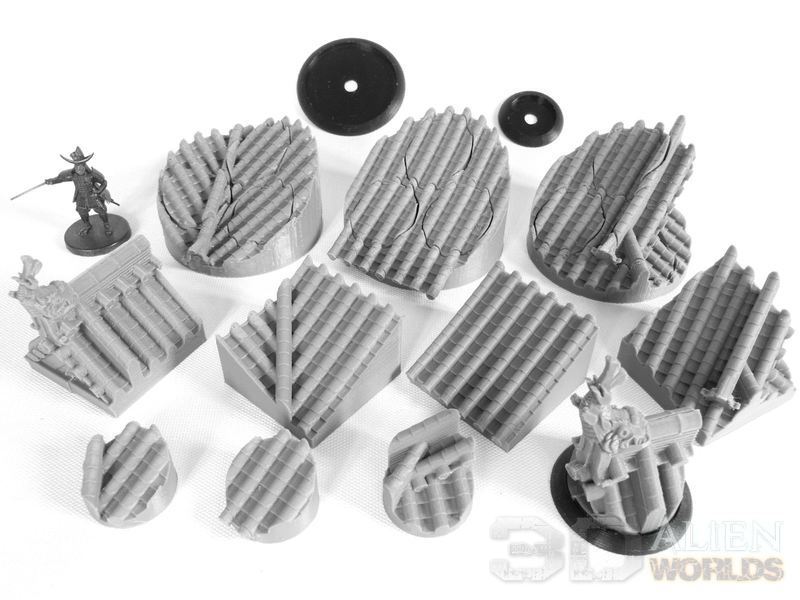
£ There's a great variety of square and rounds bases, in 3 different sizes: 25mm, 40mm and 60mm (group) bases. There are several designs for each size, so your ninja models can have a wide range of action poses!
The Ninja Rooftop Bases are available for download from today!
An upcoming mini-release to show you today ... a set of rooftop bases, designed for ninja assassins!
Have you ever wanted to show just how awesome ninja warriors can be? Why base them on boring old grass, when you can have them jumping across the rooftops of old Japan?!

£ This is a set of rooftop bases, in various sizes to suit a variety of games and miniatures. The rooftops themselves are taken from our temple and castle models, and feature authentic and highly detailed roof designs.

£ Let's start with the largest of the bases. These three designs are 60mm group bases, with three 25mm bases embedded in each. These can be removed during play as a unit takes casualties, and is specifically designed for Test of Honour players.
The middle design, by the way, is probably the only base for which you might want to consider print supports. All the other designs should print fine without supports.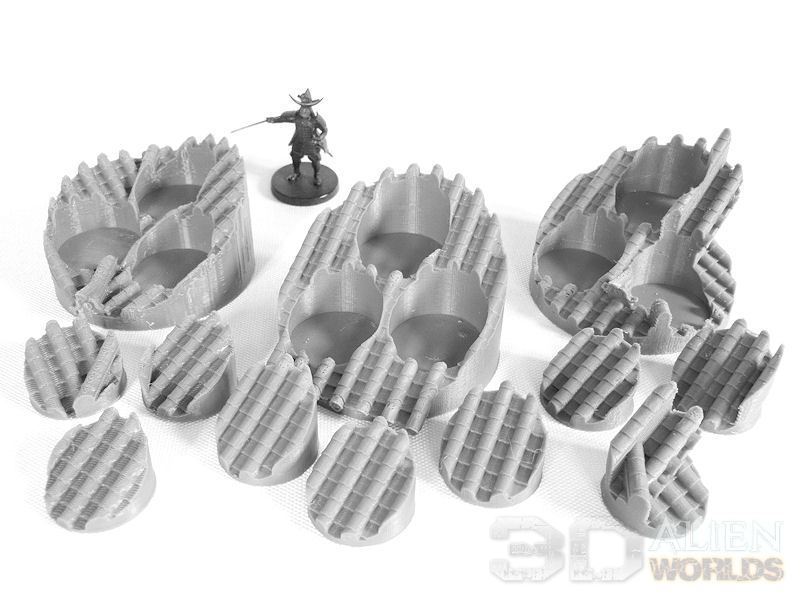
£ The 25mm bases can, of course, be used separately for individual miniatures.
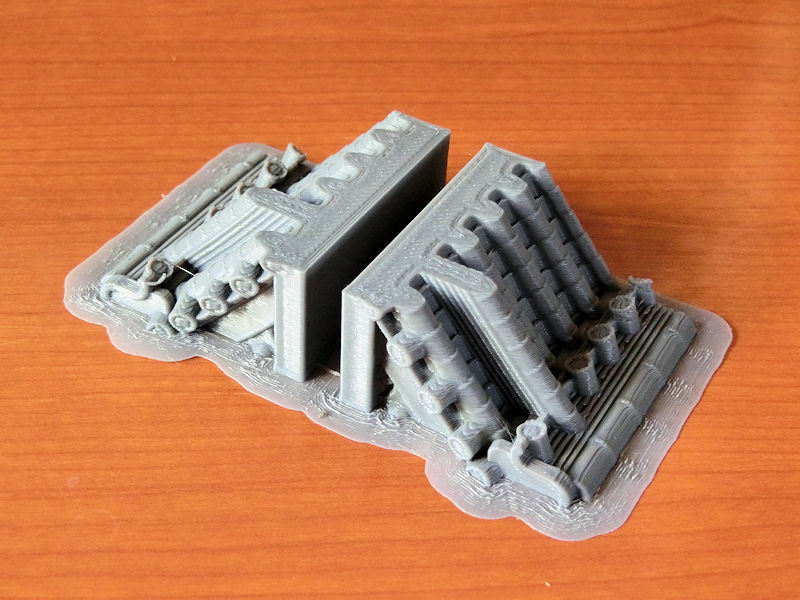
£ The medium sized prints are 40mm bases, with 4 square designs and 4 round designs included. The first design is perhaps the most complicated, and requires you to print each half flat to the print bed.
The photo above shows a 40mm square base printed at 0.1mm layers, prior to assembly.

£ The first design (on the left) can also be fitted with an optional dragon fish sculpture, and is perfect for your hero models to pose atop.
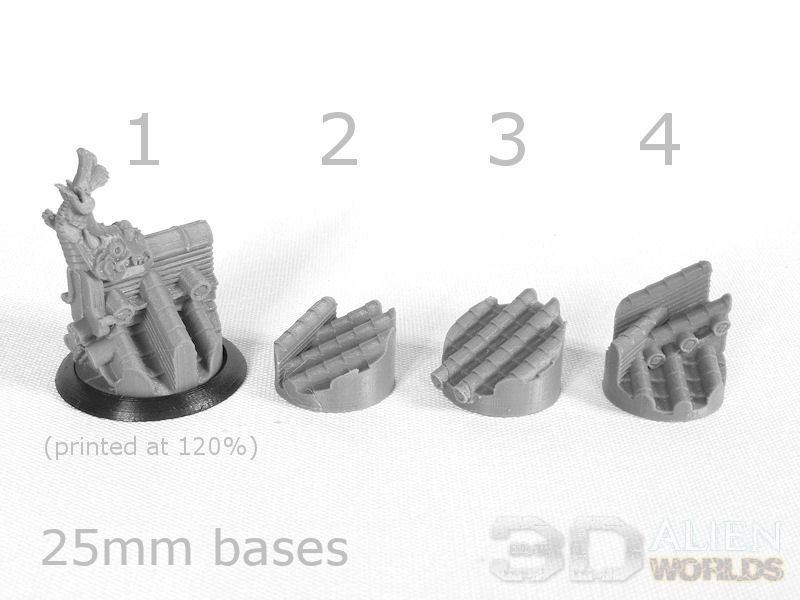
£ Lastly, we have the smallest set of bases - four round 25mm bases and four square 25mm bases. If you add these four round bases to the nine from the group bases, you actually have 13 round bases to choose from.
In the photo above, you can see the first design (on the left, with the dragonfish) has been printed at 120% scale, and fitted into a 40mm round lip base - this is designed for Bushido players, and you can fit a variety of the round designs into the 30mm, 40mm and 50mm lip bases, by tweaking the scale:
* For 30mm round lip bases, resize the round 25mm base by 82% to fit inside.
* For 40mm round lip bases, resize the round 25mm base by 120%, or the 40mm base by 76% to fit inside.
* For 50mm round lip bases, resize the round 40mm base by 103% to fit inside.
These rooftop bases will be hitting the paintdesk today, and should be ready for release by the weekend!
Apologies for the gap in blog posts - I've been busy painting houses, but not at 28mm scale - just an actual house! Painted it blood red, too! haha
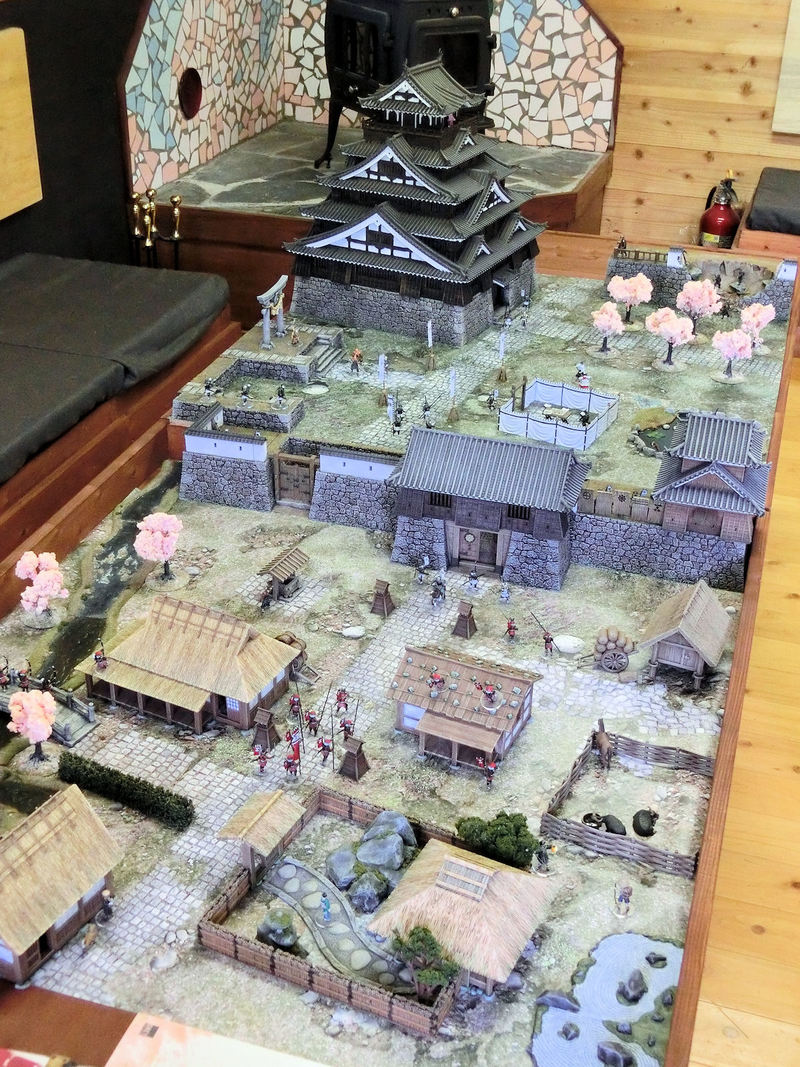
Today I thought you might like to see some photos of a recent gaming table we played over last month! Although the big castle was finished last winter, it's taken 6 months before we've actually had a chance to play over it! So it seemed worth putting together a double-size layout, and going MAD with the terrain.....
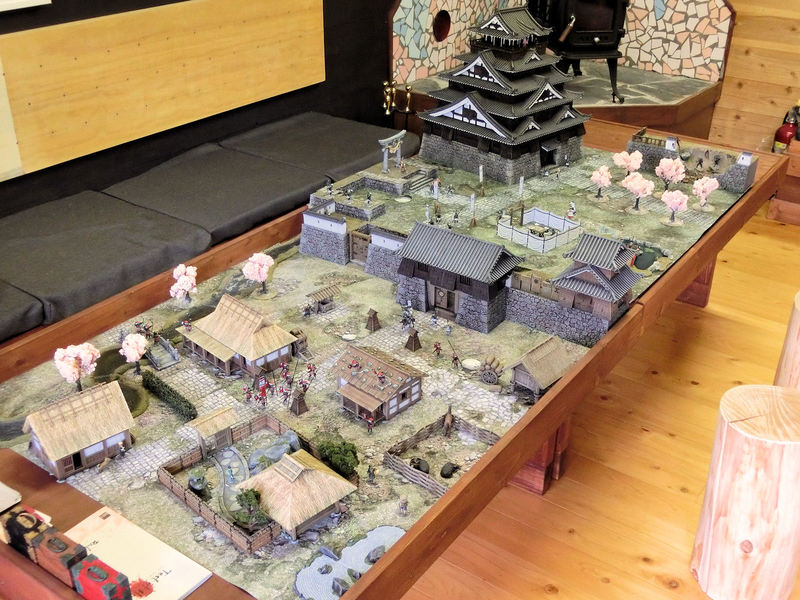
£ This was the sight that greeted my guest players! Some of them had never seen a real gaming table before, and their reaction was awesome!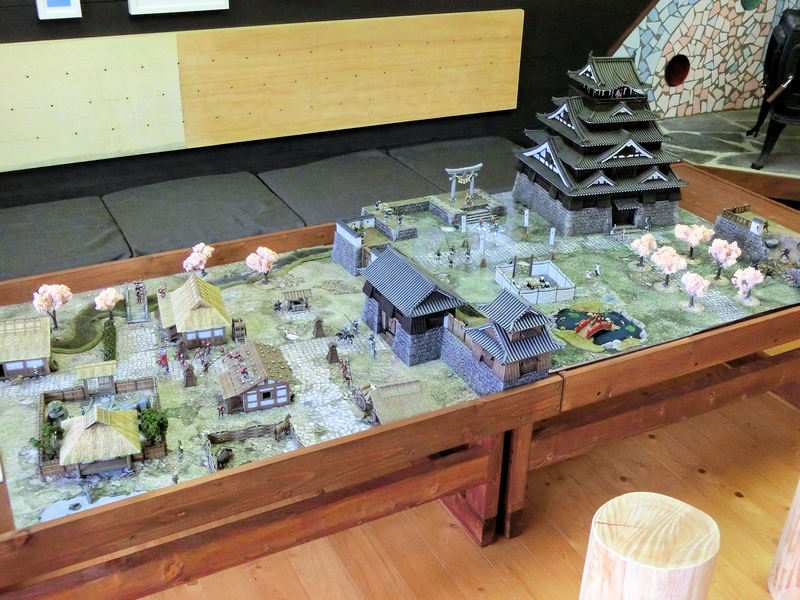
£ This is two 3x3 mats placed together, on two separate levels.
£ Such a great view, looking up through the little town to the castle at the top.
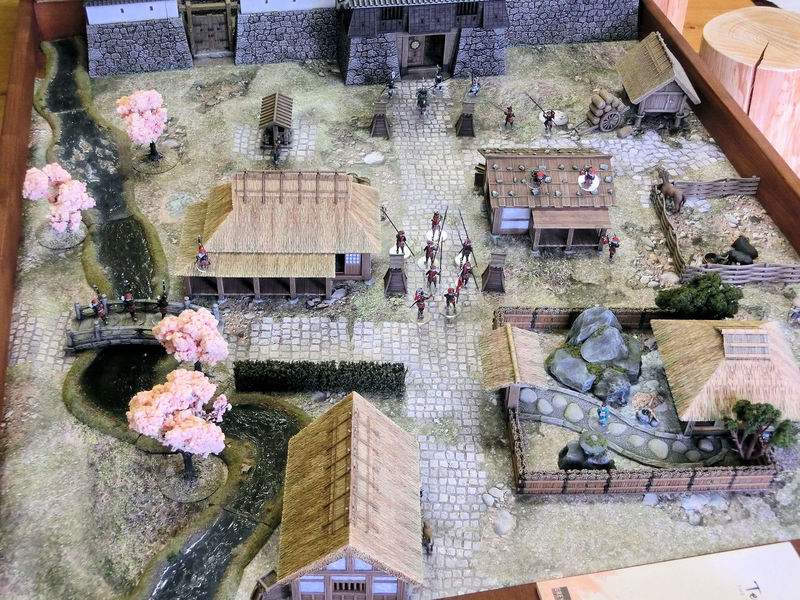
£ This is the lower half of the table - the village outside the castle gates.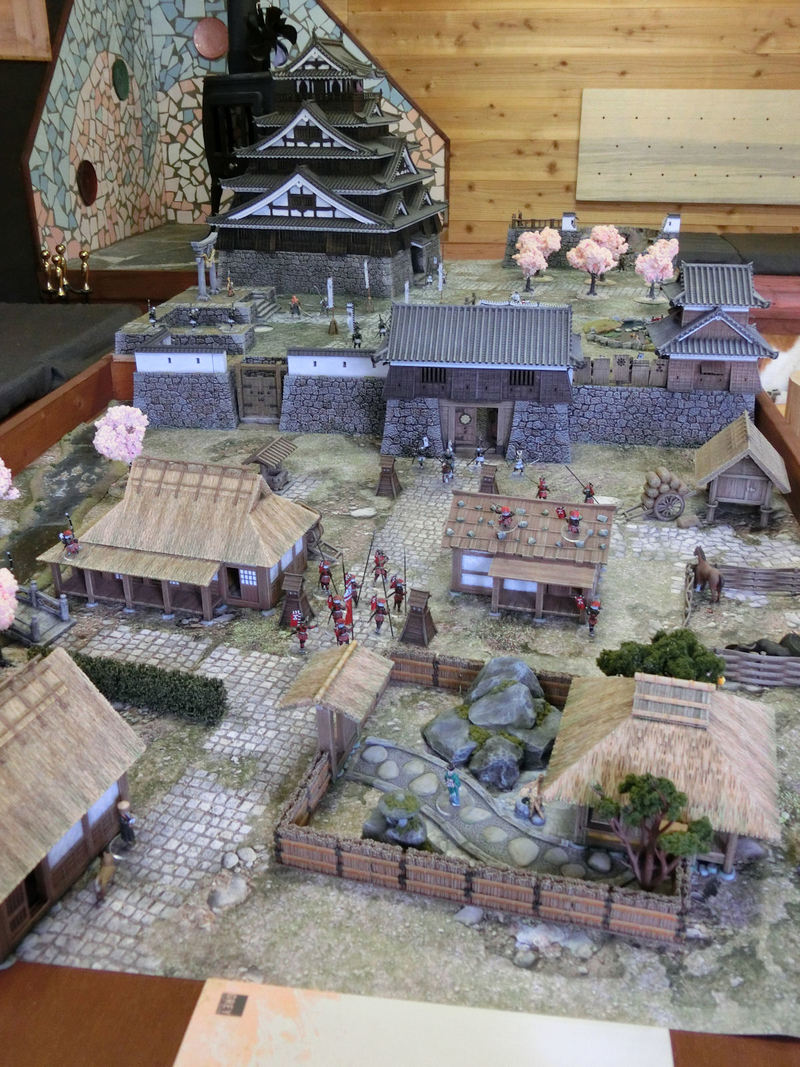
£ Here you can see Mori-clan troops attacking the defenders up the main road.

£ What better time to play some cool jazz-flute, than in the middle of the battle?! Pochi the dog likes it, anyway...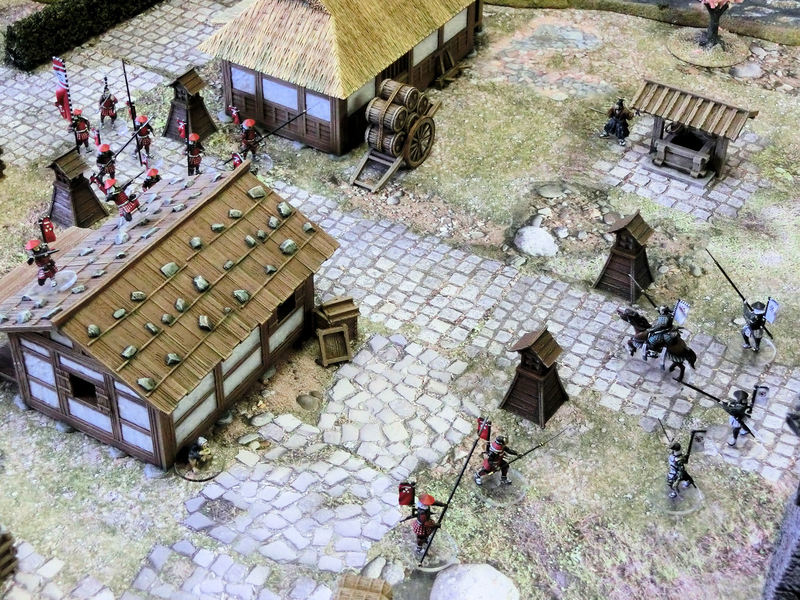
£ Defenders surge out of the gatehouse to push the attackers back.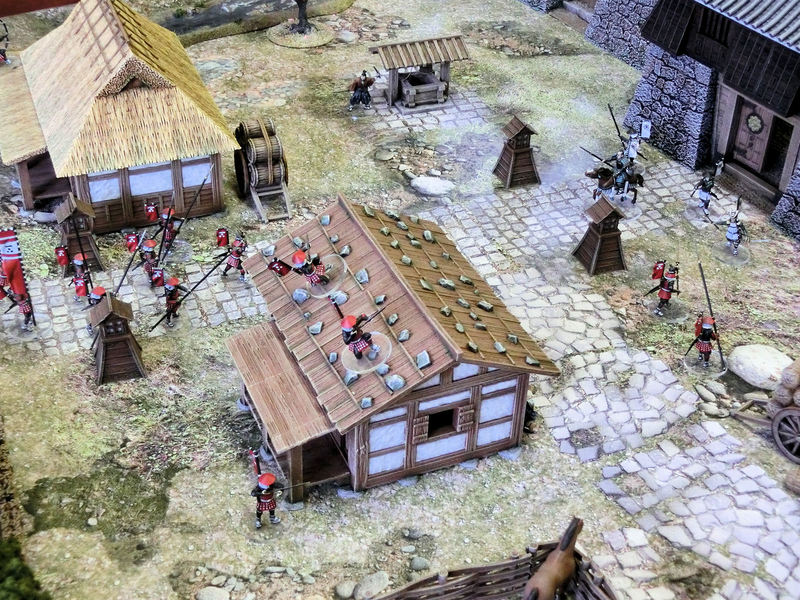
£ Musketmen on the rooftops lay down a hail of fire on the castle walls.
£ Archers on the left flank shoot from the relative safety of a stone bridge.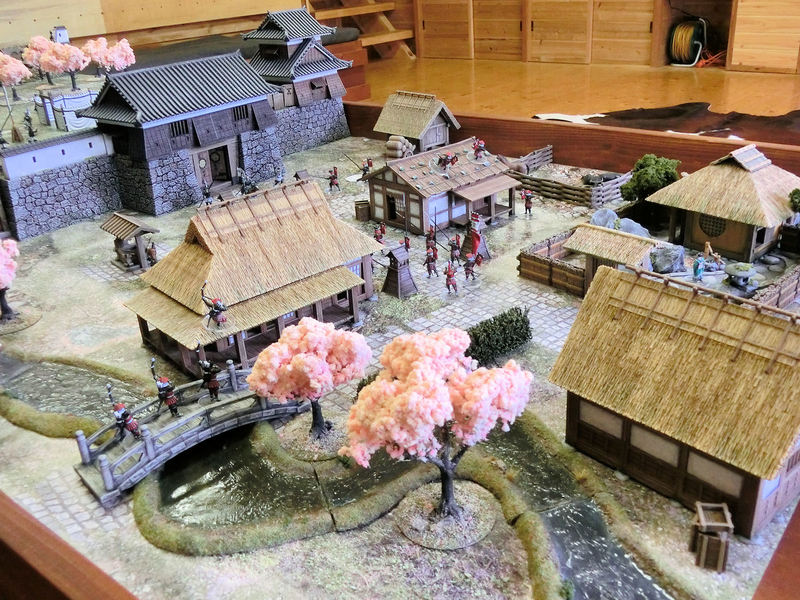
£ But you have to consider, what do they hope to gain by attacking such strong fortifications.....?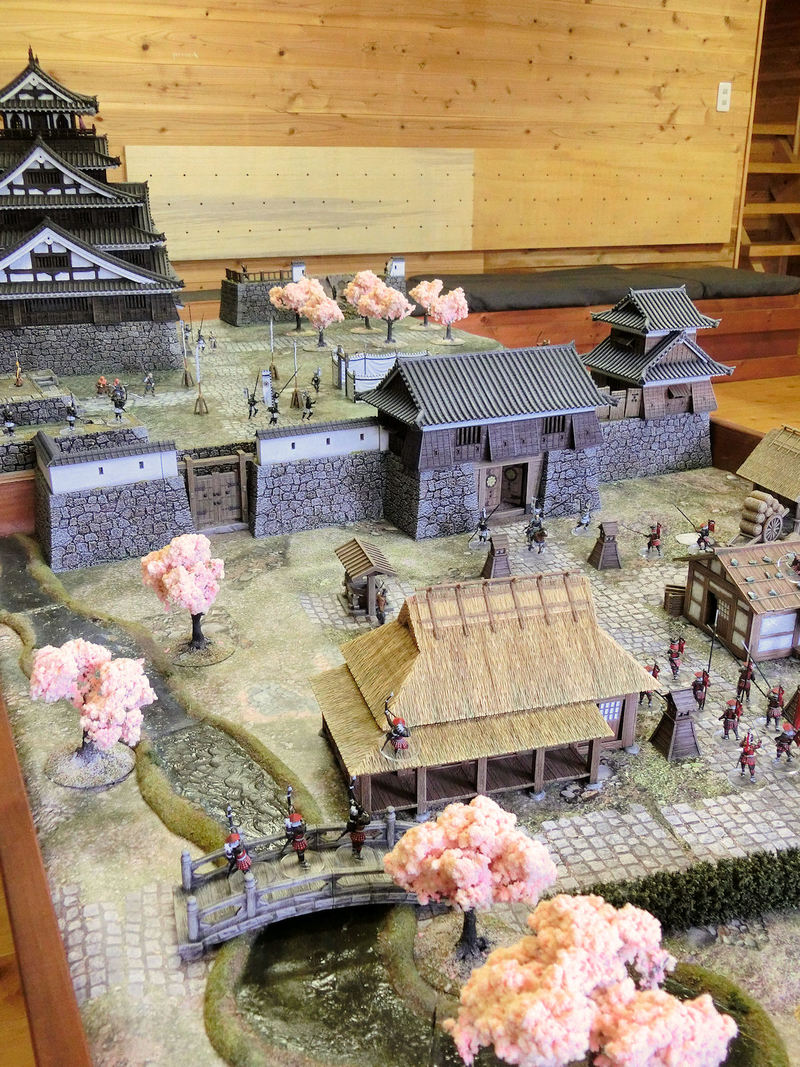
£ .... well, the efforts of the defenders are focused on the front wall, so maybe there's something else going on?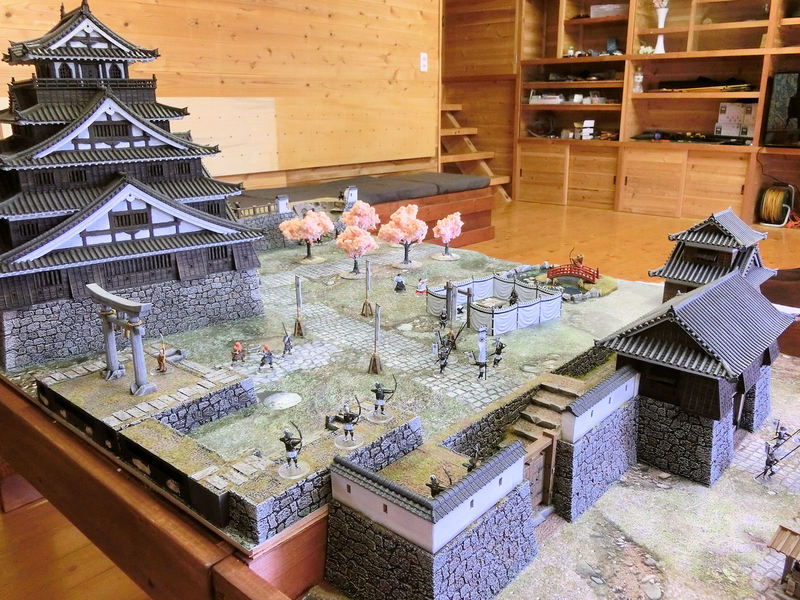
£ Let's take a look behind the walls....
£ Aha! It's all a diversion! Ninja assassins have infiltrated from the rear, and have their real target sighted, as he strolls out of the castle doors!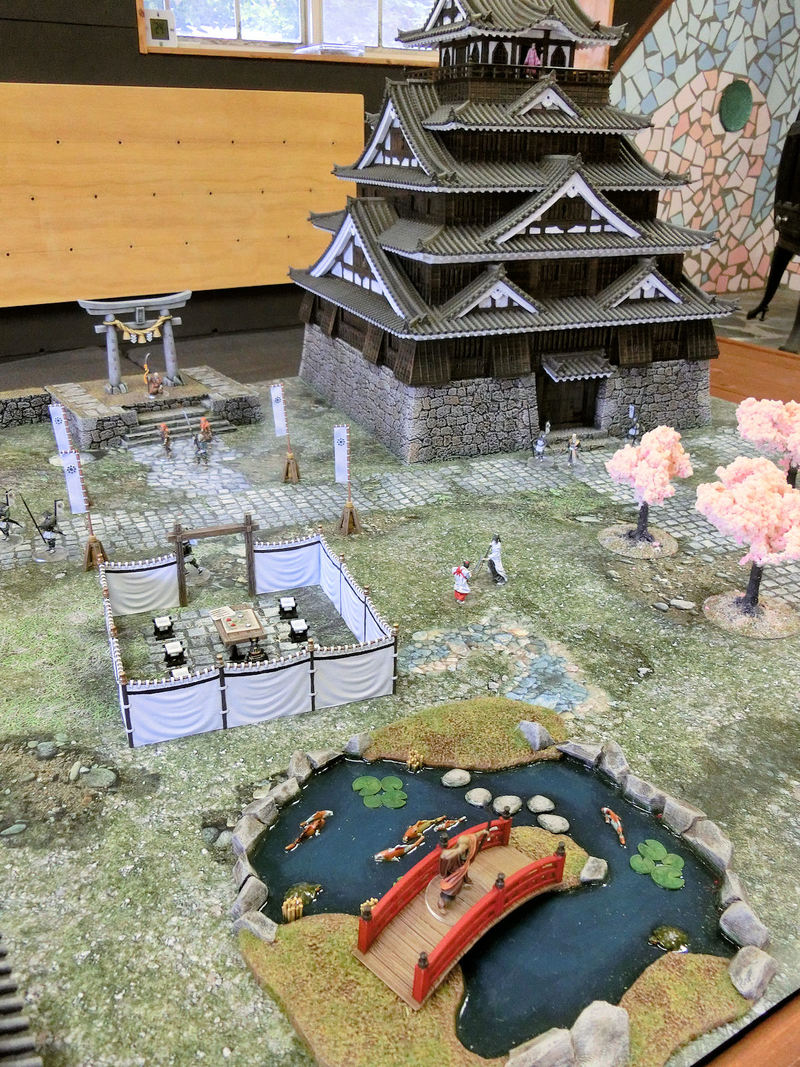
£ Only one defender seems to have spotted the intruders so far, as he shoots at them from the ornamental pond!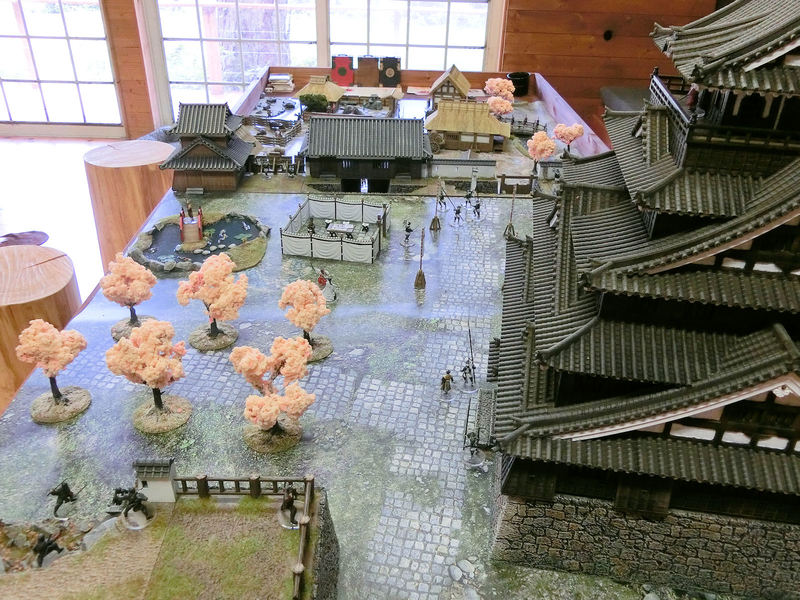
£ Do you think their sneak attack will work?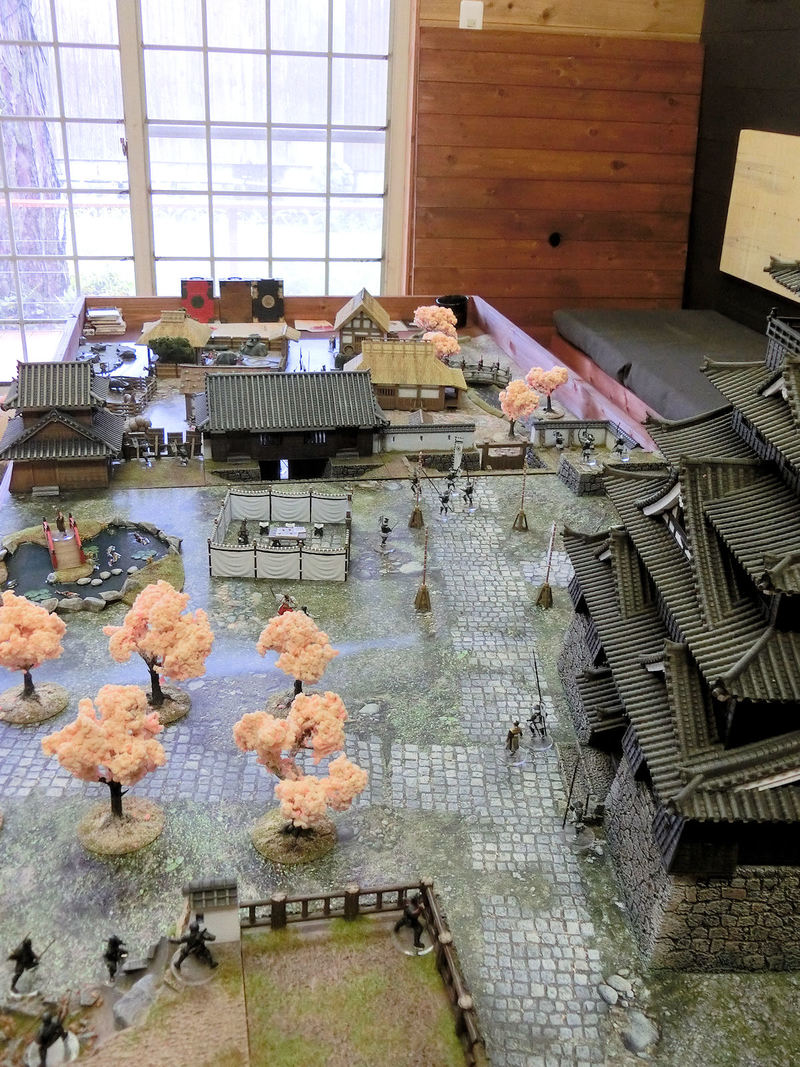
£ That was a fun table to put together. Maybe next time the temple models will be making an appearance....
Hope you enjoyed these pics - let us know what you'd like to see next!
The next building for the samurai temple collection will be a classic pagoda, and I was lucky to find one of Japan's top pagodas located only a 90 minute drive away, in Yamaguchi prefecture.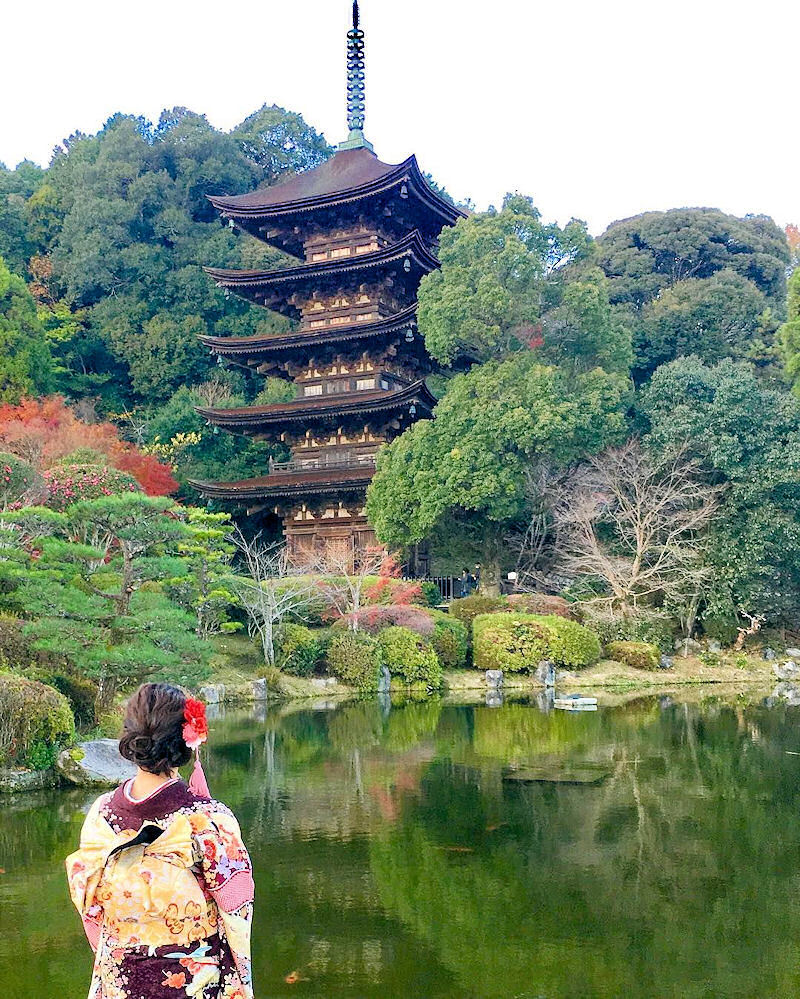
£ This is the gorgeous 5-storied pagoda at Ruriko Temple, built in 1442, overlooking this large fish pond. It's all wood, even the roof, and will form the basis for my pagoda model.
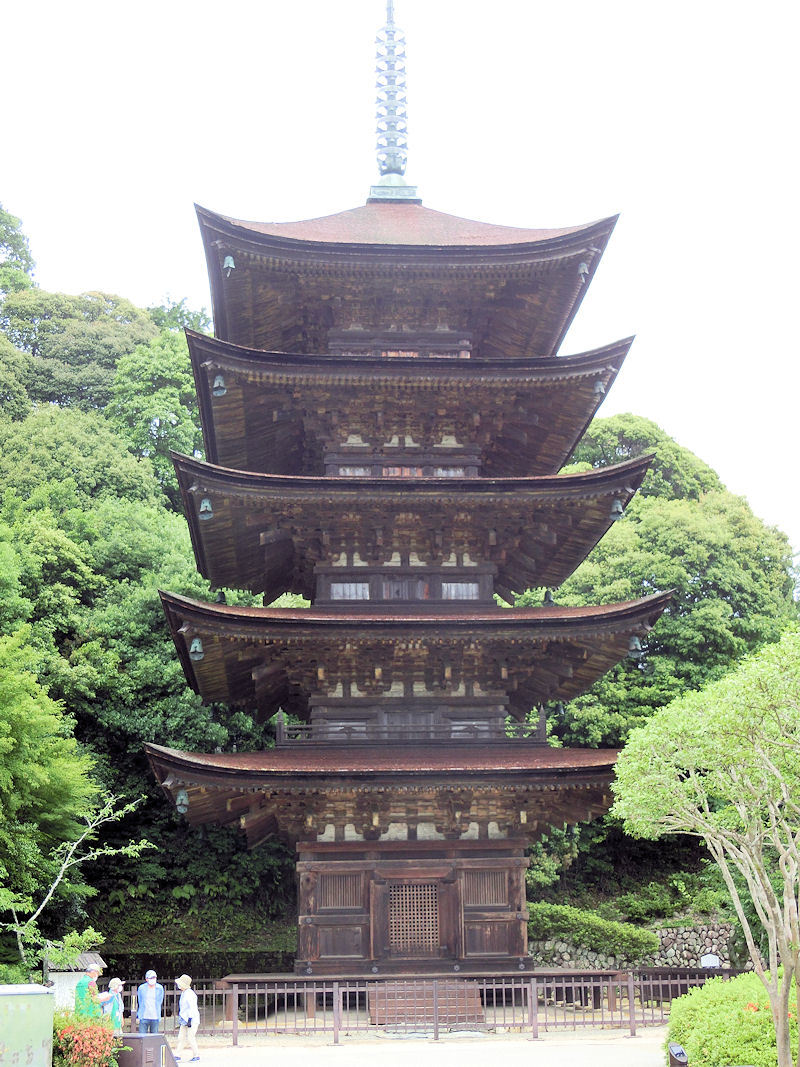
£ On this little research trip I wanted to get a close look at the details of the building, and if possible what it looks like inside.
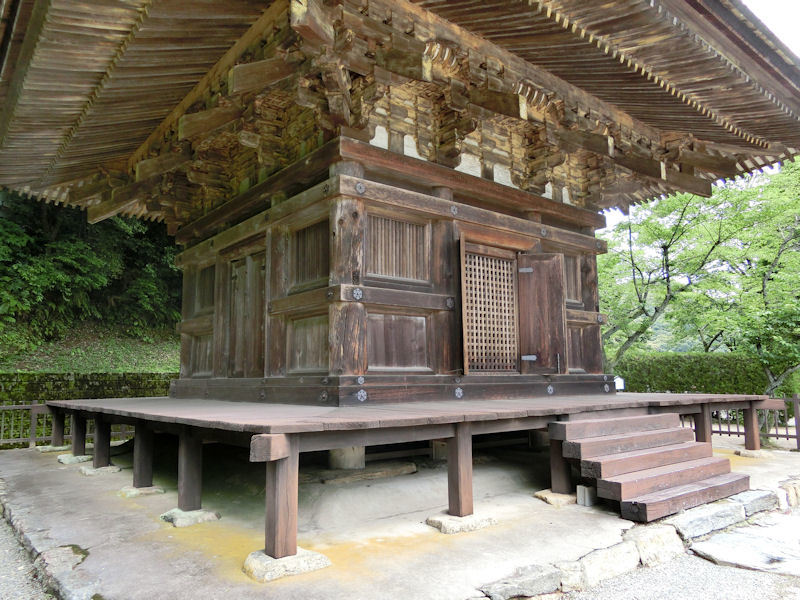
£ Just look at the wood details in this photo! Hopefully the upcoming model will match this in terms of details, although I think perhaps a stone base and roof tiles will also look great.
£ Seeing me measuring the base width of the pagoda for reference purposes, the volunteer staff were very interested in my little project! 3D printing is still mostly unknown in Japan, and most people have never even seen the technology at work, and they were keen to help!
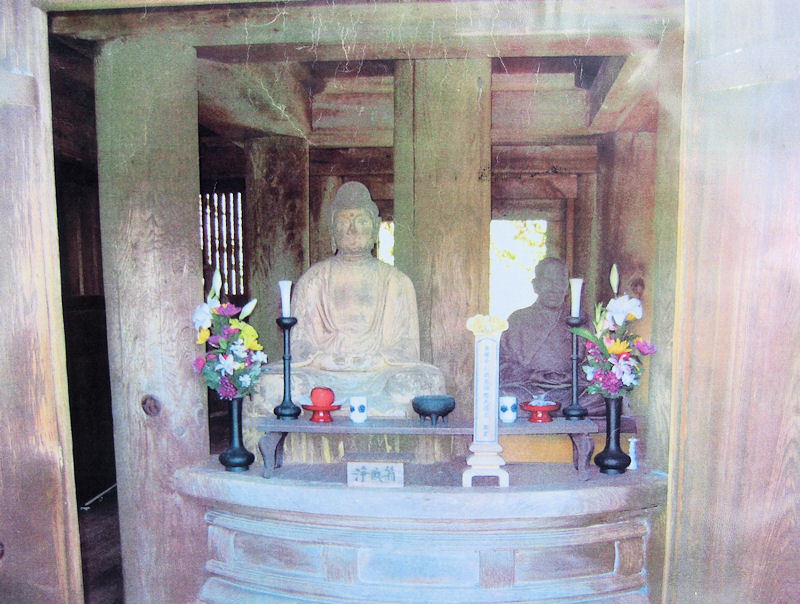
I was very privileged to be shown what the inside of the pagoda looks like, as few people ever get to see it. Opening doors on each of the 4 sides lead into this very cramped space, with 4 columns (on the first level) surrounding a massively thick wooden column in the centre. That column goes all the way up to the top of the building, and lets it flex and sway when necessary (earthquakes etc).
I was surprised to find that there are in fact no internal steps up to higher levels, so I will have to provide some ladder access to the second floor on my model, since the Ruriko pagoda building actually has a narrow balcony on the 2nd level.
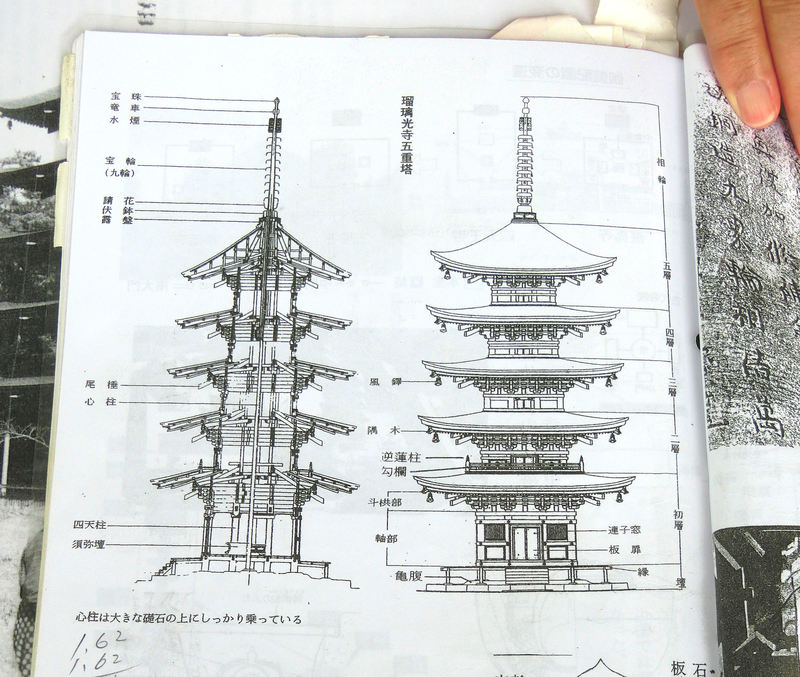
£ The kind staff also provided me with some detailed schematics of the building, made a few years ago during repair work. Combined with my own reference photos, I think I've got everything I need to recreate it perfectly.
So we're all set to start on this fantastic building, and I'll be sharing work-in-progress shots as we go along....
Apologies to all our customers who've posted their awesome photos over the past couple of years (thanks, everybody!) - today we have possibly the most realistic customer pics you'll EVER see!
These absolutely stunning lifelike vignettes were printed, painted and posed by Franktactica on TabletopDeutschland.com, and seem to mostly be from our farmyard and farmhouse sets. The miniatures appear to be mostly Perry Miniatures civilian models, which add some great atmosphere and life to the pics. I just wish I knew where the background photo came from - it's perfect!
Prepare to be amazed......
£ This looks so real!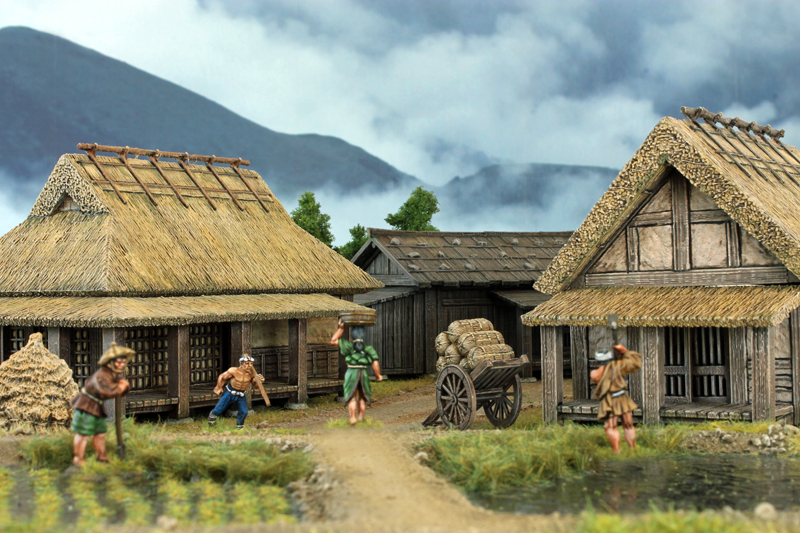
£ The wonderful custom-made board suits this terrain so well - you can feel the squelch of the rice paddies between your toes.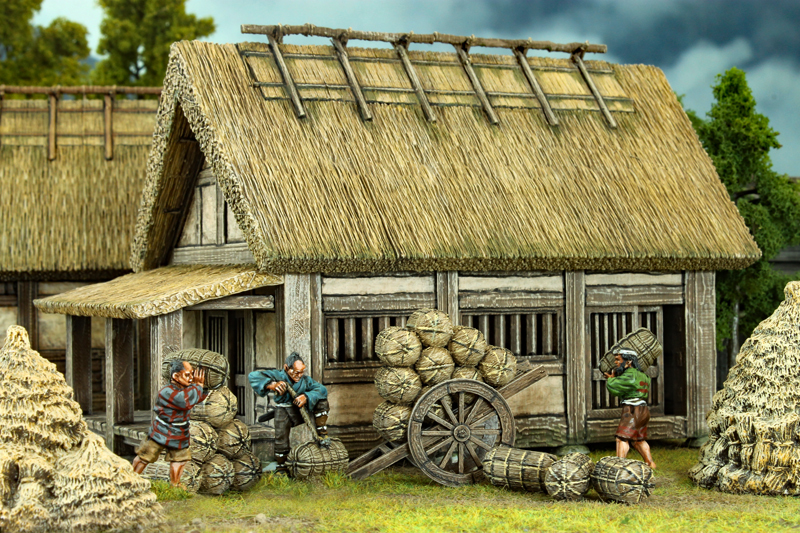
£ These minis are from a Perry Miniatures set of workers, and the rice bail cart looks perfect next to them.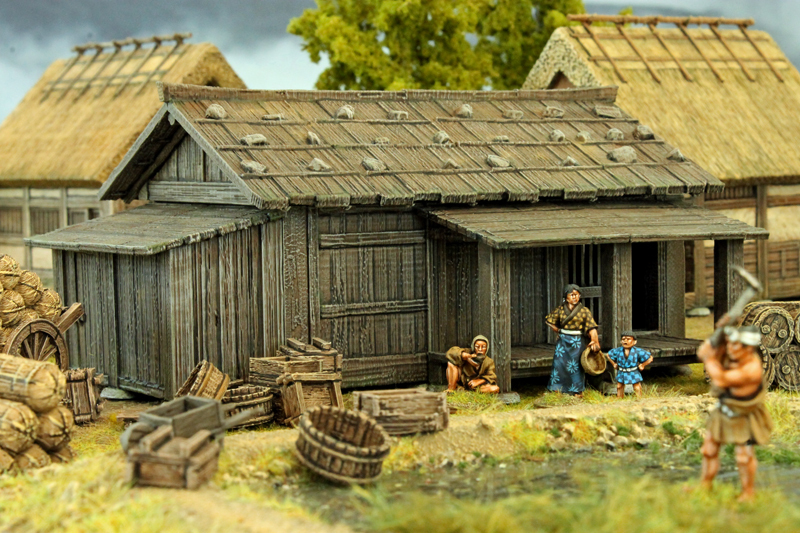
£ Jeez, man, stop drinking and tidy up a bit!
£ This scene is so full of life!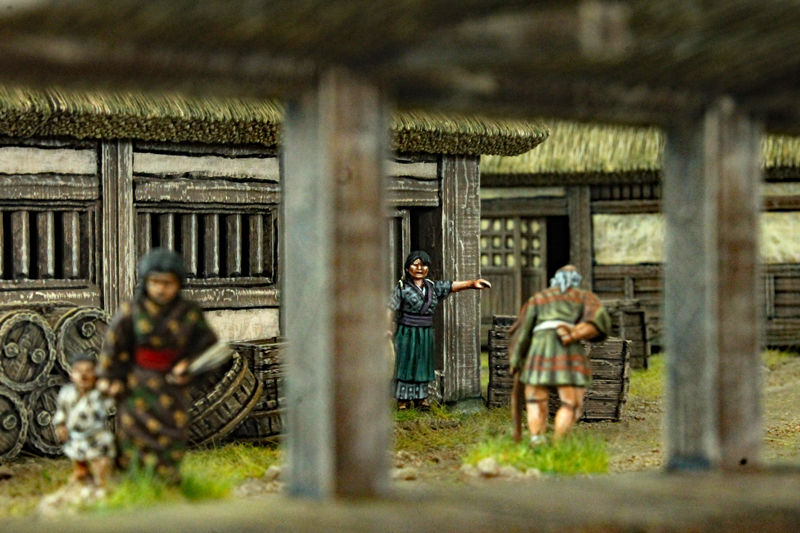
£ This village looks ideally old and weathered, much like most of its inhabitants.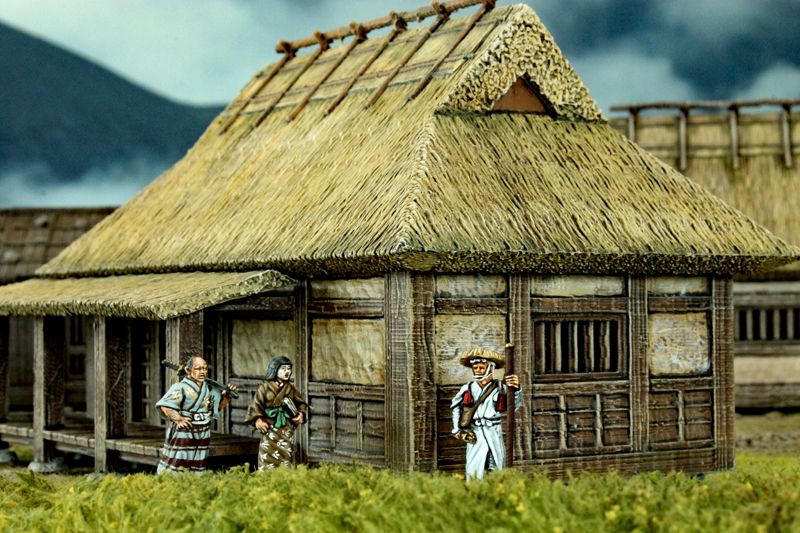
£ A priest paying a visit.
£ The little boxes and storage accessories look great here.
£ Needs a good clean, this one!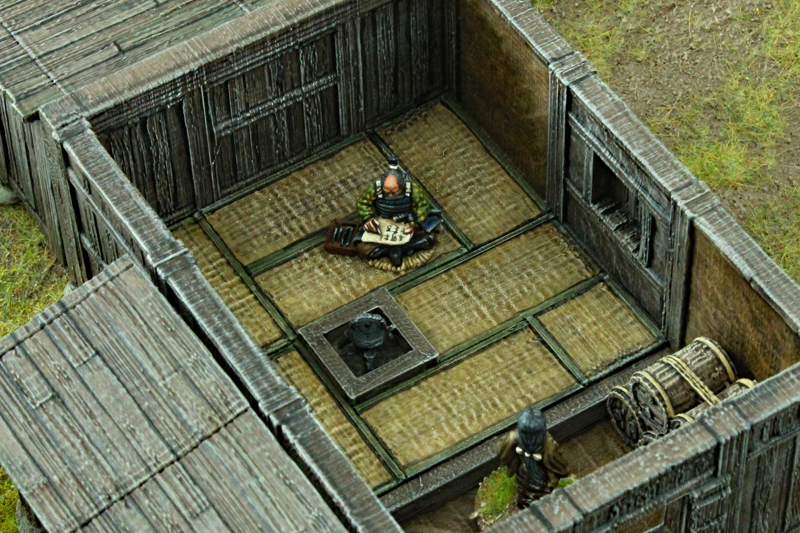
£ An excellent mini to use in this interior.
£ A secret meeting, perhaps?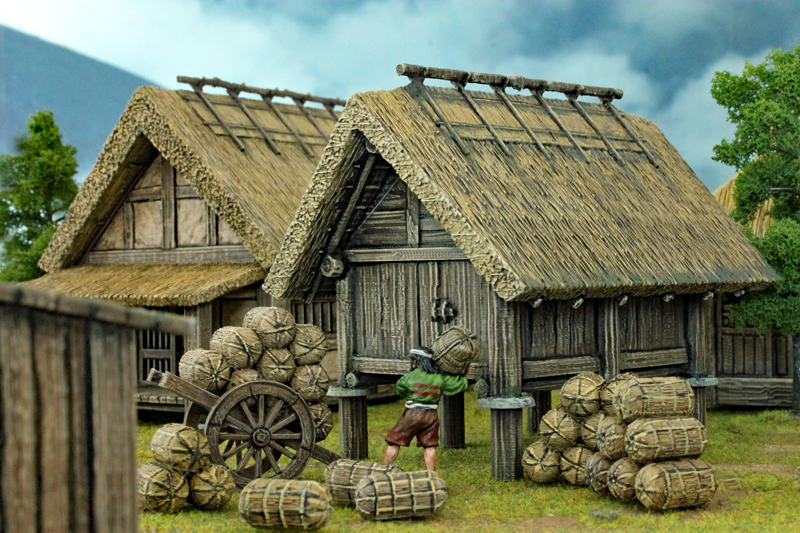
£ Time to load the rice.
£ He's used the wooden walls set too, but without the roof sections. It's a distinctly Japanese style of fence.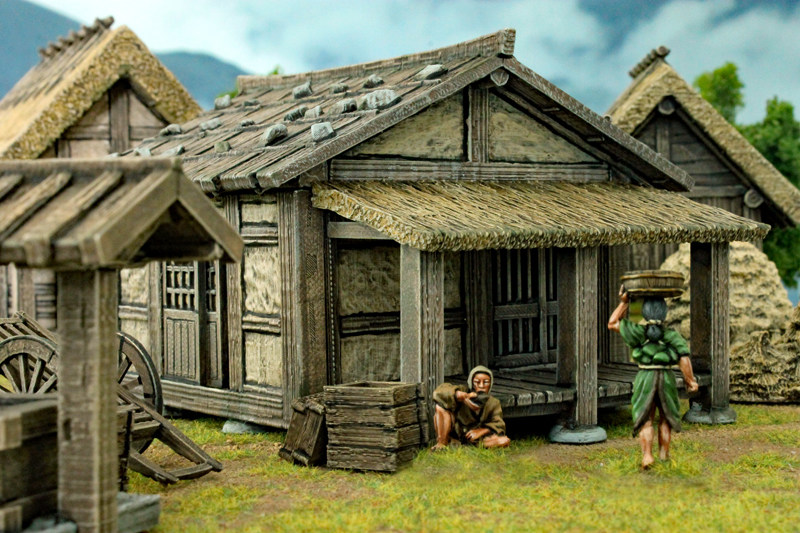
£ Still drinking...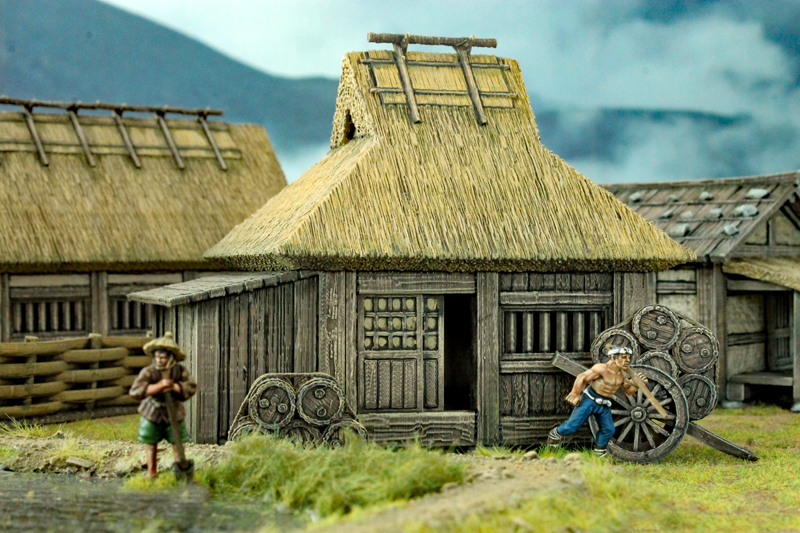
£ A mini farmhouse. Storage room, perhaps?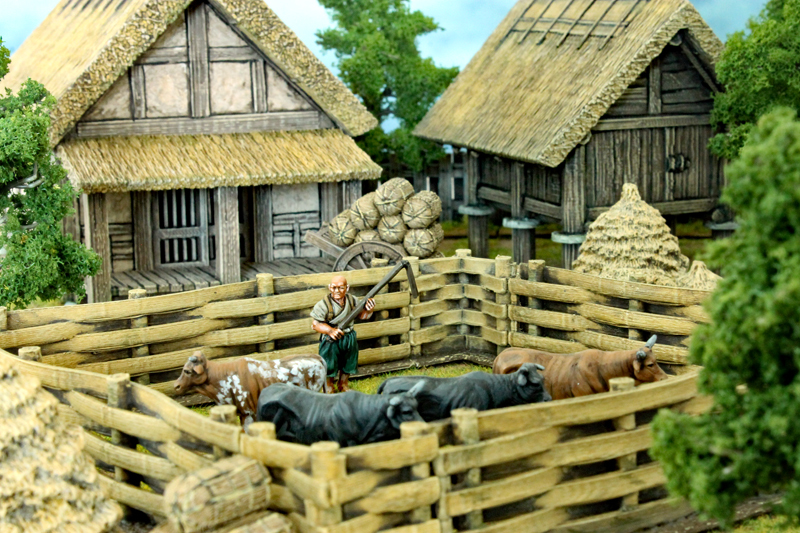
£ Not sure where the cow minis are from, but the bamboo fence from the farmyard set works well here, too.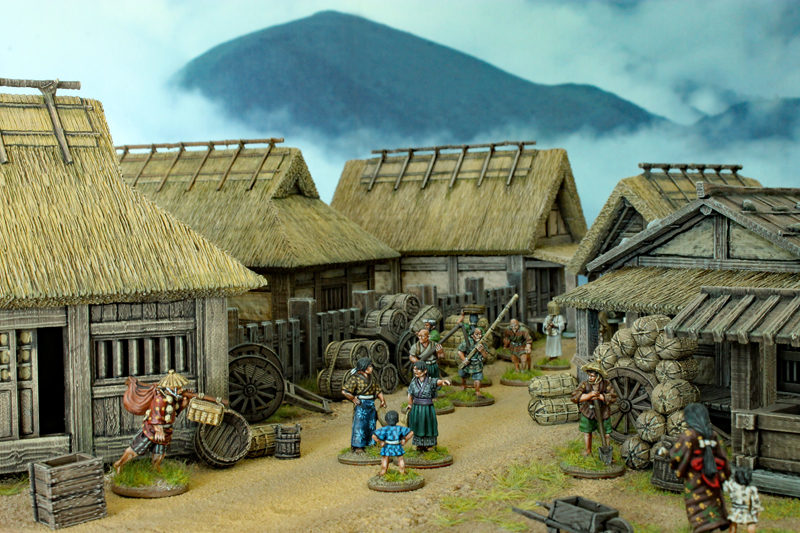
£ The village's busy main street.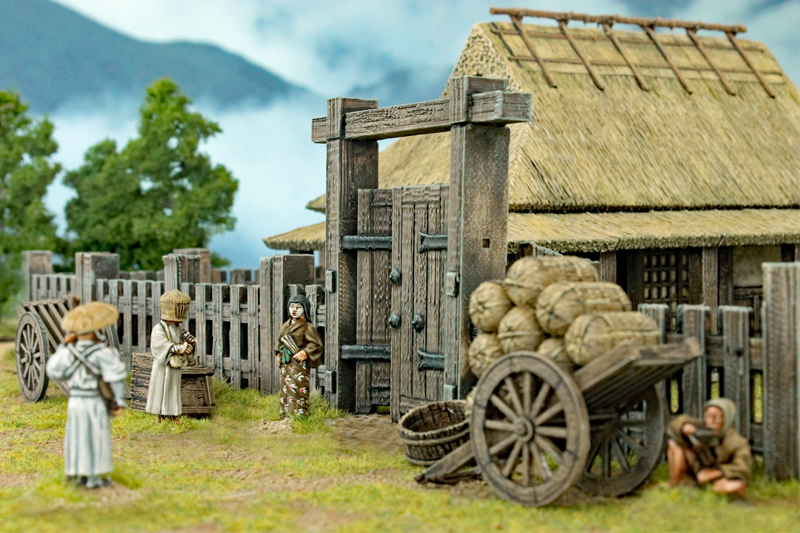
£ More visiting priests.. while that guy drinks his day away......


0 Comments :
Write a comment :