3d-printable terrain for all your samurai wargaming needs


| << Printing & assembling the Kitchen 2024-02-20 | Printing & assembling the Garden >> 2024-03-09 |
It's taken quite a while, but we've finally reached the end of this massive project! The last building from the upcoming Samurai Lord's House has now been completed.
So let's dive right in.....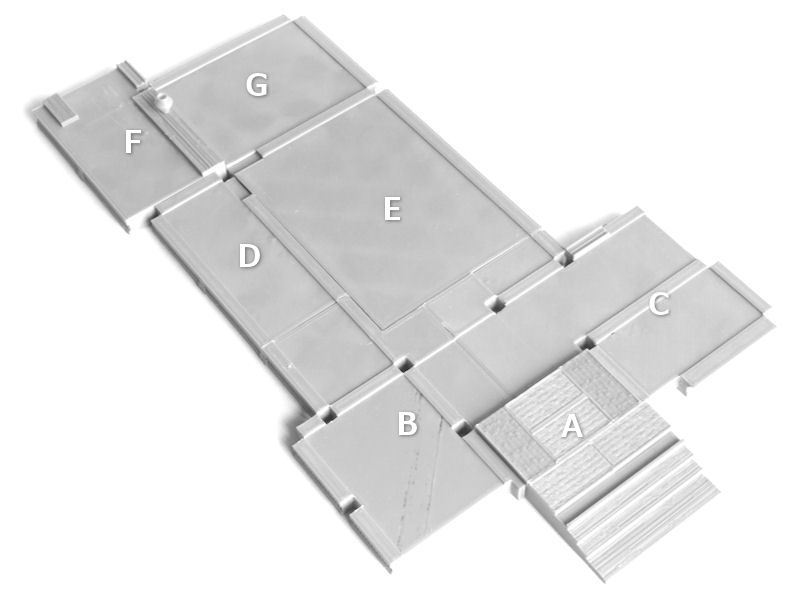
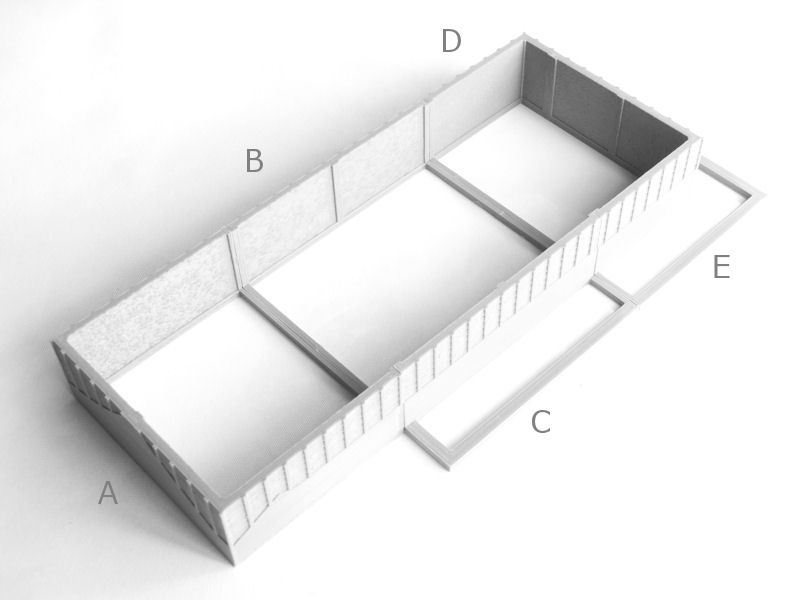
▲ The main house is by far the biggest building of the set, and as such it requires 7 sections for the base assembly. These have been labelled A~G, and should be arranged as shown in the photo above.
I chose NOT to glue most of them together now, so they would be easier to fit with the walls in subsequent steps.
This first stage is also a great moment to note that the 6 tatami mats of the entrance room, immediately above the front steps (labelled A in the photo), are slightly different sizes of tatami mat from all of the others, so now is a good time to print those and glue them in first.
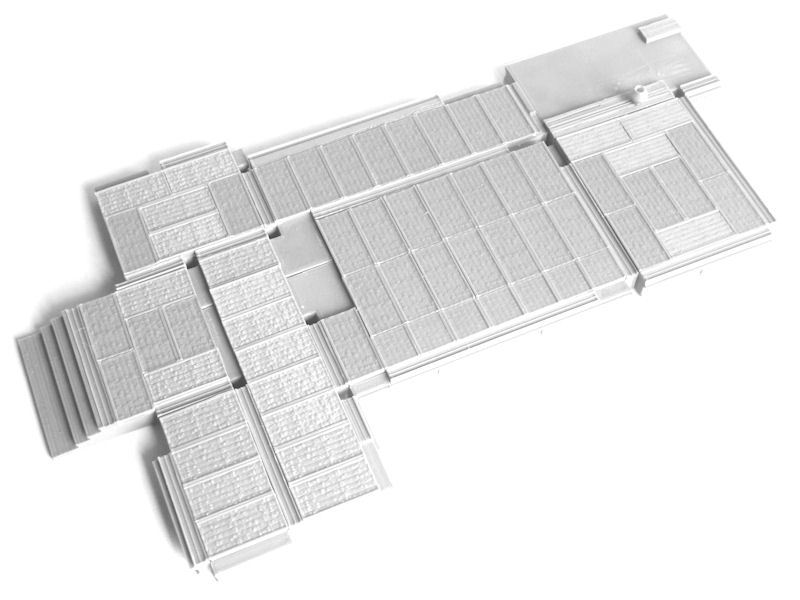
▲ It's tatami time! The rest of the floors require 51 tatami mats and 7 half-sized mats! Glue those down as shown in the photo above, and then you'll need to glue down all of the doorway strips for the sliding doors too.
My assembly tip here would be to use a quick rub along a strip of flat sandpaper, to ensure every mat fits snugly.

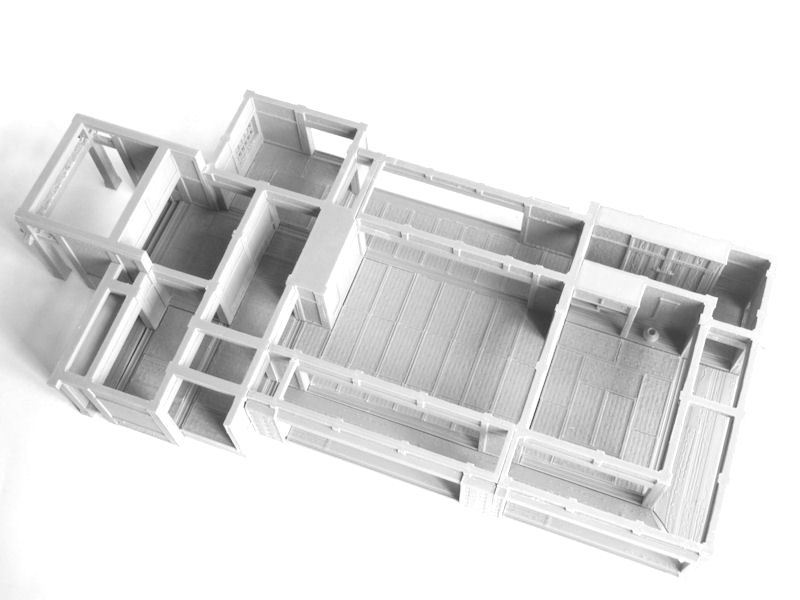
▲ Similarly to the base section assembly, the walls are also made up of 7 separate sections. They all print upside down, and don't require slicer print supports - although there are some built-in print supports at the front, and the front and rear windows, as shown in red in the photo above. You'll need to carefully remove those with cutters.
TIP: Setting your slicer to print walls "inside-to-outside" will help reduce printing problems with the overhangs in a few places, such as the shutter boxes and window frames.

▲ It's time to slot the walls into the base sections, so you might find a thin needle file useful at this point, to help ensure everything fits. My printers produced a tiny bit of "elephant's foot" on many pieces, so some of the wall posts were a pretty snug squeeze before I filed things flat ever so slightly.
▲ It's time to finish the floors, with those long balcony wood sections on all four sides of the building. Now is also the time when you want to decide which version of the windows you want to print - a solid version and a version designed for use with semi-transparent baking sheet paper are included in the folder.
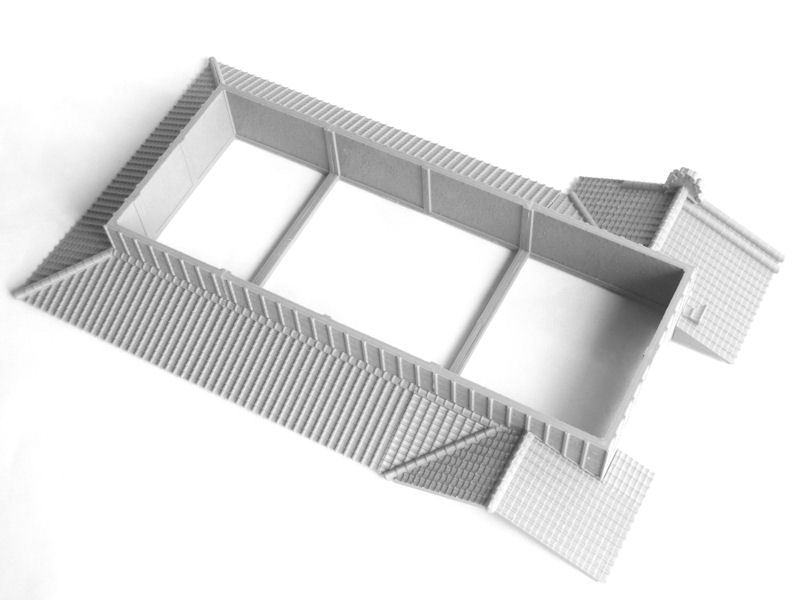
▲ Things get a little simpler as we move to the upper walls, with only 5 sections required for the construction. These are labelled A~E, and should be arranged as shown in the photo above.
▲ Looks at these huge side roof sections! These have been included as long one-piece prints for those with big enough printers, and as smaller halved versions for everybody else! These can be glued to the upper walls as shown in the photo above, so they can be removed quickly during play.

▲ This is how the upper walls and subroof pieces fit onto the main walls.
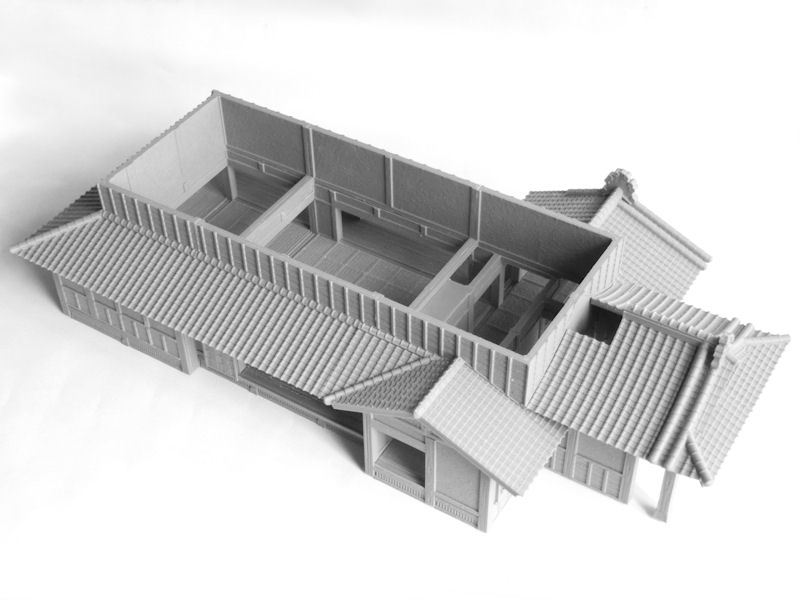
▲ The front roof of the building has an awesome curved roof shape, and I've decided not to glue mine to the rest of the upper walls yet. You can use it separately, or glue it as you see fit.
The last thing to do is print the 4 quarters of that massive long roof. You should find everything slots together nicely on top, to keep things from sliding around, even without glue.
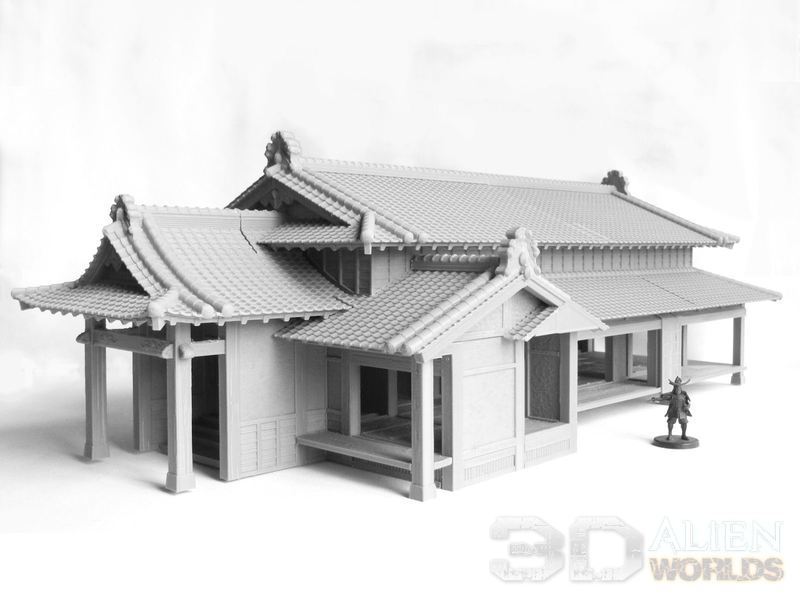
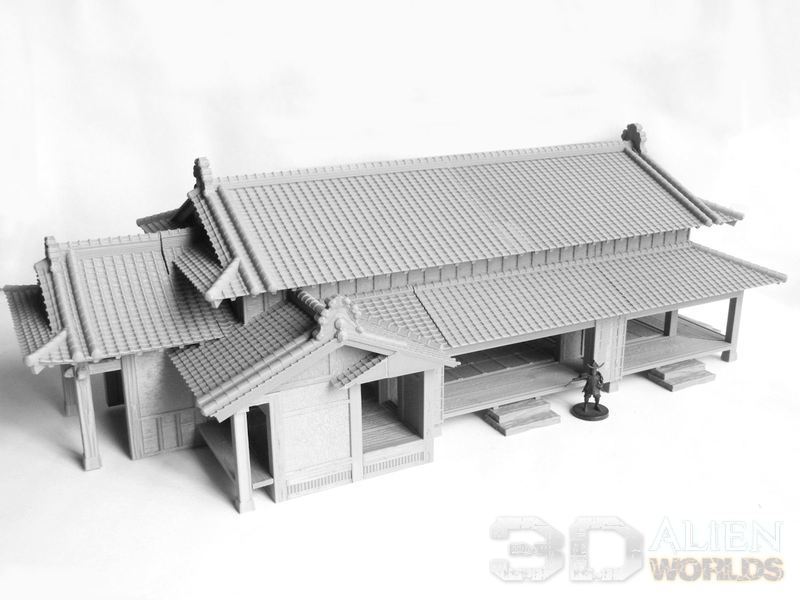
▲ Here's the finished building! Isn't it HUGE?! It actually turned out to be longer than the biggest roof level of the giant castle model!
If you look closely at the photo above, the doorway just to the left of the samurai figure is the opening that connects to the corridor piece leading to the Residence and Kitchen buildings - but in this photo I have also temporarily slotted in an extra optional doorway piece, to allow the main house to be used as a standalone building.
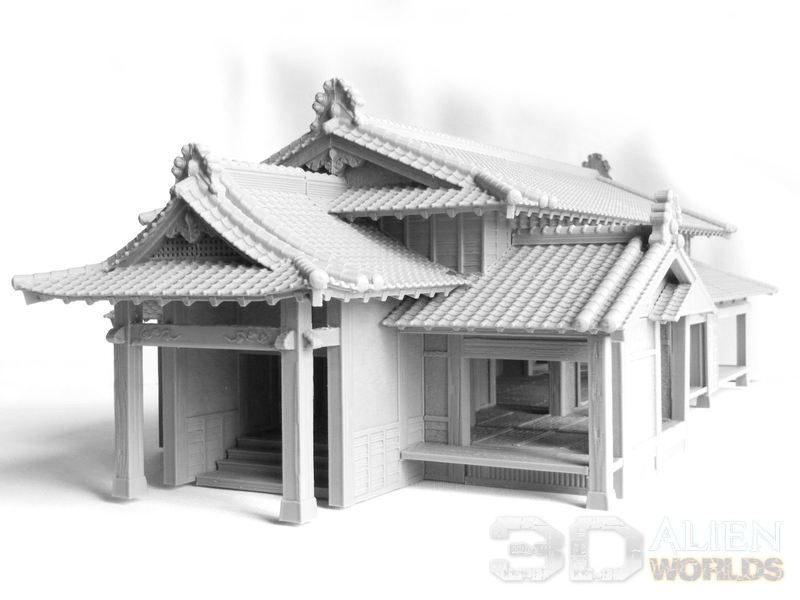
▲ Stone steps lead down to the garden and guesthouses on 3 sides!
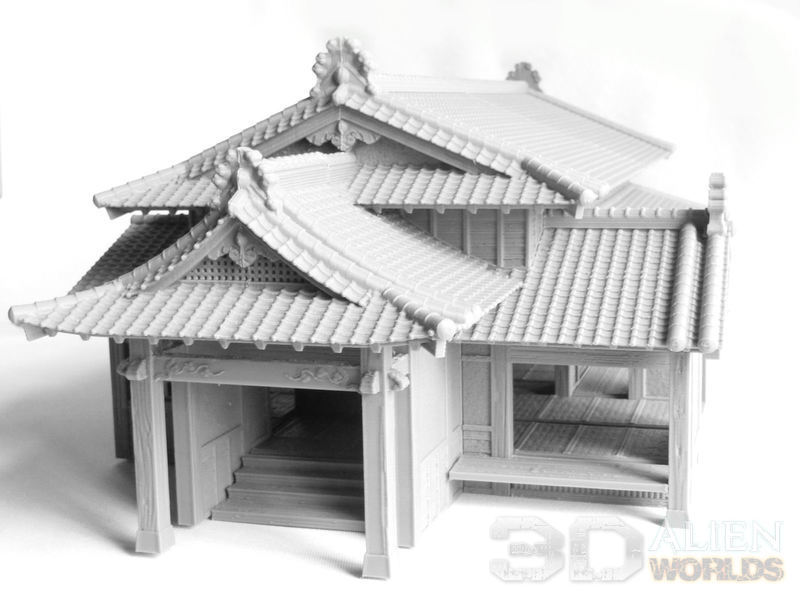
▲ This is the front angle of the house, with that imposing gateway reminiscent of a shrine entrance. I'll probably be using my doorways mostly without sliding doors, although you can print a full spread of different door types to allow your figures to explore this vast building room-by-room, if you prefer?
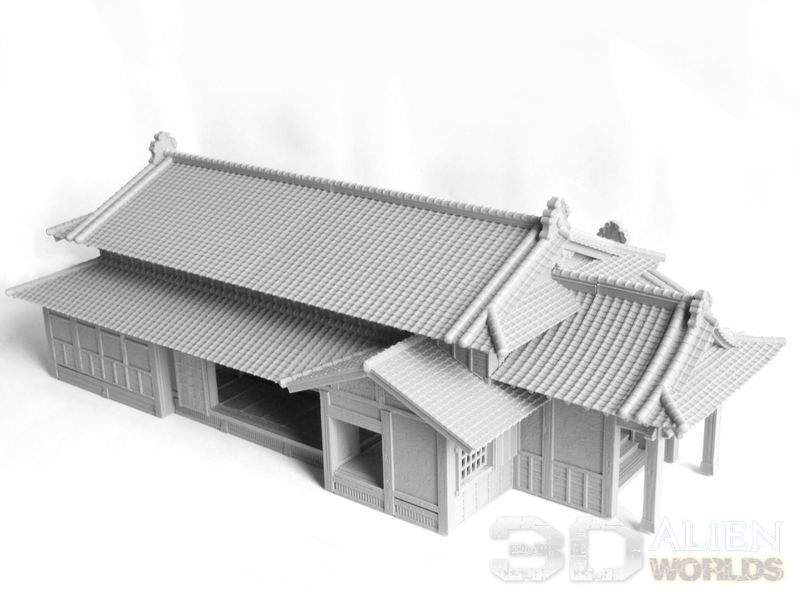
▲ This side of the house also features another doorway, which leads to the covered walkways connecting this building with the two guesthouses. As always, those are not essential for gameplay, so you have maximum flexibility in your gameboard layout.
▲ If you leave your doorways open, you can pretty much see all the way through the building from front to back and side to side.
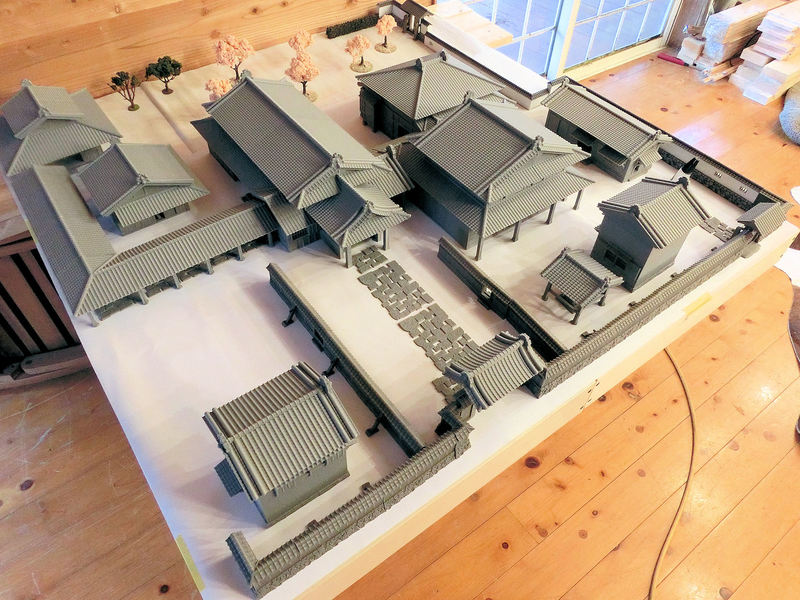
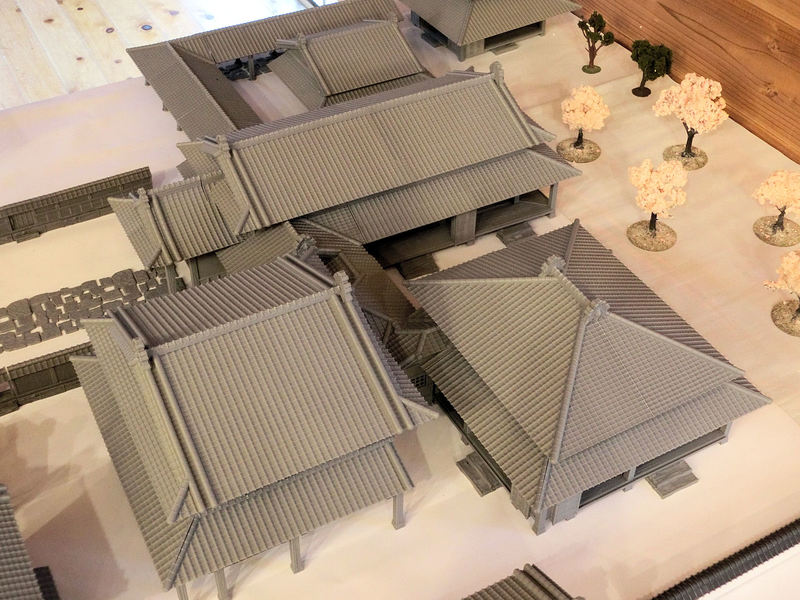
▲ So let's take a look at the almost-finished gameboard, as it now stands. Huge, isn't it?!
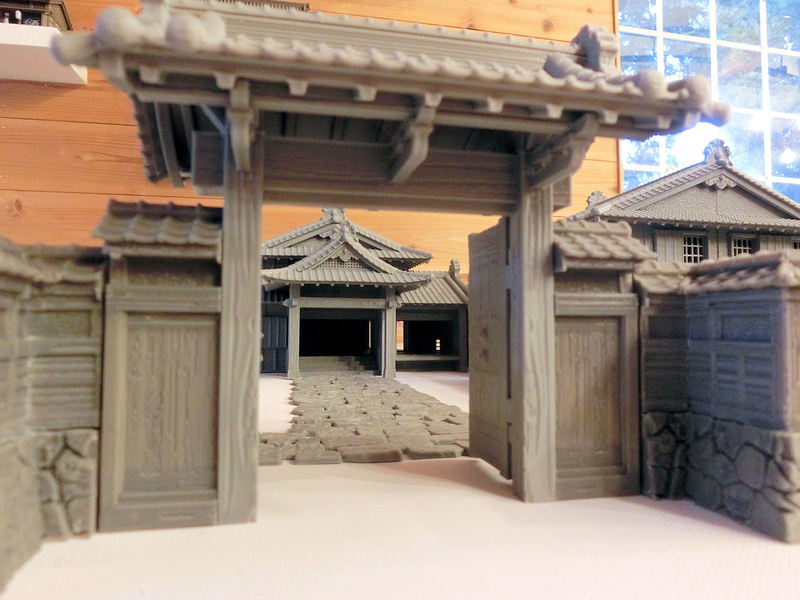
▲ Here's a fun little comparison photo for you - this is the view through the front gates of the model, towards the main house....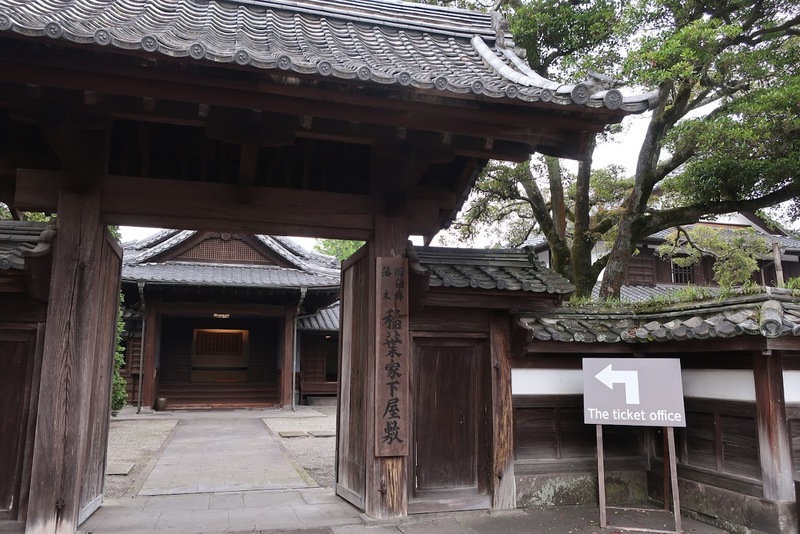
▲ ... and here's the real-life version, from the Inaba Residence in Usuki City, Oita Prefecture.
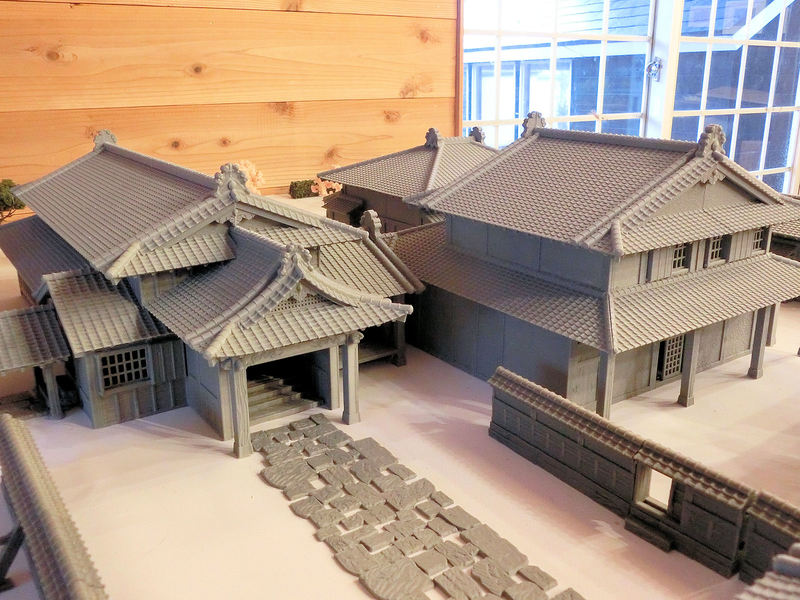
▲ Although the main house is the biggest of the buildings, the kitchen building is actually slightly taller, since it has a second storey inside.
▲ This gives you some idea of how all 3 main buildings fit together with the connecting corridor. We'll be taking a closer look at this when it's painted up, but for now it's time to finish the set with some garden accessories.
Watch this space....
| << Printing & assembling the Kitchen 2024-02-20 | Printing & assembling the Garden >> 2024-03-09 |