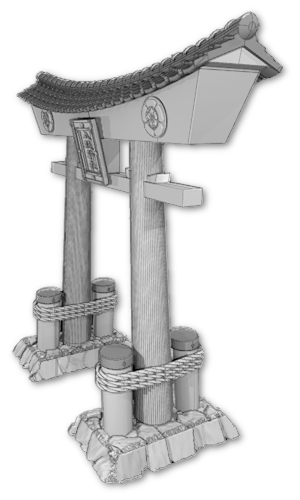
3d-printable terrain for all your samurai wargaming needs


| << Painting the Sumo Ring 2021-10-20 | Samurai Dice Tower Pagoda available NOW! >> 2021-10-28 |
It's been about 3 weeks since the Dice Tower Pagoda model was printed and assembled - sorry for the delay! You'll be happy to hear that both the Dice Tower AND the Sumo Ring have been fully painted now, and will be released over the next few days!
Here's a how-to-paint guide for the new dice tower model, which I decided to paint in a very bright RED colour scheme, just to make it different from its big brother, the wooden Temple Pagoda. 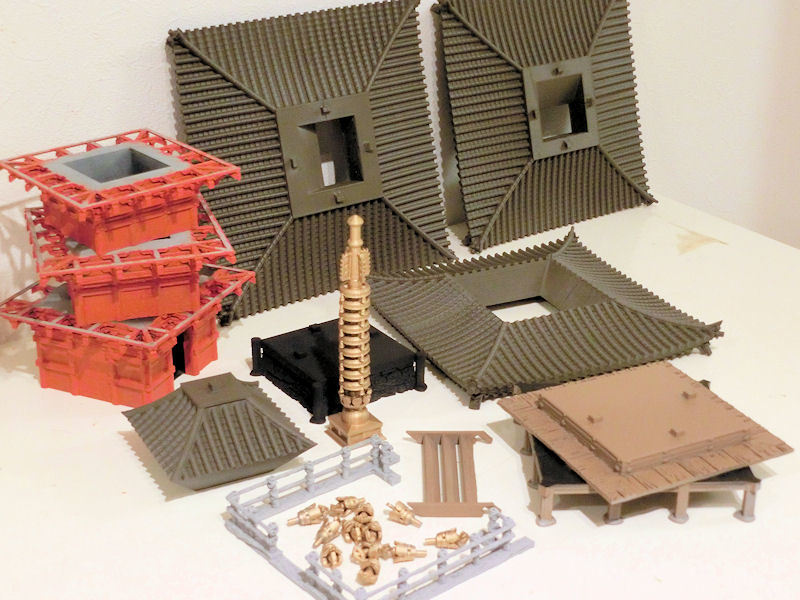
£ You've got two main options for this dice tower - brown wood (either light brown or dark brown), or red painted wood. You can paint the roof in a variety of different colours (black, grey, red, brown, green, blue etc.), however, and also the bells and spire (gold, black iron, verdigris copper, etc.).
I've chosen to paint this dice tower red, which is a colour scheme found in both Buddhist temples and Shinto shrines. I sprayed each piece in matt undercoat using rattlecans. The stone part of the base section was undercoated in black, the wooden parts in light brown, the roof parts in slate grey, and the spire and bells in gold.
I didn't have a red undercoat spray handy, so I had to handpaint each level section in red. It did take a while! I really recommend saving time by spray undercoating these pieces if you can!

£ Here's a handy tip for spray undercoating the bells - the best way seems to be to stick them all upside down to a strip of parcel tape. It's got enough adhesion to stop them from falling over during spraying, but they are still easy to remove when you're done!
£ You'll probably find it easier to paint each base section separately, and then glue them together. I started by brushing medium grey on the stone sections, then washing heavily in black wash, and then drybrushing up to light grey. I also added dabs of brown and red washes on random stones to add interest.
The wooden parts were washed in black, and then drybrushed with light browns. These sections were then glued together, and the bottom planks of the tower were painted in red.
I also dabbed green wash around the bottom of each post and stone, to add some weathering and age effects.
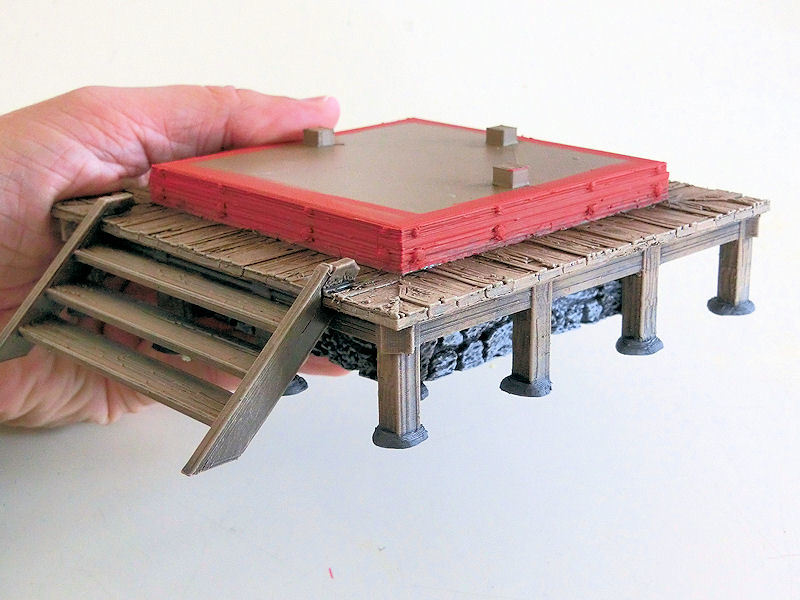
£ The dice tray was washed in black wash, and then the stone parts were drybrushed up to light grey.
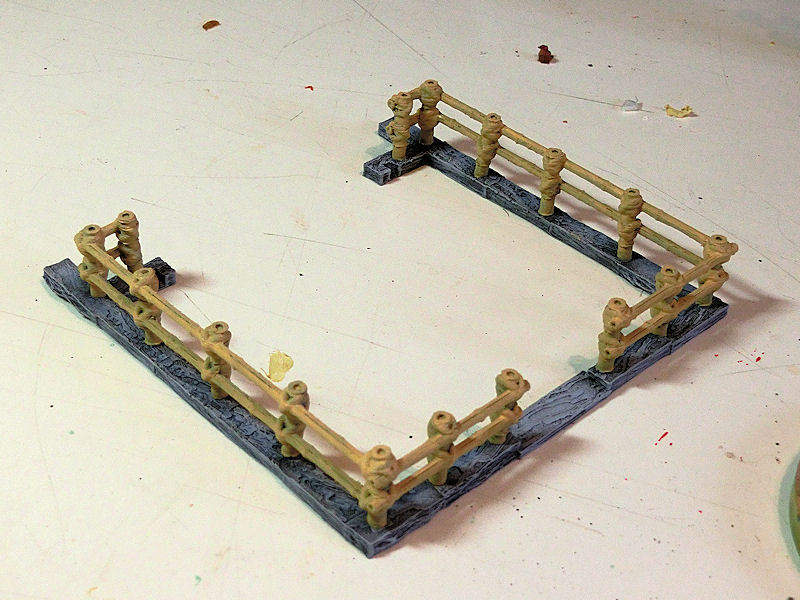
Next I basecoated the bamboo fence in sandy yellow.

£ After a brown wash on the bamboo, I drybrushed up with a sandy yellow again, and then edge drybrushed with a flesh colour. Then I painted the rope knots with dark grey and washed each one with black wash.
When the whole model was assembled at the end, I also added area of brown and red wash to the stones, and then green wash in the corners and at the bottoms of stones.

£ The roof sections had been spray undercoated in slate grey, and I then washed each section with a heavy coat of black wash. When it had completely dried, I drybrushed with medium grey, and again with light grey, using a big 5cm-wide brush.
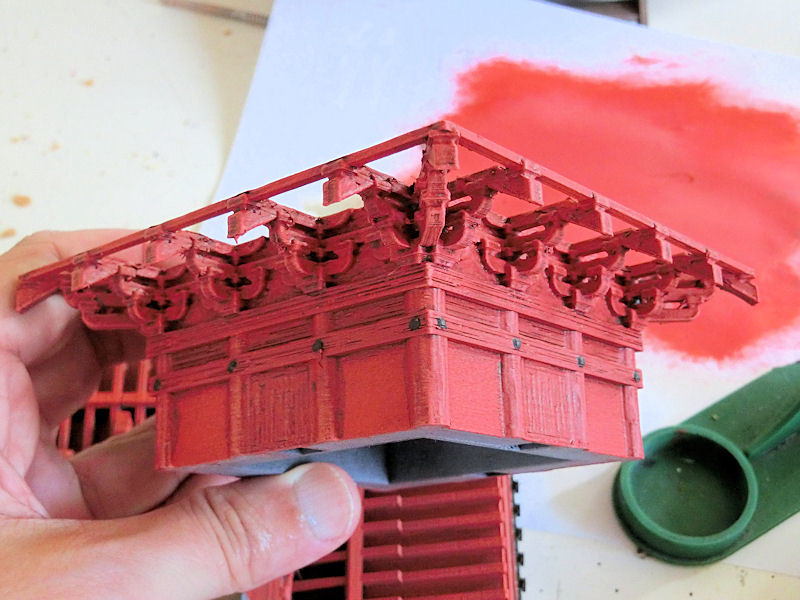
£ The red used on temples and shrines in Japan is actually a special orangey-red paint, also reserved for the wood-carved name stamps used on official and religious forms. I tried to duplicate this by giving a thick red undercoat, and then a thin brown wash on all the wooden sections.
This made it a little dark, so it took two drybrush attempts to bring those wooden areas back up to a bright red again, and I finished off by lightly drybrushing the edges with a red-orange mix of paint.
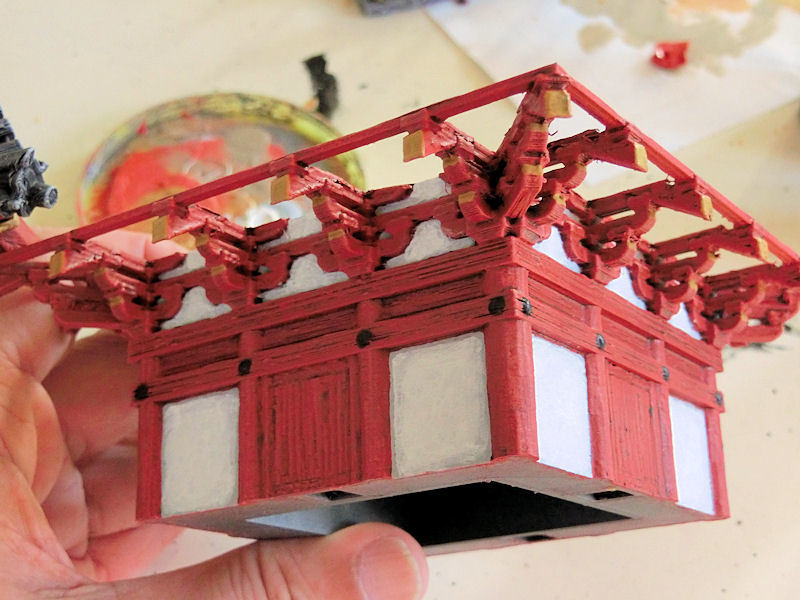
£ The stucco panels came next, with an even coat of very light grey. I then coloured in the middle of each panel with white, and I had to do this 2-3 times to get the white smooth(ish). At least each subsequent coat of white covered a smaller area, and got quicker and quicker!

£ I gave a light coat of brown wash to the gold spire and bells, and then drybrushed with the brightest shade of gold I owned. However, it still wasn't quite light enough, so I also gave it a very gentle drybrush of silver on the edges.
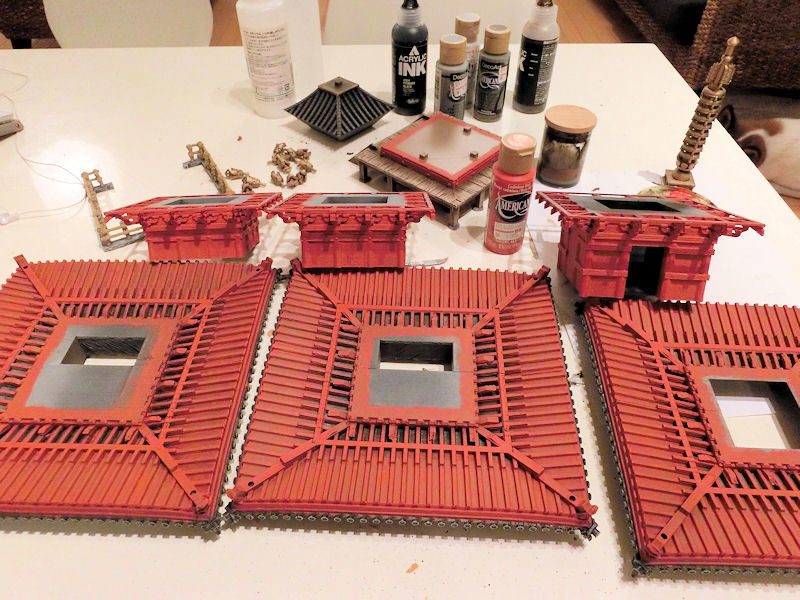
£ The last stage was to paint the underside of each roof section. This did take quite a few hours, because I had to paint using a brush - getting it into all the nooks and crannies is hard! I wish I'd had a red spray can available to save time!
I didn't bother washing this with brown (as I did for the 3 level sections), and instead moved straight onto drybrushing with the orange-red mix, just to make the edges pop.
£ Painting these white stripes was also quite time-consuming, especially as they'll be mostly hidden in the final photos! I painted them with 2 coats of white each, and a thin but flat brush.
One final detail that adds a bit of realism to this colour scheme is to paint the ends of each beam in yellow. It might sound odd, but it is commonly done on temples and shrines for this red colour scheme.
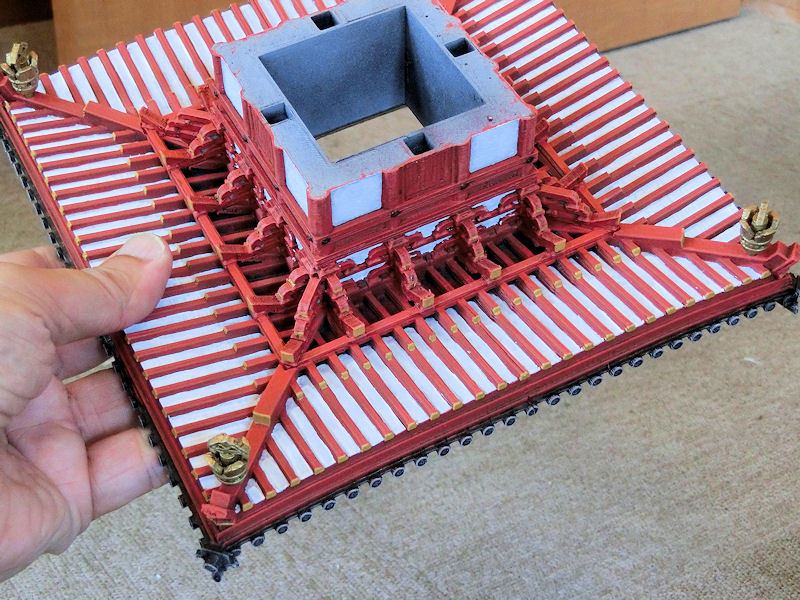
And that was it! Finally, my dice pagoda was painted. I glued the bells into the roof sections, and glued each room onto each roof section.
Time to roll some dice....
| << Painting the Sumo Ring 2021-10-20 | Samurai Dice Tower Pagoda available NOW! >> 2021-10-28 |