3d-printable terrain for all your samurai wargaming needs


| << Samurai Temple Bell available NOW! 2021-10-14 | Painting the dice tower >> 2021-10-27 |
The new Sumo Ring has been a great painting project this month - with some unique challenges and some wonderful sumo wrestler minis from Fish Creek 3D printed up and painted specially to match!
Here are a few tips for those of you wanting to tackle this upcoming release....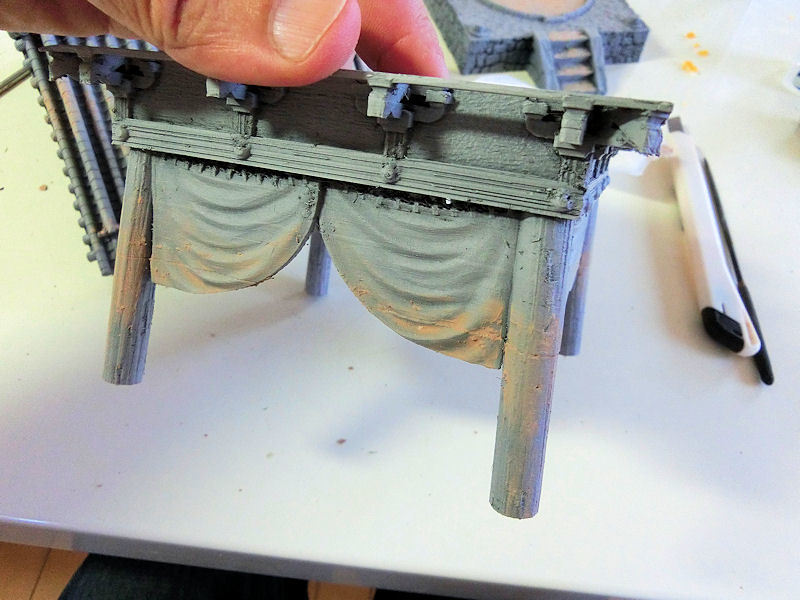
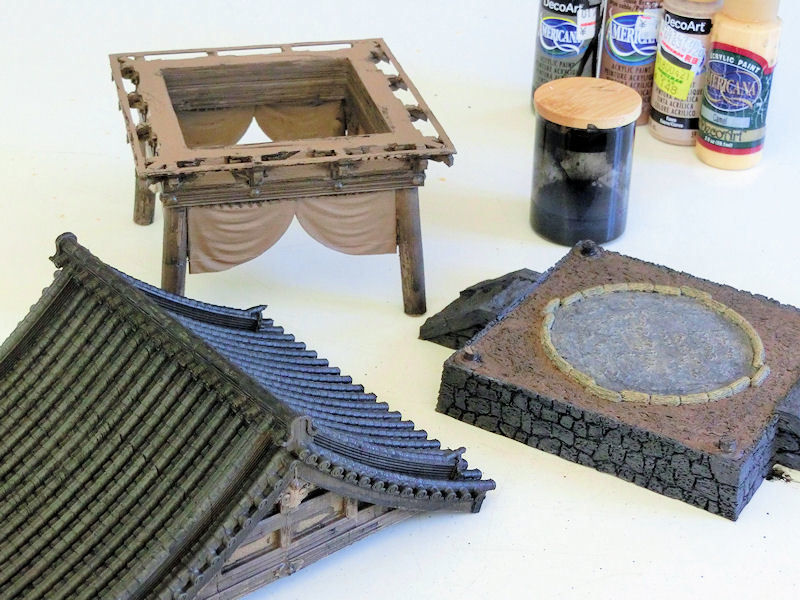
£ First thing was some cleanup on the model. This wasn't a problem in the STL files, but my printer had a hiccup during printing, and produced a tiny layer shift about halfway through the print. This meant that the corner posts and curtains all had a small line through them, which I needed to fix.
In the photo above, you can see I actually used some wood putty smoothed over the cracks with a wet finger. Obviously greenstuff or modelling putty would be another good option, but mine had dried up - so I had to use whatever was available!
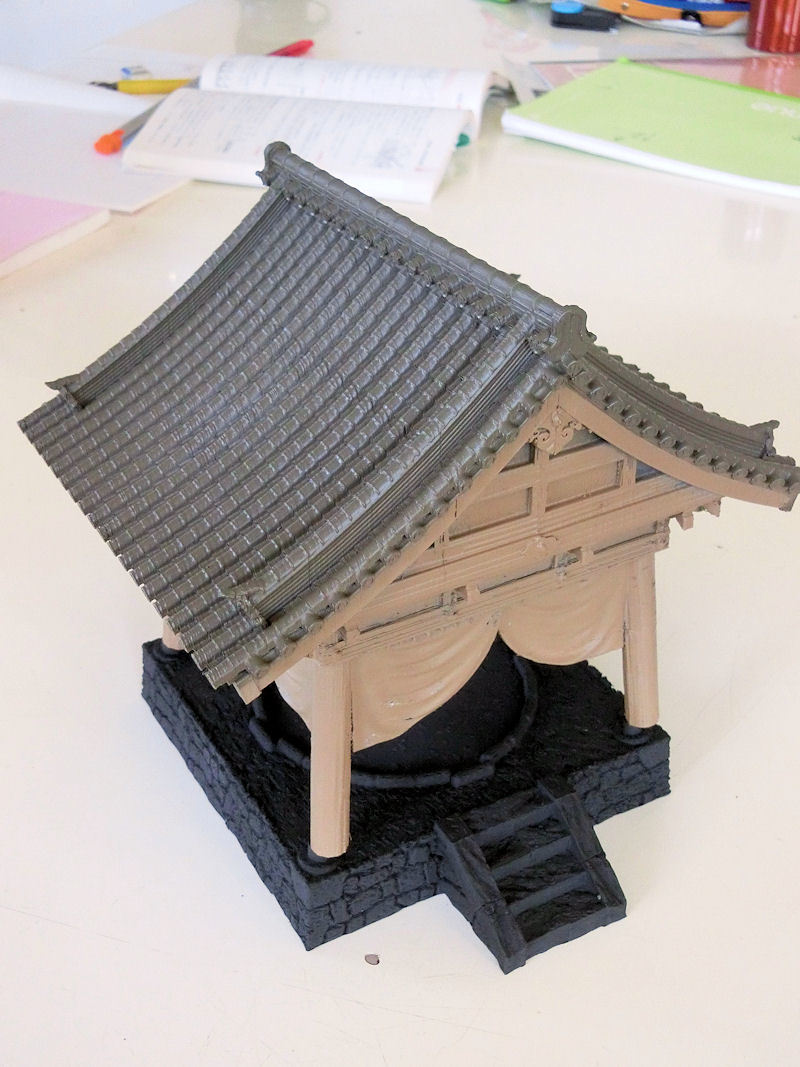
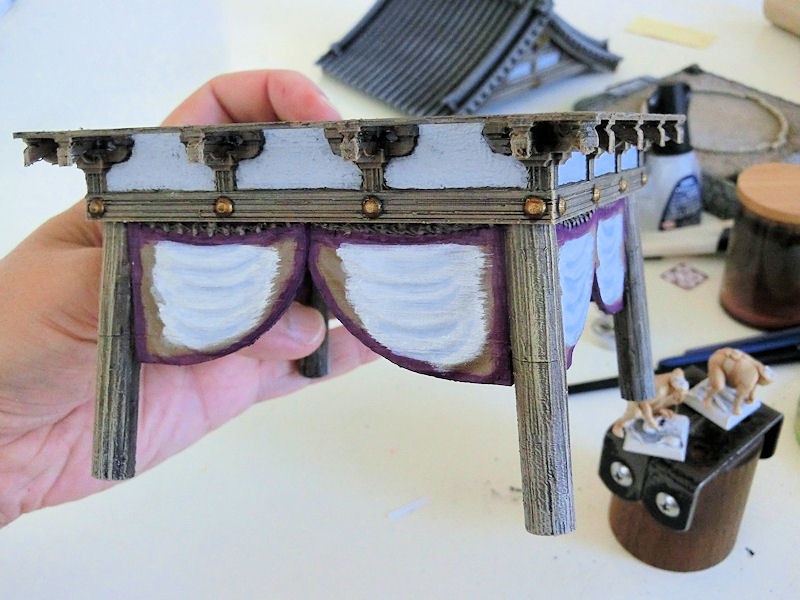
£ On to the painting..... I started with my usual technique of undercoating and basecoating with some matt acrylic rattlecans. Black for the base section, light brown for the frame and underside of the roof, and slate grey for the top side of the roof section.
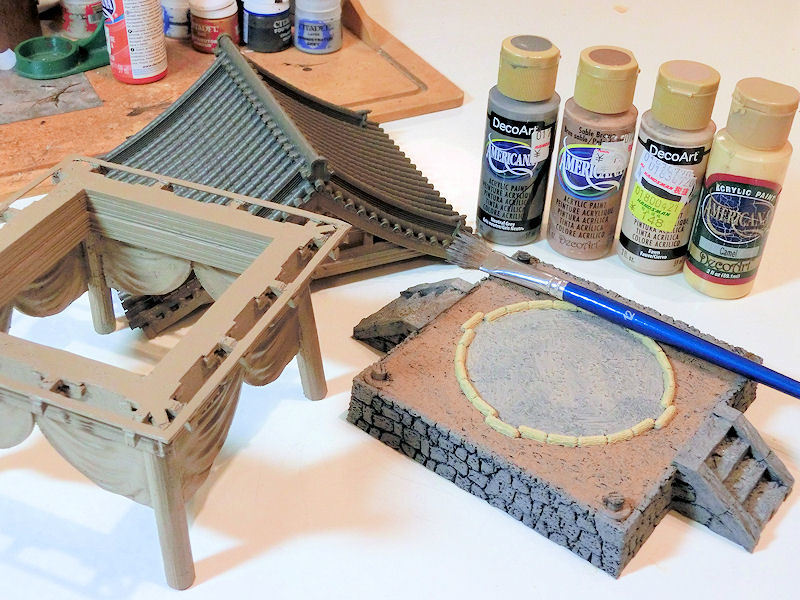
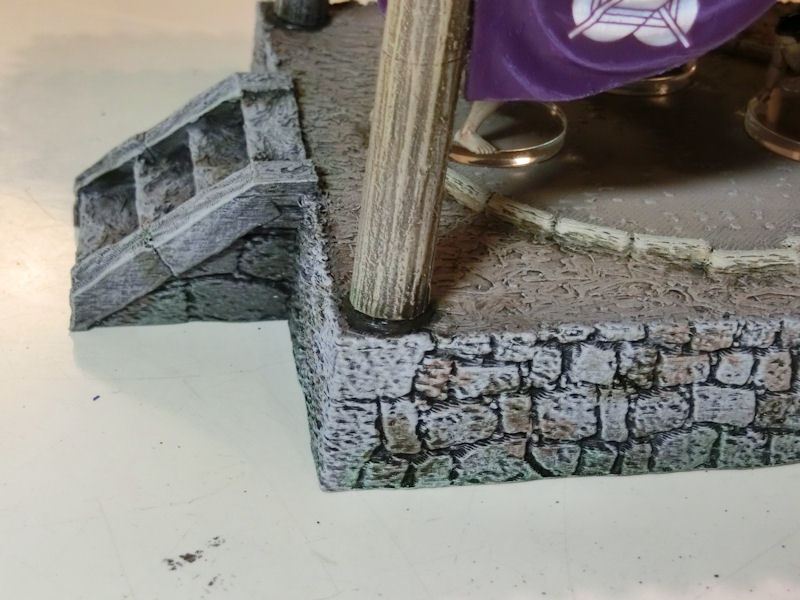
£ The base section was then roughly blocked in with medium grey for the stone, medium brown for the dirt, sandy brown for the ring of small rice bails, and a lighter grey/brown for the clay surface of the inner ring.
£ Next, everything gets a heavy coat of black wash, and is then left to dry overnight.
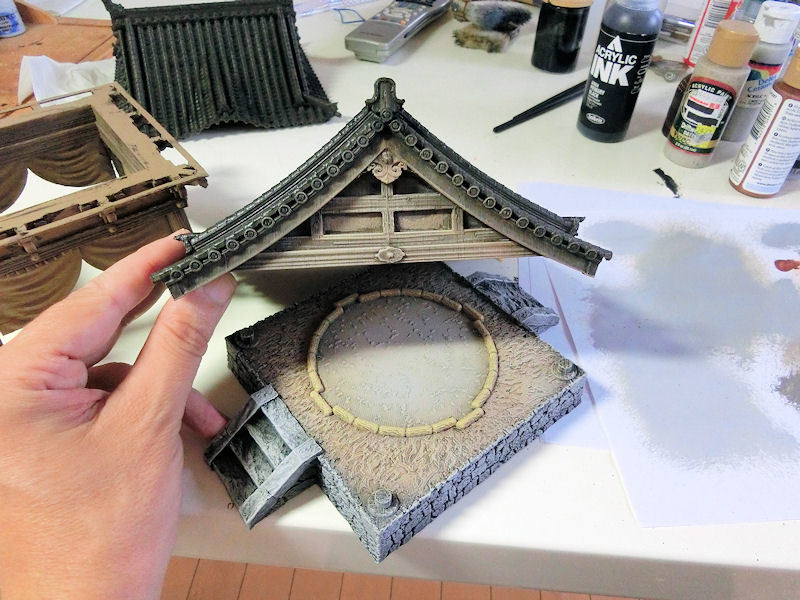
£ Next comes the drybrushing. Using a big 5cm-wide brush, I drybrushed the stone areas of the base in medium grey and then light grey, and the dirt and sand in various shades of light brown.
The frame was drybrushed in light brown using the same big brush, but for the smaller areas of the roof section I switched to a smaller 1cm-wide brush, and I then carefully drybrushed the wooden beams.
£ The last section to be drybrushed was the roof of the sumo ring, which was done using the big 5cm-wide brush in medium grey, and then very lightly in light grey, by just scraping it over the edges of tiles and ridges.
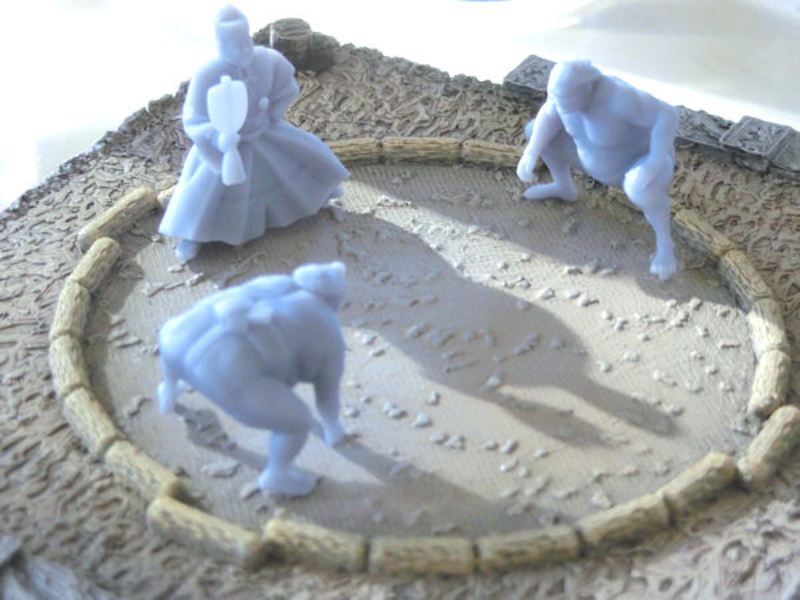
£ It was at this point that the awesome miniatures from FishCreek3D arrived in the post, and I couldn't help snapping a quick photo for you guys watching on Facebook!
I don't have a resin printer myself, so I ordered these models printed - and they were kind enough to resize from their normal 32mm scale down to 28mm scale. As you can see, the size and quality are absolutely perfect!
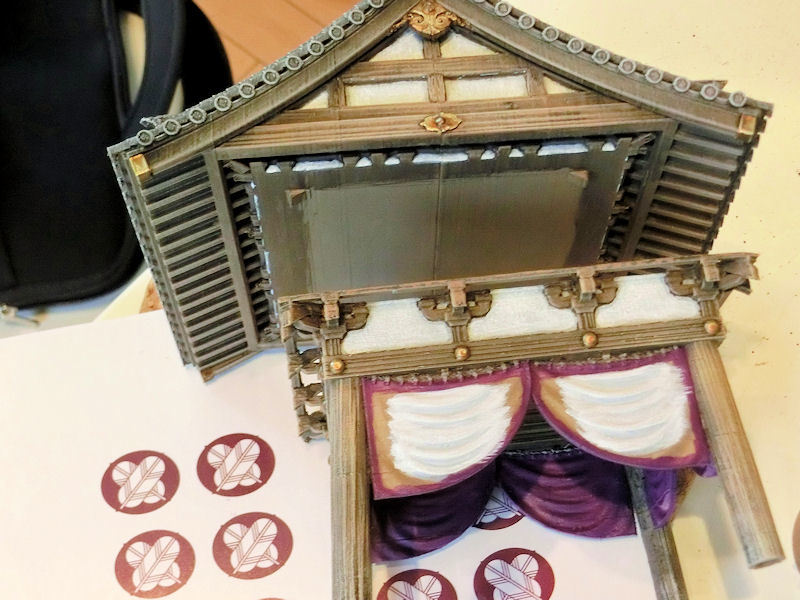
£ I decided to paint my curtains in purple, with motif crests in white. Other common colours are darker reds and blues. But here I hit a problem - I didn't have any suitable transfers that were white!
So I decided to print my own custom transfers, but of course I can't print in white. The printer (a normal computer inkjet printer) can only print colours, so I had to print the purple of the area around the crests, and leave the crests themselves as clear transfer paper.
To that end, I painted the middle of each curtain white in preparation, and did some simple shading with light grey.
£ Next I had to print the custom design on transfer paper. I had some special transfer paper (you can buy it at any good computer store), which required me to print the design in a mirror image, and by trial and error I found that if your crests are about 18mm wide (as circles), they will fit neatly on each curtain.
TIP: If you paint each area with gloss varnish before applying a transfer, it makes it easier to adjust a transfer by gently nudging it sideways into position.
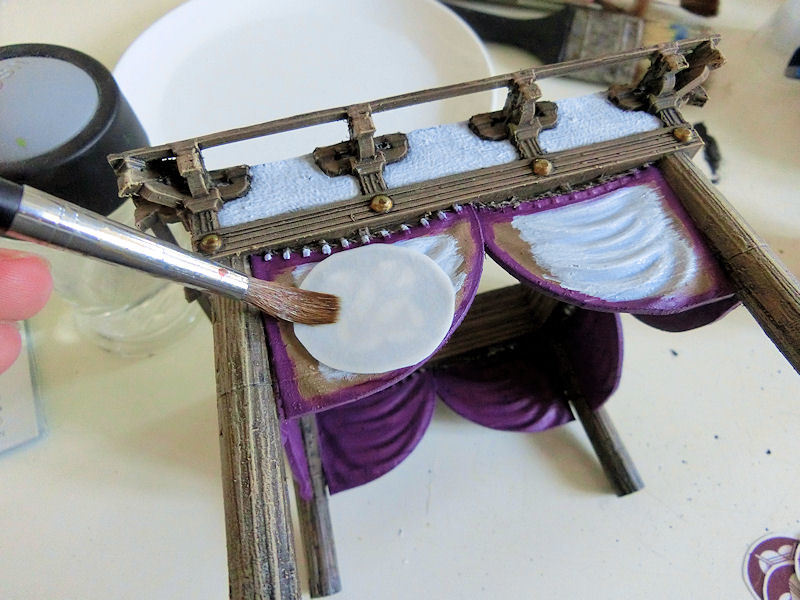
£ The next stage was applying the custom transfers. These ones need to be pushed gently on to the model, and then water is applied to the back of the transfer to loosen them from the paper.
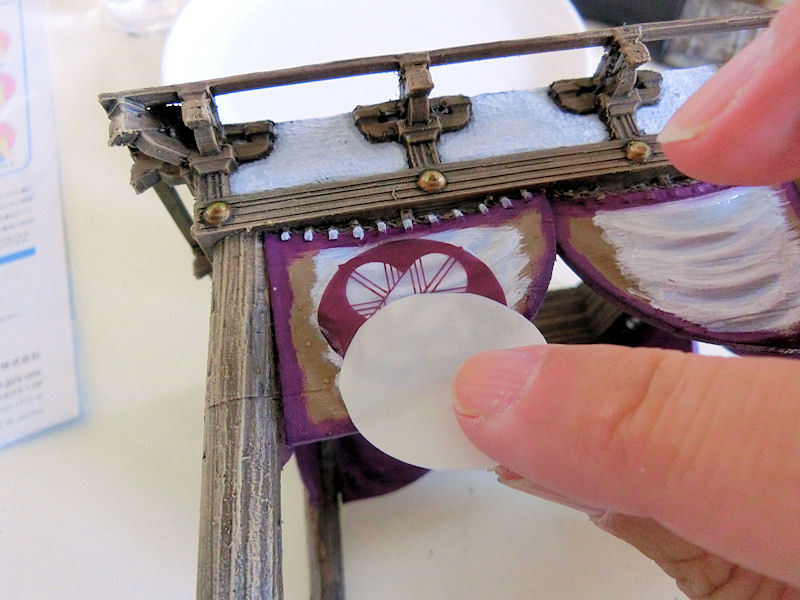
£ After 1 ~ 2 minutes, the water will loosen the backing paper from the transfer decal, and it can be gently slid off the model.

£ After the water has dried from each transfer, I recommend one last step - a coat of clear medium such as Lahmian Medium (by Games Workshop) seems to help remove the shine from transfers and soften any edges.
As you can see from the photo above, I was a bit too enthusiastic in pushing the transfer paper onto the bumps in the fabric before it was fully dry, and a few bits of ink seem to have bled onto white areas. That is one of the risks of home-made transfers, as opposed to shop-bought transfers!
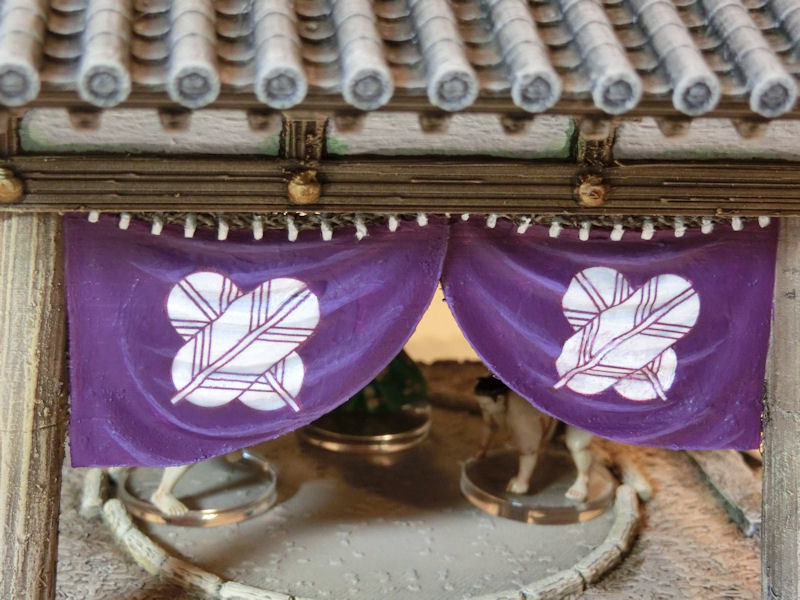
£ When everything was fully dry, I painted in the rest of the purple areas around each feather shape, and added a little bit of highlighting on the ridges. Then I had to tidy up a few bits of white, where the ink had bled.
The last step for the curtains was to paint light grey and then white onto the curtain loops at the top.
Phew - done! A little bit time-consuming, but it looks great with so many detailed designs on the curtains!
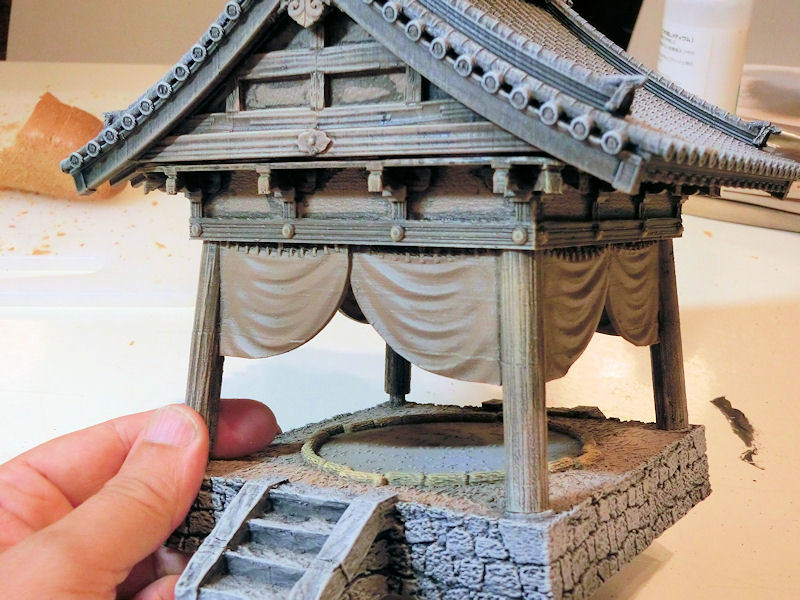
£ All the pieces have now been undercoated, washed, drybrushed and highlighted - so it's time to glue everything together!
The last part is to add some weathering and aging, with brown and red washes dabbed on to the stones of the base, and then finally some green wash on the bottom edges to indicate mould growing in various places.
With that, the model was complete, so the sumo ring is due to be released just as soon as the wrestler models have been finished! Watch this space....
| << Samurai Temple Bell available NOW! 2021-10-14 | Painting the dice tower >> 2021-10-27 |