3d-printable terrain for all your samurai wargaming needs


| << Assembling the samurai temple outer gate (1st level) 2021-06-07 | Painting the samurai outer gate building >> 2021-06-11 |
Well done on assembling the first level of the Temple Outer Gate building! Today we're going to crack on and finish the rest of this large model, and here are a few tips and tricks to help you....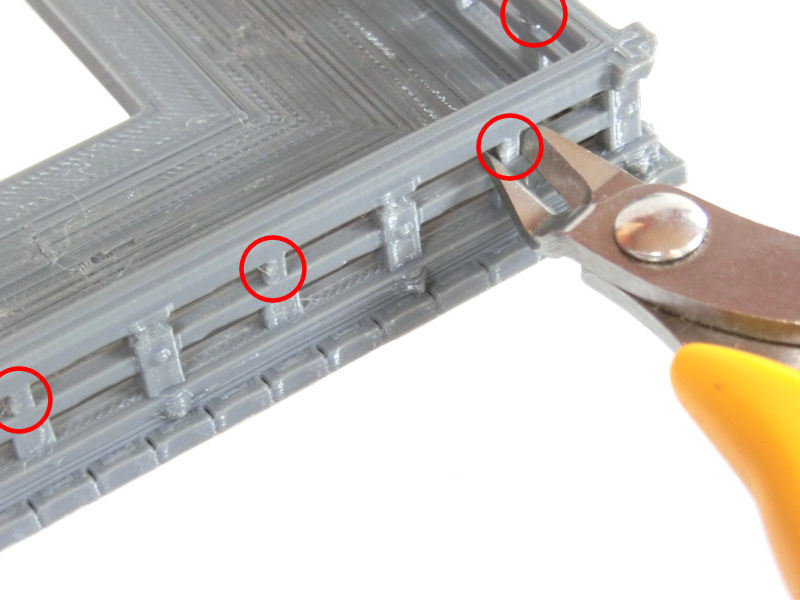
£ We're going to start with the second level balcony. This can either be printed in 4 quarters and glued together, or printed as one larger piece if your printer bed is large enough.
Once you've printed the balcony, you'll need to carefully remove a few built-in print supports. These supports are at the top of every other post, connecting the middle and top railings (as shown circled in red in the photo above). It's optional to remove these, but I recommend doing so - the railing will look much more authentic!
£ Glue your balcony pieces together, and they should slot neatly onto the joining pegs on the top of the first level. I recommend not gluing the balcony on yet, as it might help you to paint hard-to-reach places later on.
£ The floor for the second level room is simply made up of 4 planked sections, and 1 planked section with a trapdoor. You should be able to fit these neatly into the space in the centre. It makes sense for the trapdoor to go in a back corner, where the steps from ground level would emerge.
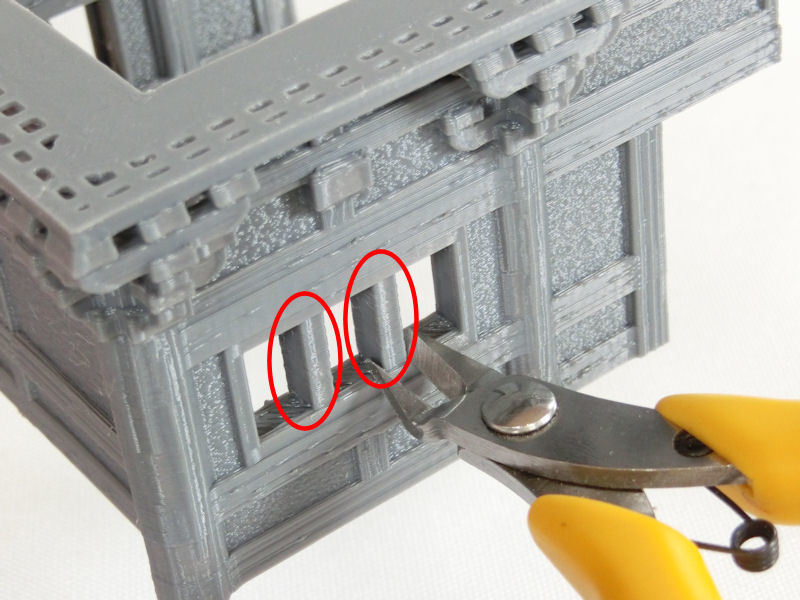
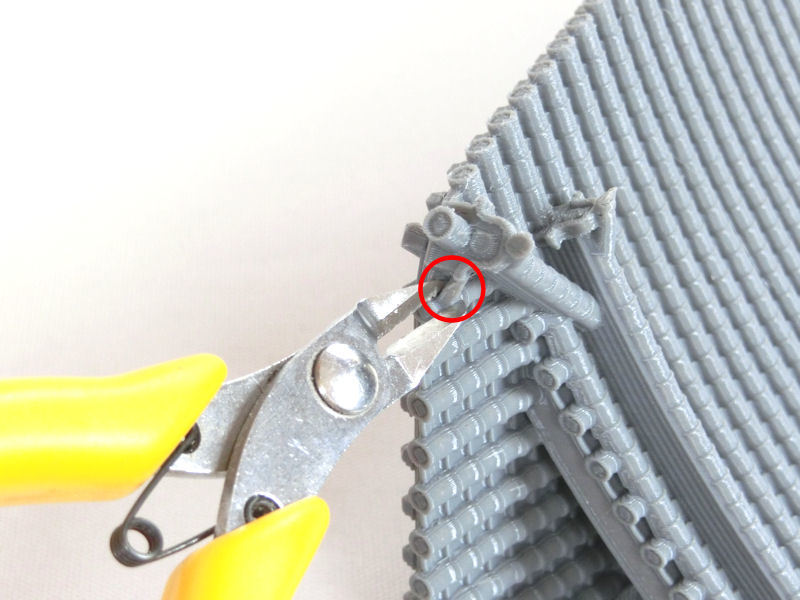
£ The second level room is made up of 2 identical pieces, which are printed upside down and do not require supports. Instead, you'll see that each window space has 2 built-in supports (circled in red in the photo above), which should be carefully removed with cutters.
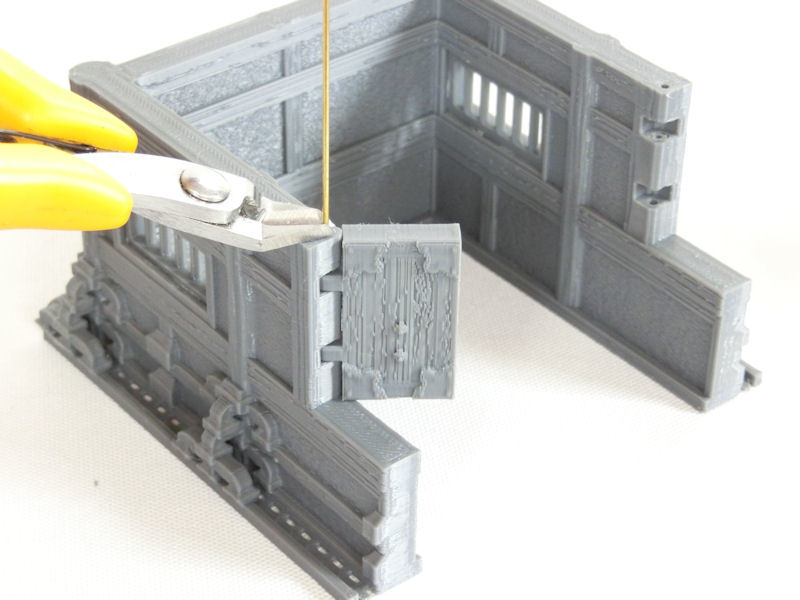
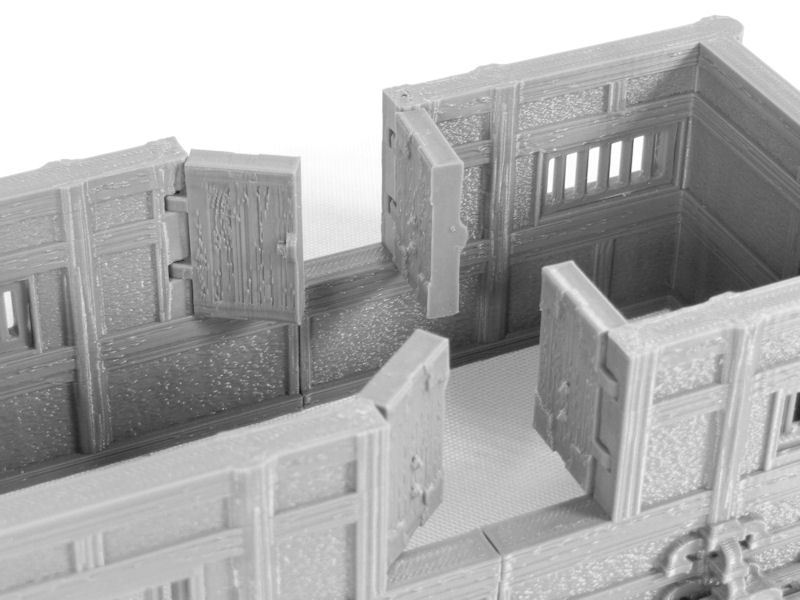
£ Next you'll need to print 4 doors, which slot into the doorframes as shown. I used 1mm brass wire inserted in the holes. Those doors can be reversed, by the way, if you prefer less ornamental styles.
£ TIP: If you cut the wires 2 or 3mm shorter than the top of the holes, then you can close the holes with a spare bit of filament. I found these 1.75mm diameter cut-offs were a perfect fit, with a dab of superglue. They will stop your brass rod falling out when the room is turned over.
£ See? You can smoothly cut the extra filament off smoothly with a sharp knife.
£ Lastly, for this room, you'll need to print 4 of your chosen window type. The normal version has five vertical bars, but a shuttered version and an ornamental version are also included. Just push them in to the window frames from the inside.

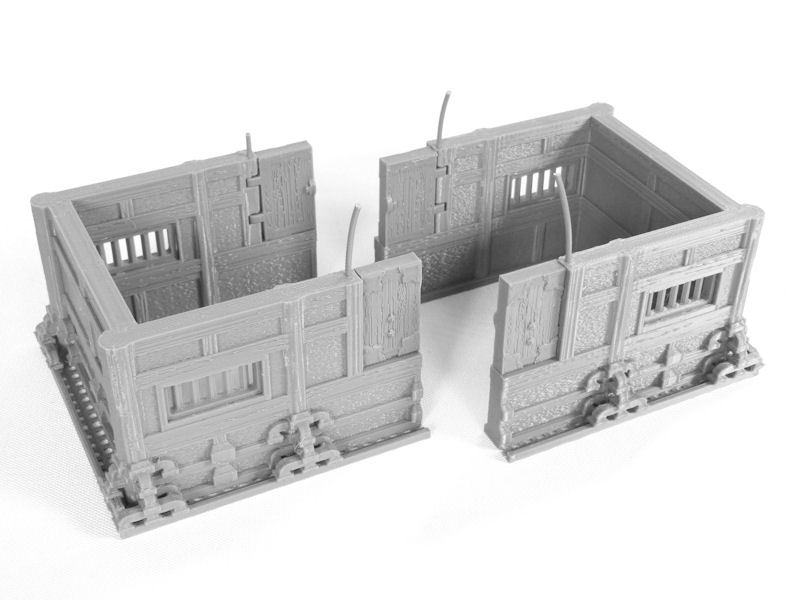
£ For now, you might not want to glue the room in place on the second level - it will be much easier to paint the interior separately. I left my two room halves as two separate pieces, for even easier painting.
£ We're almost done now! The last sections to print are the roof pieces, which are printed as 4 quarters for smaller printers, or 2 long half pieces for those with longer print beds. None of these require print supports.
If you look closely at the corner of each piece, however, you can see there is a tiny built-in print support holding up the tip of the decorative tile. You can carefully remove this with a sharp knife or cutters, or leave it in place if you prefer.
So, your model is now complete!!! Congratulations!
It's time for some finished pics.......
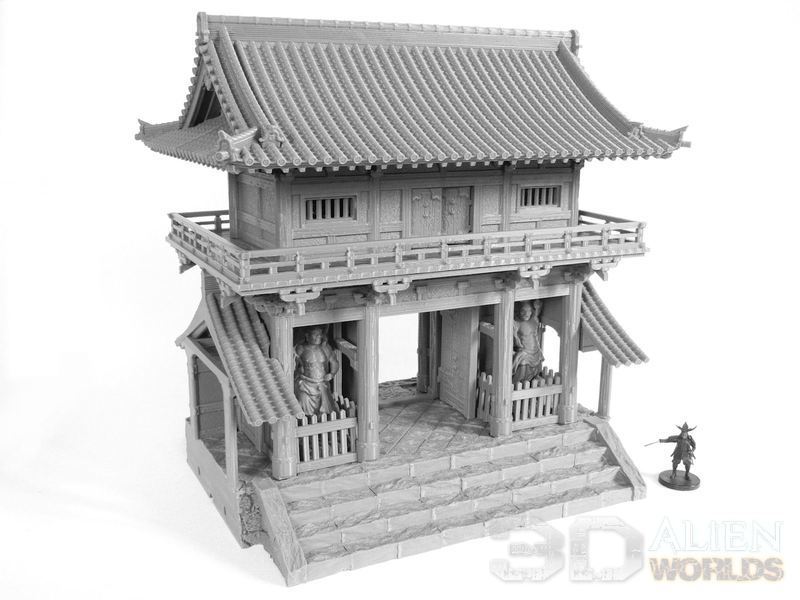
£ Fully assembled, it's a pretty big building! With the base section, it's 240mm wide (270mm wide at the roof) and 270mm (11") tall!
£ With those large gates closed tight, the front of the building is pretty imposing.

£ From this model's eye view of the back (the 'inside' of the temple), you can see the intricate supports underneath the balcony and the roof.
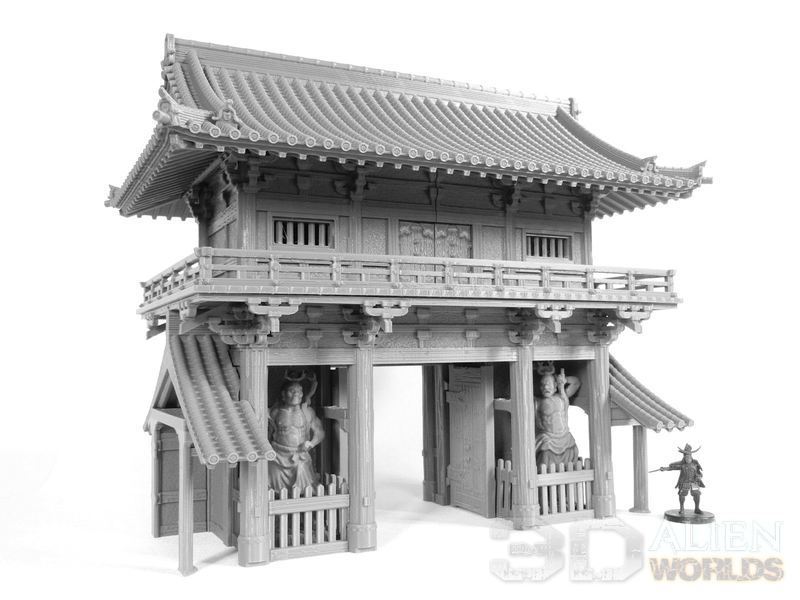
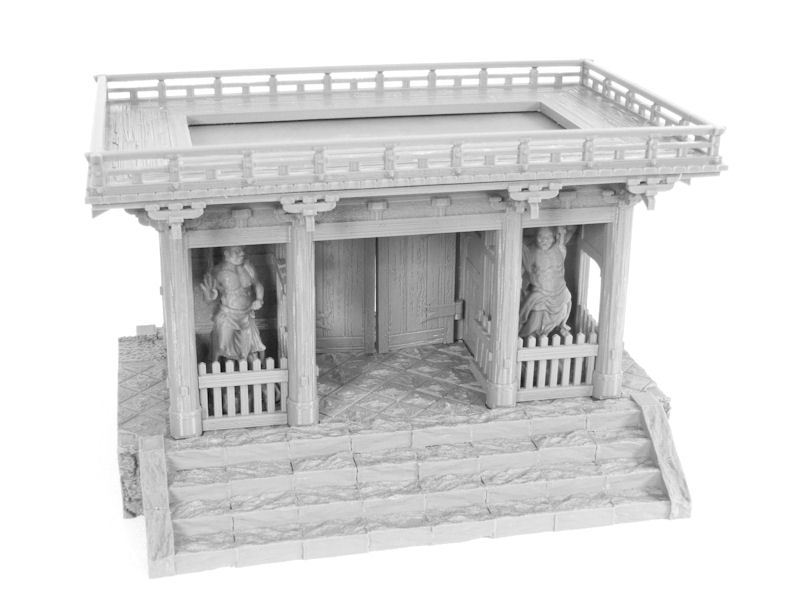
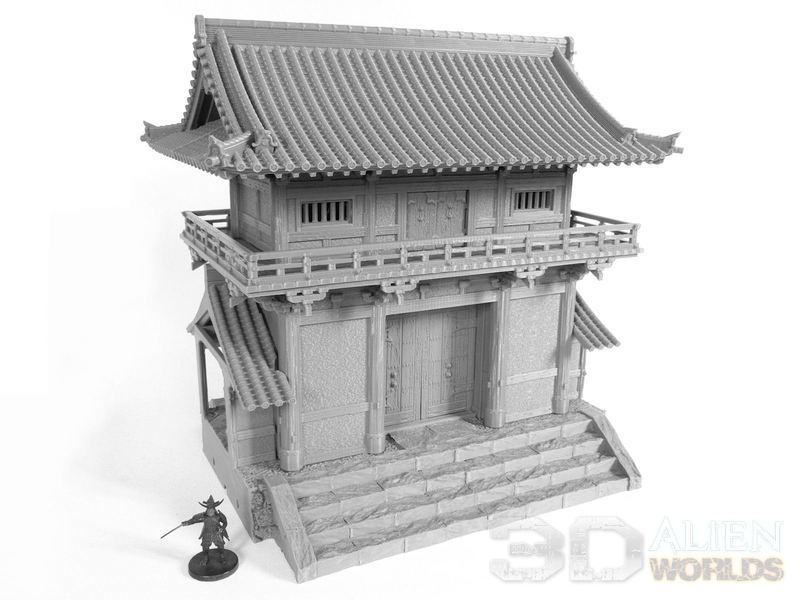
£ Even without the base section, you can see how impressive the gate building and its deity statues look!

£ You can even leave off the side roof sections, and use this as a stand-along building if you prefer.
* There will be more stand-alone temple buildings coming soon, by the way!
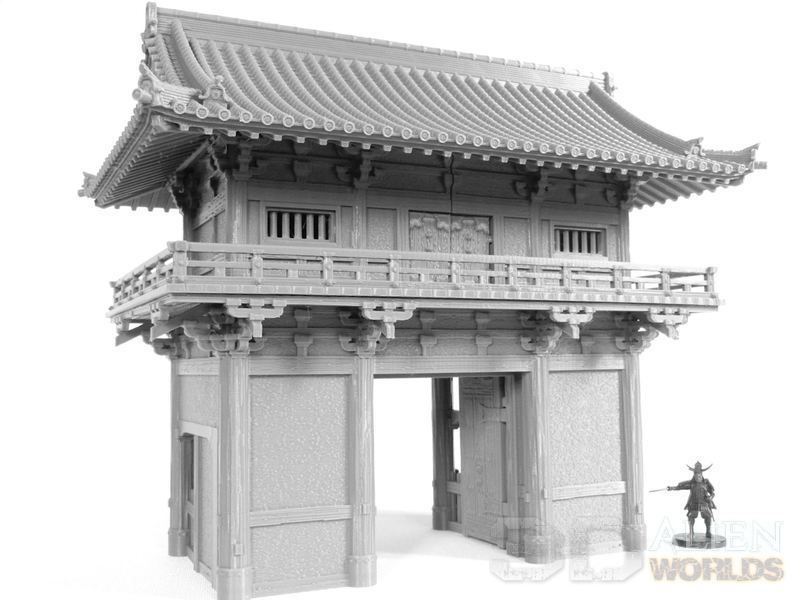
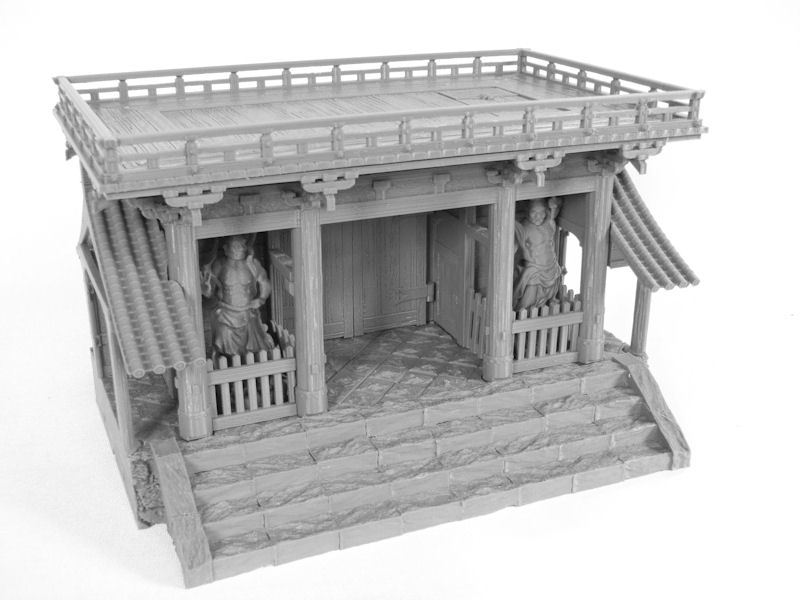
£ This is the front view of the stand-alone version of this building, without the base section.
This large model will be hitting the paint desk today, and should be released very shortly!
| << Assembling the samurai temple outer gate (1st level) 2021-06-07 | Painting the samurai outer gate building >> 2021-06-11 |