| << Introducing PRINTABLE FANTASIES, our new US print partner... 2020-10-27 | Assembling the castle : level 4 >> 2020-11-18 |
Here's a special sneak peek for those of you checking in to the blog regularly - an assembly guide for the fifth level of the samurai castle.
Half the levels are now fully printed and assembled, with the others soon to follow - but strangely it's easier to work backwards from the top level, to ensure all the roof sections line up once printed (and to spot any problems in the files!). So please bear with me.....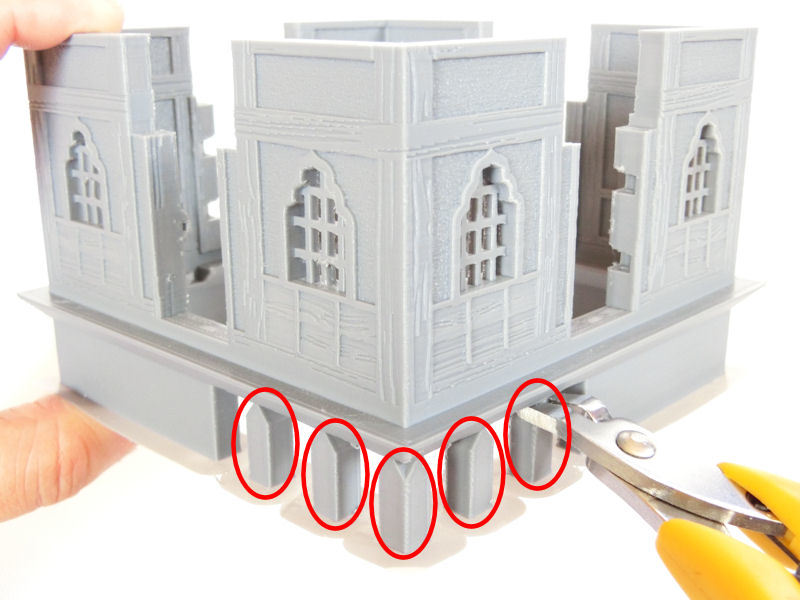
£ The central section of the 5th level is this single room with a door on each side. It prints as one piece, without supports. Please note that you will need to cut off the 5 built-in support posts in one corner (circled in red above), as those will block the stairs if not removed.
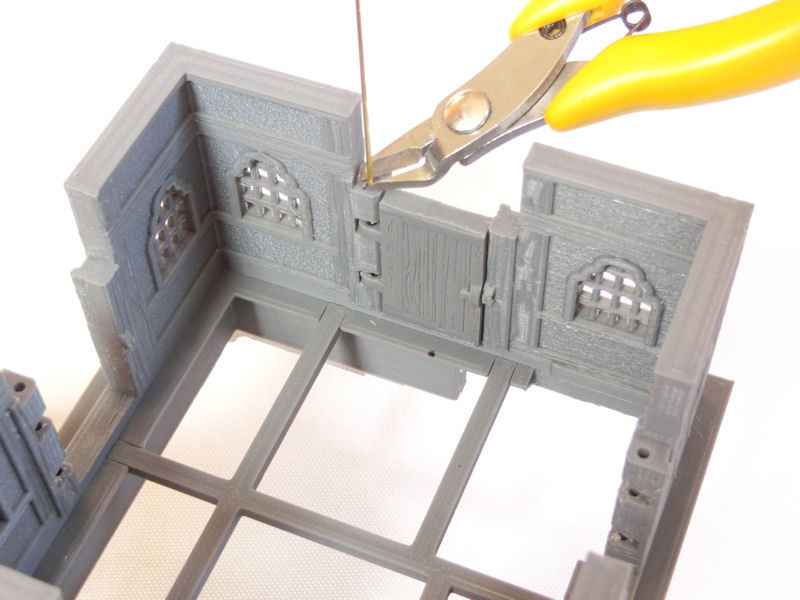
£ As for other buildings in the samurai collection, you can open and close doors. The doors in this section all lead out on to the balcony, and can be hinged with a piece of brass rod or filament. Simpy insert the rod all the way down, and cut at the top of the door, as shown above. Each door has a top section that is glued in to place above the door, locking in the hinge rod.
The support beams for the floor is printed as one piece, and includes space for the stairs to lower levels (on the right of the photo).
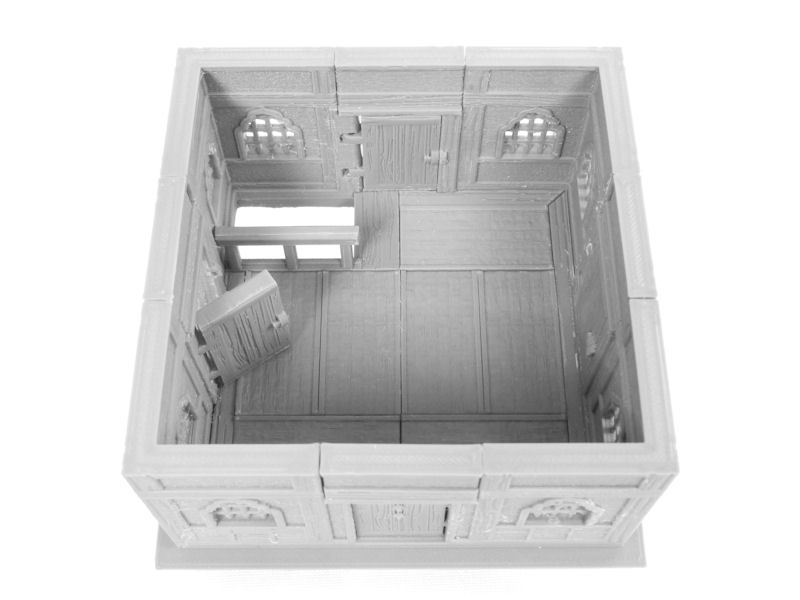
£ The next step is to glue in 7 tatami mats in the arrangement shown above, and then the extra wooden sections and stair railing (top left of the photo).
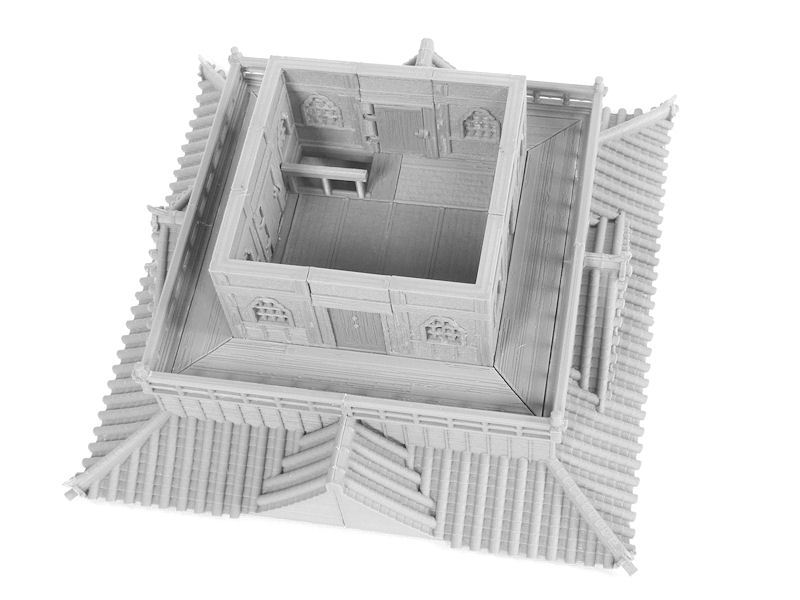
£ Next we go BIG! The lower parts of the 5th level are printed as four quarters (two left and two right sections), and the upper room is then slotted into place and glued. Apologies for this, but these four sections will need to be printed with supports. :(
* Angie from our partner shop Alt Reality Terrain mentions that the best choice for her was Cura "tree supports" for printing this section, by the way. Thanks for the tip, Angie!
With the central room glued in place, the last parts are 4 balcony floor sections to be slotted around the outside of the room, and then the 4 corner knobs. You can add more if you want to make it even more decorative!
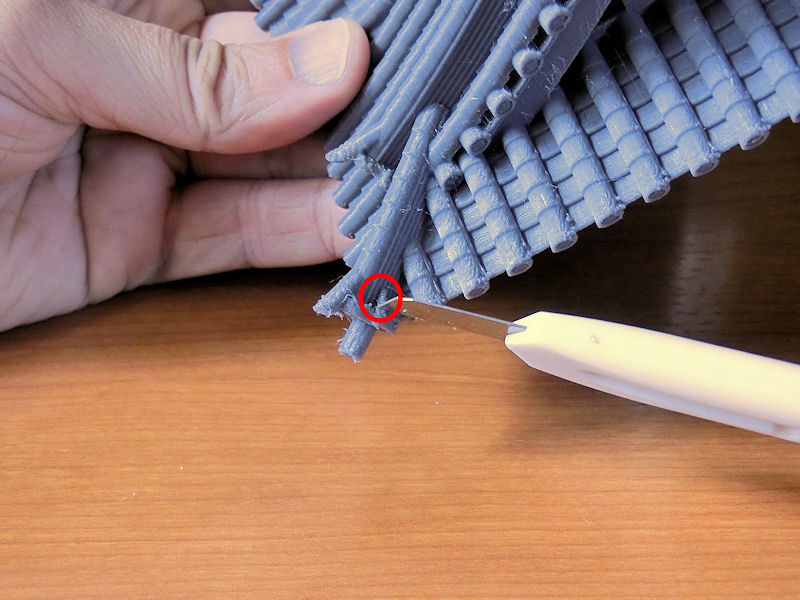
£ We're almost there now! The top roof is printed in two halves (the same section twice), and are simply glued together. This can be printed without supports, and I decided to print very slowly at good quality (0.1mm layers) - because the top roof will probably be inspected more closely than any other section of the castle by gamers!
If you look closely at the corners, you might notice a tiny piece of built-in support right near the tip (2mm long bar, circled in red in the photo above). This can be carefully removed if you prefer, but in all honesty probably nobody will ever notice if you leave it there!
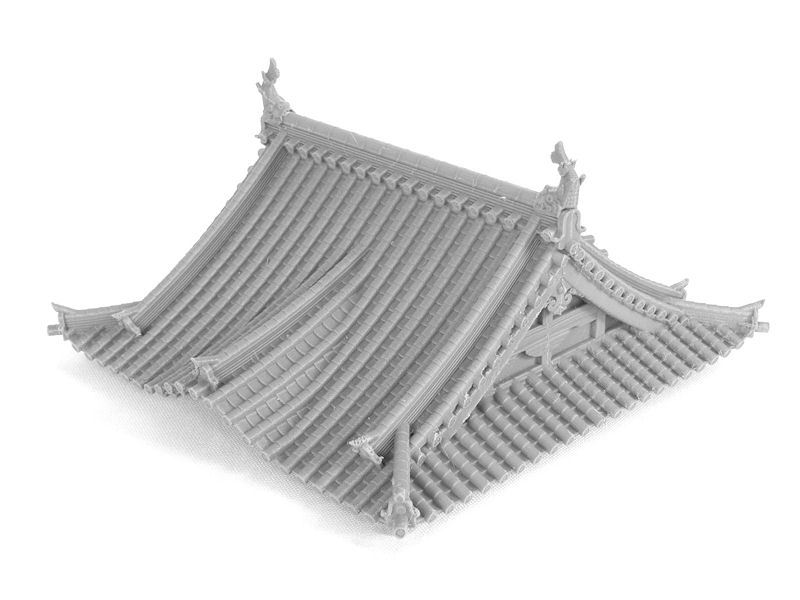
£ With the two halves of the top roof firmly glued together, you can finally print the decorative shachihoko dragonfish, and glue those on top. These are very small, so I printed them at the best quality my printer could manage, and they look great!
If you really want to make your castle even fancier, you could print extra dragonfish ornaments, as they will fit pretty much any roof spines on the castle, on any of the 5 levels. So go nuts if you want!!!
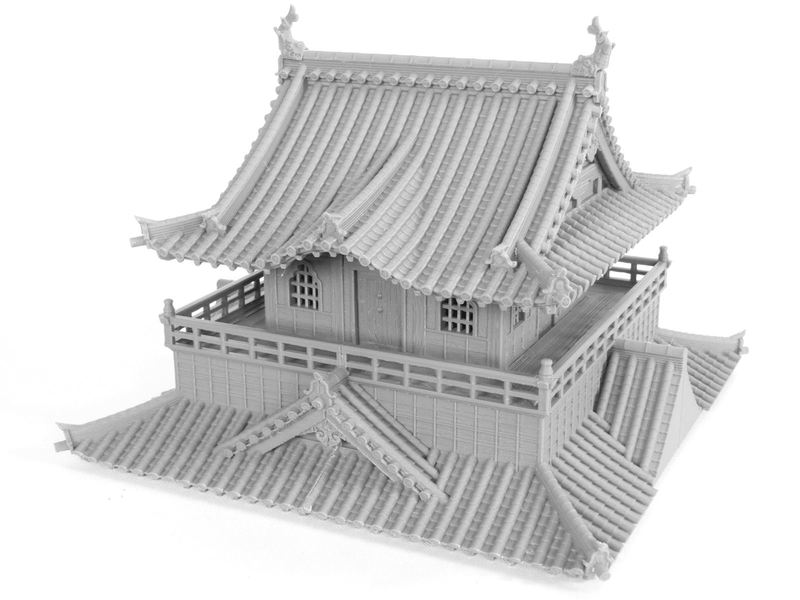
£ With the roof section placed on top of the 5th level, you can get some idea of just how super-detailed this castle will be! It's huge, and every part of it has been lovingly designed. The roof tiles in particular, have caused many headaches for creating the files, but the final sections seem to be rolling off the printer smoothly now.
So apologies for the delays, and thank you all for your patience!!
| << Introducing PRINTABLE FANTASIES, our new US print partner... 2020-10-27 | Assembling the castle : level 4 >> 2020-11-18 |
