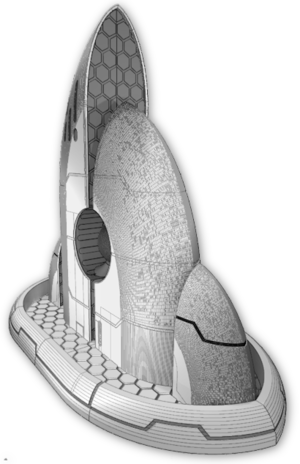
3d-printable terrain for all your samurai wargaming needs


| << Printing the farmyard set 2019-04-23 | Introducing MEDIEVAL CLANS, our new Scottish print partner... >> 2019-04-26 |
Rice paddies tend to be built on small areas of slightly sloping land (mountain valleys etc), so they are quite often terraced, with the flow of water from a higher paddy field slowly trickling into a series of lower fields.
The rice paddy included in the samurai farmyard set is 12cm x 12cm, but you can combine two or more fields if you have the space on your print bed, and still keep the surrounding earth banks watertight - in case you want to add clear resin or water effects.
Here is our "How To" guide....
1. You will need a 3D modelling program. These are available freely, and I recommend 3D Builder, that can be downloaded for free from Microsoft and really does work (yes, really!).
2. In file manager software, copy the rice paddy STL file on your system under a new name. Use that one to work on.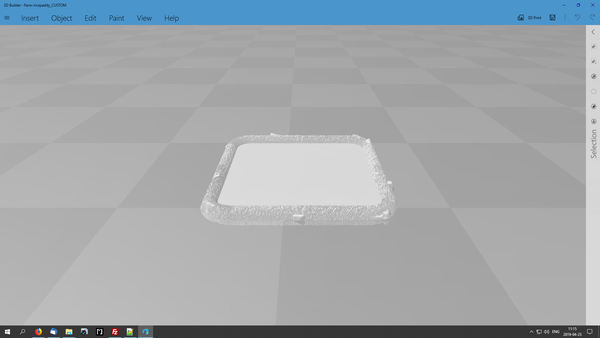
£ 3. Open the copy to work on, in 3D Builder.
4. Select the rice paddy, and push Ctrl+C to copy it, and then Ctrl+V to paste it alongside.
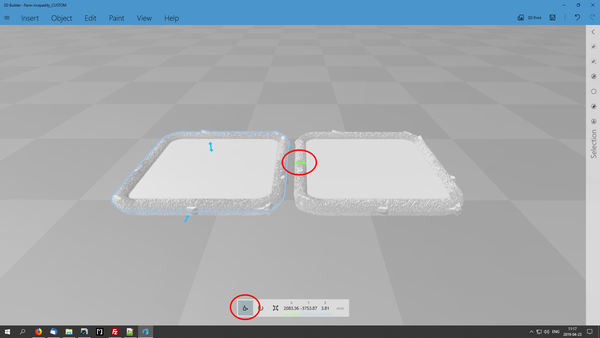
£ 5. You should now have two rice paddies, as shown above. Select the left rice paddy, and click the MOVE button at the bottom (circled in red), and then slide the right arrow to move the rice paddy so that the earth banks overlap.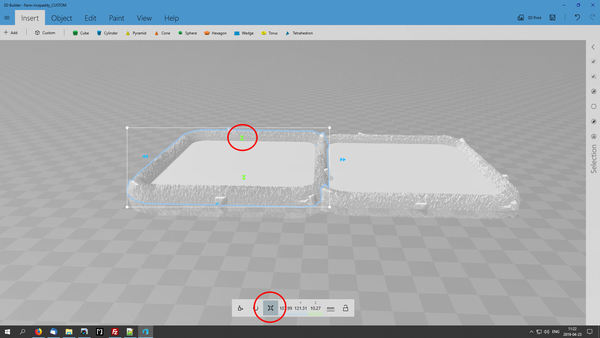
£ 6. Your rice paddies should now overlap, like in the image above. One thing you might want to do at this stage is make one rice paddy a few millimetres taller, so it gives the effect of a slightly sloping terrace.
To adjust the height, simply select the left rice paddy and click on the SCALE button at the bottom (circled in red), then stretch it up using the two small vertical arrows. 2 or 3 millimetres extra should be enough to give the right effect.
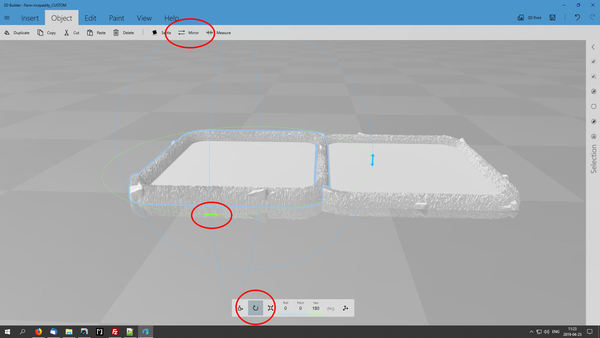
£ 7. At this stage you have two rice paddies or different heights, but you might want to mirror or rotate one of them to make the stones around the edge look more natural.
To rotate one field, select it and click on the ROTATE button at the bottom (circled in red). Then grab the horizontal arrow and spin it around 180 degrees. It should snap to 180 degrees when you are close enough.

£ 8. We're almost done! Now you just need to select both fields by pushing Ctrl+A and then select MERGE from the EDIT menu at the top of the screen (circled in red). The software will then join the fields together and remove any unnecessary internal walls. It might take a minute to do this.

£ 9. Remember to SAVE your new file using the button at the top right of the screen (circled in red). You can now open the STL file in your regular slicer, and get printing!!
Don't be too daunted by this process! It should only take a couple of minutes, and gives you lots of options for customising your rice paddies. Have fun!!
| << Printing the farmyard set 2019-04-23 | Introducing MEDIEVAL CLANS, our new Scottish print partner... >> 2019-04-26 |