3d-printable terrain for all your samurai wargaming needs


| << Printing & assembling the Storehouses 2024-01-17 | Introducing FALLING STAR GAMES, our new US print partner... >> 2024-02-07 |
Today we're showing you how to print and assemble the two guesthouses from the new Samurai Lord's House set. Both of these models can be printed without slicer-created print supports, and are both stand-alone buildings, separated from the main residence via a covered walkway.
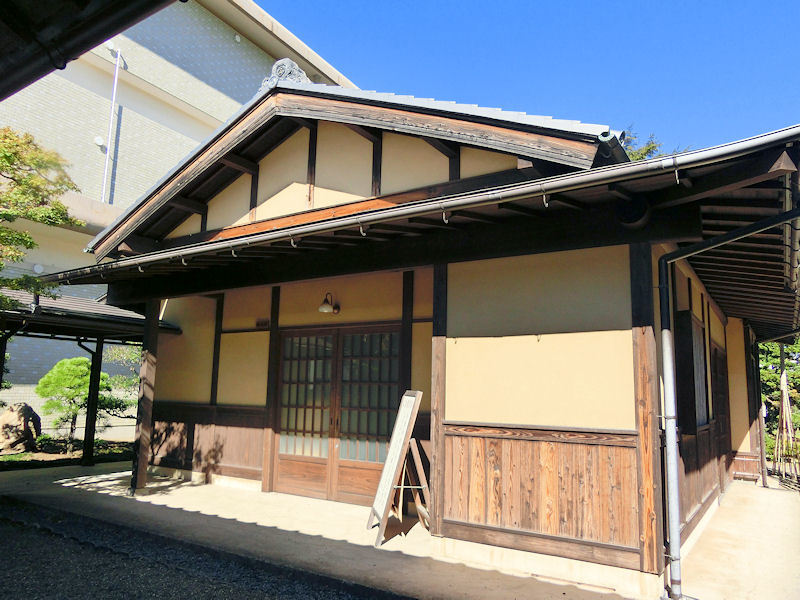
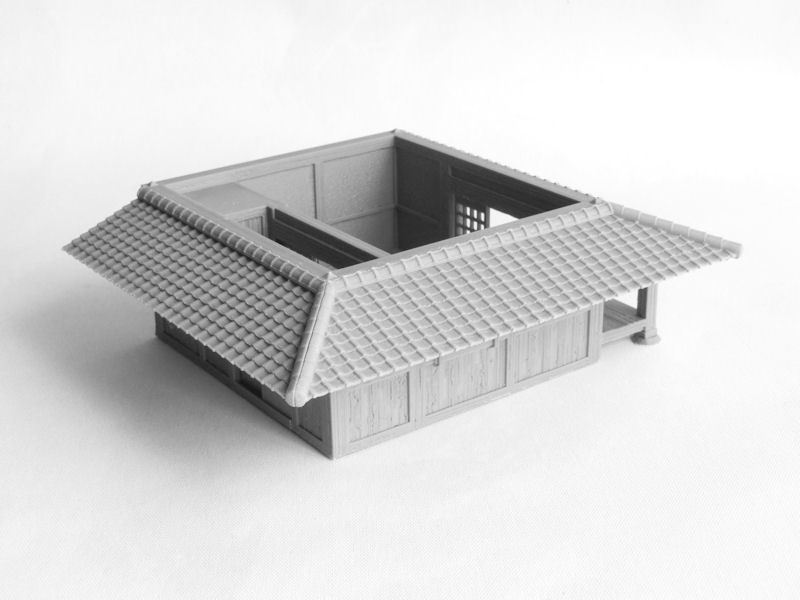
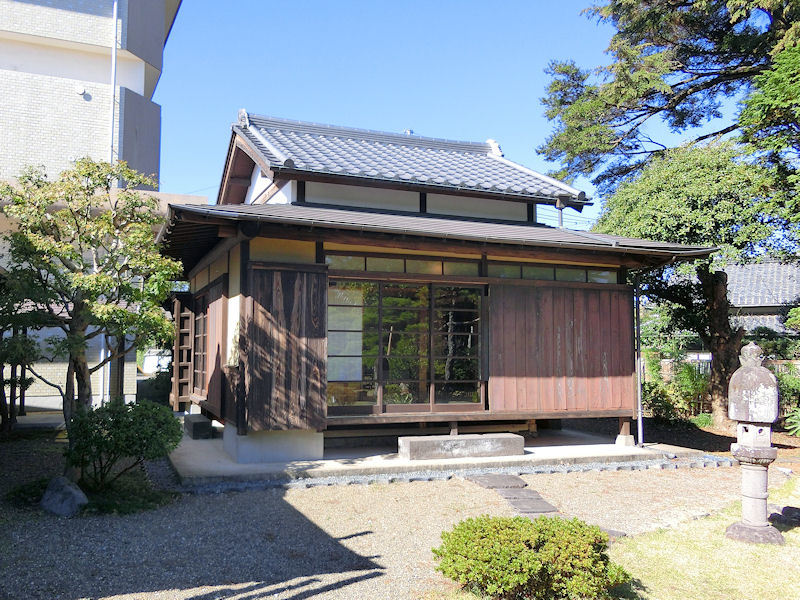
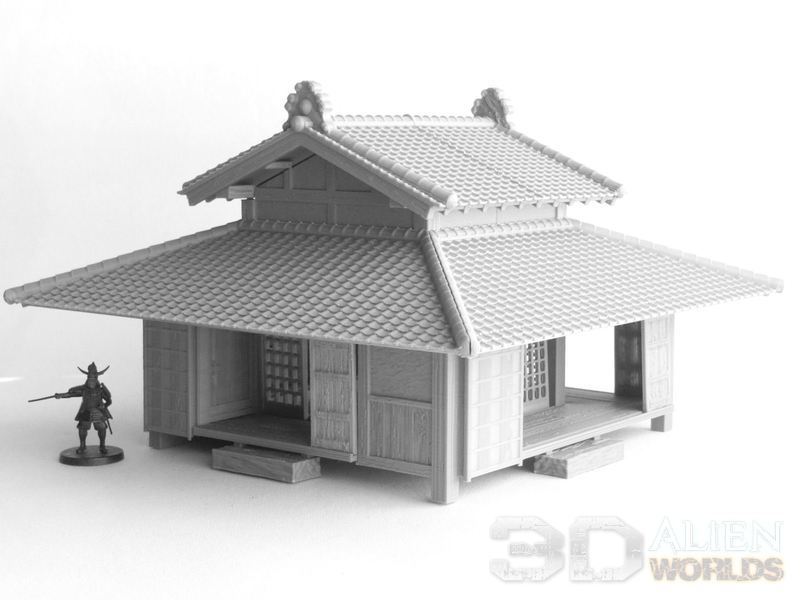
▲ Let's start with Guesthouse #1, which is perhaps the more functional of the two. This guesthouse is, like the rest of the set contents, based on an actual samurai residence in Oita prefecture (please ignore that horrible modern government building next-door!).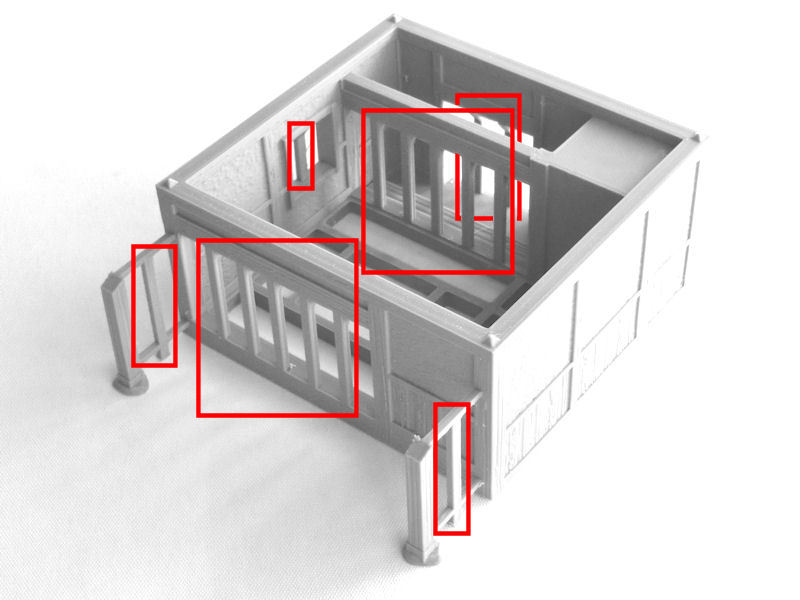
▲ The building itself is printed in one piece (split sections are also included for smaller printers), but does include quite a few built-in print supports in the doorways and window, which can be easily removed during assembly.
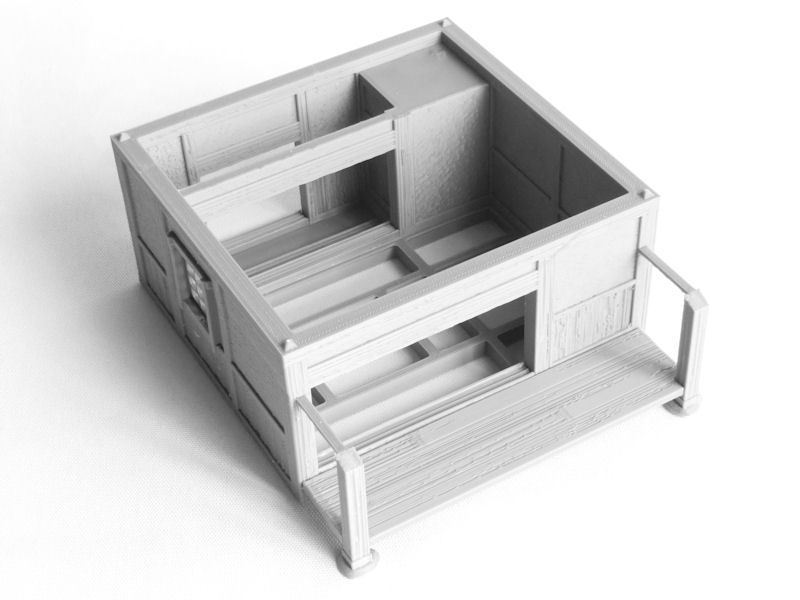
▲ Next we print a small group of extra pieces, which includes the balcony floor decking and 3 small sliding door strips, plus a choice of windows. These should be glued into place as shown in the photo above.
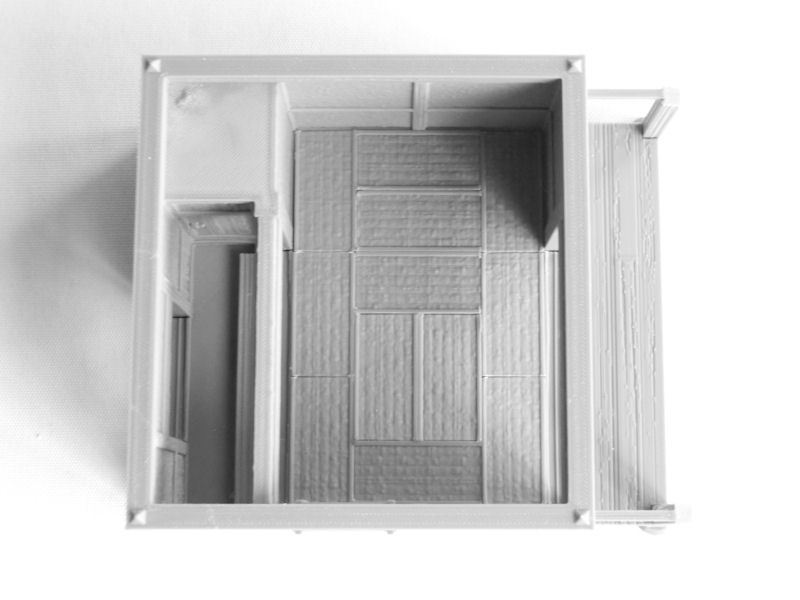
▲ This guesthouse needs 12 tatami mats, which can be squeezed into place in the layout shown above.
▲ There are 3 subroof pieces (and split sections for smaller printers), which should be glued into place as shown.
TIP: Glue the balcony's subroof first, as it will help to locate the other two sections properly.
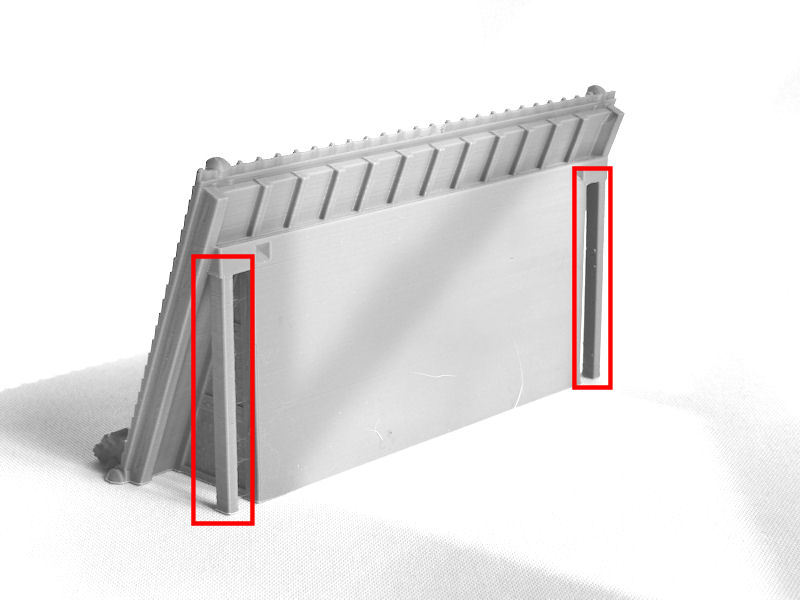
▲ The main roof is printed in two halves, and there are a couple of built-in print supports on each piece (as shown in red in the photo above), which should be cut off.

▲ The last step for Guesthouse #1 is to print a couple of sliding front doors, and then decide how many sliding screen doors you'd like to include in the interior. You could use up to 8 sliding doors inside, or none at all. As always, there are two versions of each door design - the version with holes (shown above) is designed to be used with semi-transparent paper such as baking sheet.
▲ This balcony faces the garden in the real-life version, with the front door closest to the main house.

▲ The interior of this first guesthouse is pretty normal, and can serve a variety of functions.
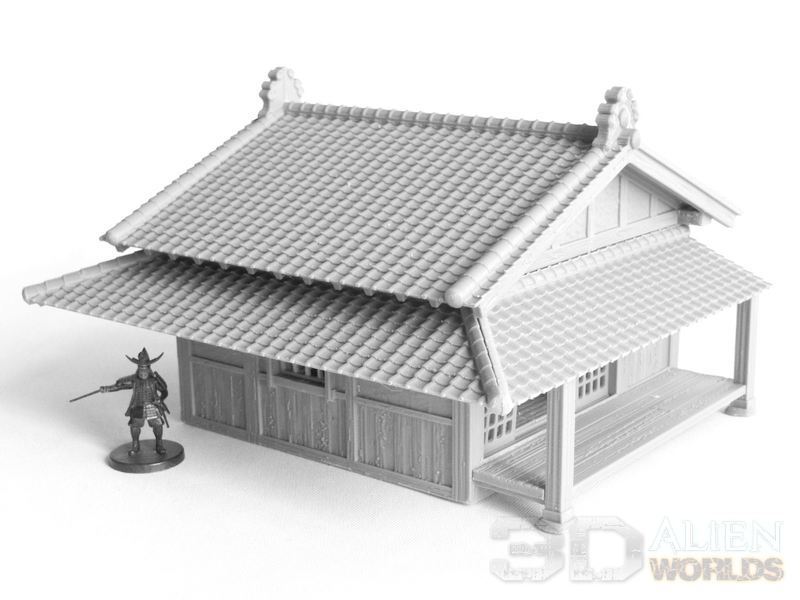
▲ Guesthouse #2 is altogether a more interesting building, and has a smaller interior room but a large wrap-around balcony on 3 sides. It also features sliding storm shutters on 3 sides.
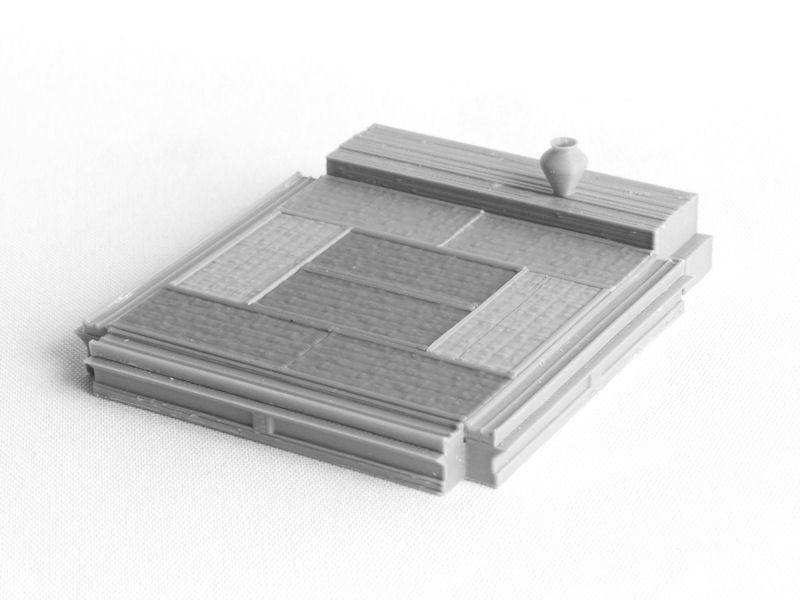
▲ We start by printing this base section for the interior room, and gluing on the 3 sliding door strips and 8 tatami mats. The vase is part of the base piece, by the way.
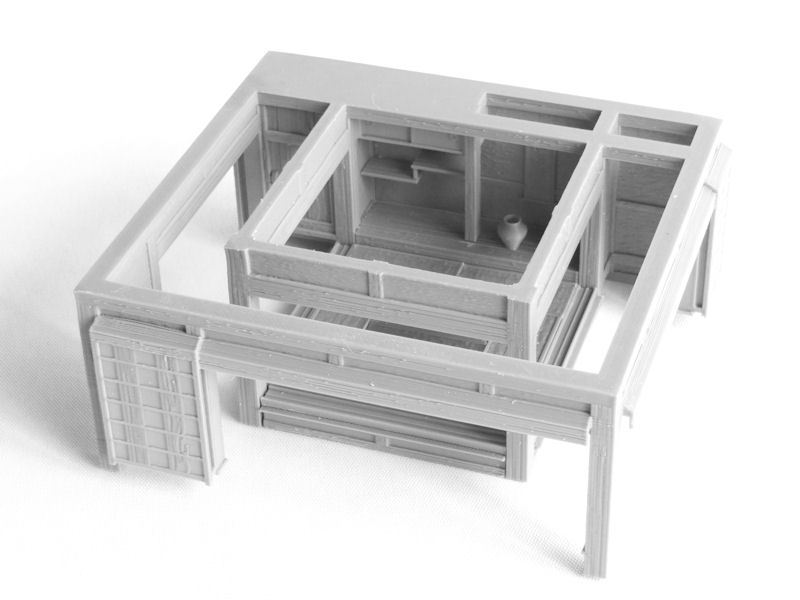
▲ The main frame of the guesthouse is pretty cool, and prints completely upside down! Therefore it doesn't need any supports at all. It simply slots in place over the central base section. You should also print that little shelf piece, which can be glued into place in the alcove.
TIP: Setting your slicer to print walls "inside-to-outside" will help to ensure those overhangs will print cleanly!
The interior of this building is lovely, with that uniquely Japanese style split shelf, the small cupboard at the top with sliding doors, and the wall scroll and vase. I'll have to find something suitable to drop into that vase after I paint it!
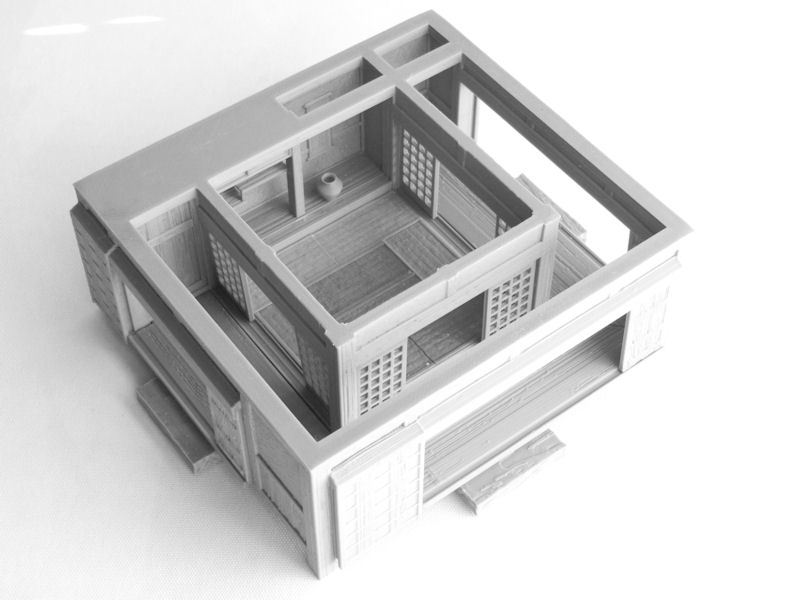
▲ Next we will need to print the 3 floor sections and slot those into place for the internal balcony. There are tiny pegs on the frames to help you locate them properly, but you should also glue a stone step underneath each balcony to give proper support.
▲ The upper section of the building needs 4 subroof pieces glued in place, and I recommend gluing the side with beam supports first, as it will help to locate the subroof at the correct height.
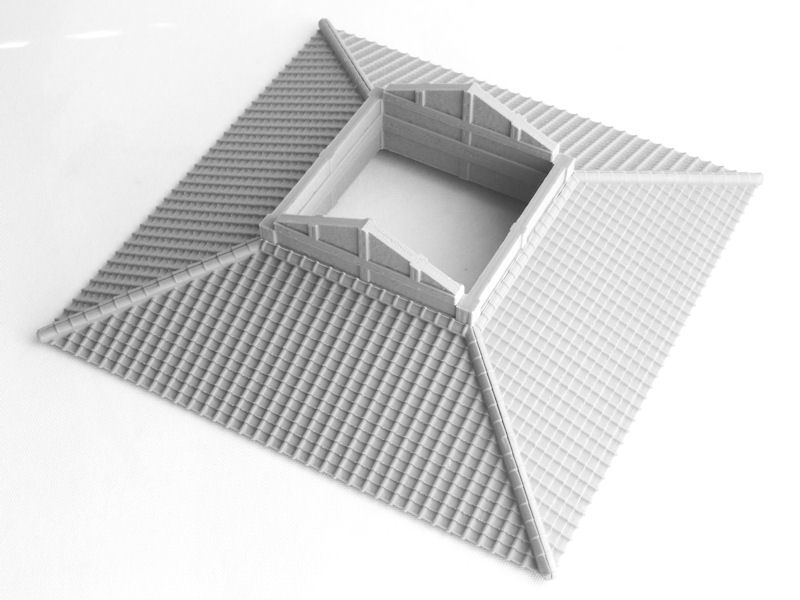
▲ The top roof prints as two halves, and has a couple of built-in print supports which need to be cut off during assembly. Then it's just a matter to deciding how many internal sliding screens (up to 12) and exterior storm shutters (up to 16!) you'd like to print. I'm only using one storm shutter on each side, I think, so that models can run through the guesthouse easily and the interior stays visible.

▲ Isn't that a nice interior? It's very typically Japanese, and conjures images of graceful strolls to and from the garden on a summer's night.
Work is already well underway on the main house and attached residence and kitchens, so watch this space for updates!
| << Printing & assembling the Storehouses 2024-01-17 | Introducing FALLING STAR GAMES, our new US print partner... >> 2024-02-07 |