3d-printable terrain for all your samurai wargaming needs


| << Printing and assembling the samurai teahouse 2020-04-26 | Samurai Teahouse available NOW! >> 2020-04-30 |
Well, the new samurai Teahouse Set is now fully painted, and ready for release tomorrow!! Oh, and what gorgeous photos I managed to pose for you! hehehe
But today we take a look at how you can quickly and easily paint up your teahouse and accessories....
£ To start with, all the parts were spray undercoated with cheap matt paint, which left them looking rather like kids' toys!
ROCKS:
£ After a black spray undercoat, these were drybrushed with medium grey, then patches of flesh tone, then light grey.
The trick to painting rocks is to introduce patches of colour variation. After the greys were done, I lightly stippled on some khaki green in places, to show old mould. You can see the difference in the two rocks above.
£ I then turned to my washes, with brown washes carefully smudged into crevices and then green wash added towards the bottom of rocks (where they meet the ground) and to strengthen the green of the mould patches.
£ Finally, after a quick survey on the Facebook page (thanks, everybody!), I decided to add some moss too. Some could be natural, but it's also a traditional Japanese style of gardening, to carefully cultivate moss growth on rocks.
This was, quite frankly, a pain to attach! I finally found it worked by adding a dab of white wood glue to the rock and jamming moss into the crevice. After the white glue had started to dry, I dripped some liquid glue (plastic cement) onto the moss and squeezed it down.
This is a messy job, and you have to be careful not to peel off the paint too!
£ For the rock lantern, I added in the LED bulb and a small ring of baking sheet paper to surround it, then glued on the top and some moss.
FENCES:
£ A light brown spray undercoat was followed by a heavy brown wash, and then a drybrush with some lighter browns and flesh tones. To differentiate the upright sticks from the long bamboo pieces, I tried a sepia wash, but as you can see from the pic above (compare left to right) ..... the difference wasn't very much.
So I tried a yellow glaze instead, and this gave it a very rich yellow finish. A little bit too bright....
£ ... so I highlighted the top of each bamboo with some yellow brown paint. Much better!
The last job was to paint the wooden posts in a red-brown, and then the rough twine in black.
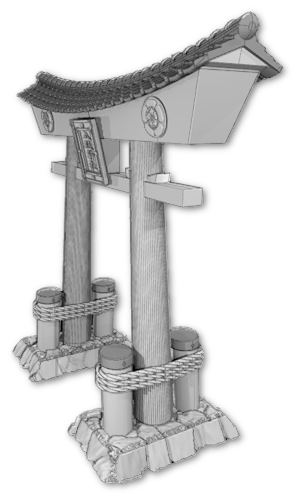
£ The gate had a few stones underneath (don't forget to add green wash for mould!), and this great thatched roof. I'll deal with how the thatch was painted in a few moments.
PATH:
£ The whole pathway was sprayed in light grey, and the gravel was basecoated in a medium grey. You could also paint the path as a mossy green surface or just plain brown dirt, if you want.
After a heavy black wash, the whole piece was drybrushed with light grey, and then patches of brown and green wash around some of the stones and edging.
THATCHED ROOF:

£ A cream spray undercoat is the perfect base colour to cover with a heavy sepia wash, and then a brown wash. Then it's a simple matter of drybrushing with a flesh tone, and adding in some streaks of brown wash and green wash to show weathering and mould.
The bamboo at the top I left in fairly faded colours, rather than the brighter yellows used for the fencing, so it wouldn't draw the eye too much. It's open to the sun and rain, after all!
TEAHOUSE:
£ The teahouse has great textures already sculpted on to all of the surfaces, so I dealt with the wood first ..... a brown wash was followed by a light brown drybrush and then a flesh tone drybrush. The interior walls were a very muted light brown (so as not to distract from the tea ceremony), but I used a brighter yellow brown for the exterior walls.
The circular window is actually bamboo tied together with black twine, and the wall has a thin slot into which I inserted a folded-over (i.e. "two-ply") piece of baking sheet paper. At 28mm scale, this is a pretty good match for handmade Japanese paper, and lets light through.
TOP TIP: For the text on the scroll, try a black wash instead of black paint. It will naturally flow into the shapes of the kanji characters, and can then be neatened up easily with white at the edges.
To age the walls, I used streaks of brown wash, smudged off with my finger. This may sound a little haphazard, but it actually matches real stains quite well. Finally, I tickled green wash into the corners for mould.
WATER BOWL:
£ The rock and bamboo were painted in the same manner as described above, but a little more carefully. There's a small trickle of water connecting the two big bamboo sections, which I painted in greys and covered in gloss varnish.
The last job was to carefully add a few drips of "realistic water effect" into the bowl. I recommend doing this with a thin straw. By putting your finger over the end, you can transfer a few drops of liquid exactly where you need it.
And DONE!!!!
The teahouse set will be released tomorrow.....
| << Printing and assembling the samurai teahouse 2020-04-26 | Samurai Teahouse available NOW! >> 2020-04-30 |